Beauty Without Fuss

Popular Posts

Recent Posts

Tuesday, 15 December 2009

Review - Compton Hair: Onix Brazilian Blowdry

Now, I don't know about you, but I find the thought of trying out a new hair salon pretty terrifying, I've been known to hang around outside salons for ages trying to pluck up the courage to actually walk in and make an appointment!   As a result, it's entirely possible I don't visit the hairdresser as often as I might.

Now, when you consider that I have crazy hair:

(hair after applying straightening shampoo, conditioner, serum, balm, and home blowdry!)

that might seem a bit short-sighted, but ... I've learned my coping strategies over the years, I don't wash it every day, I use my straighteners once or twice a week, and when all else fails, I tie it back. Wash and go hair just isn't something that is possible for a curly-girl like me.

Or so I thought.

When the opportunity came up to visit Zoltan Vargyai at Compton's Covent Garden salon and try out the next generation of Brazilian keratin treatment I nearly bit someone's hand off in my eagerness to say yes! Keratin treatments, also known as a three month blowdry, have been around for a while now. They semi-permanently straighten and condition your hair, so making it easier and quicker to style.  Unlike a Yuko treatment however, the straightening effect fades over a number of months, so they're cheaper, but also unlike Yuko, Onix can be used on colour-treated and/or damaged hair.

Previously, keratin treatments have had the major disadvantage that you have to leave your hair unwashed, untouched and unstyled (literally, you can't even tuck it behind your ears!) for at least three days after having the product applied, but the new Onix treatment renders that obsolete, meaning that you can wash your hair the same day, if you want, and you can style your hair however you want without worrying that your hair will "set" into a new, and unwanted shape. Plus, the treatment can be done in about an hour, if you're lucky!  I have a LOT of hair though, so I was in the salon a fair bit longer than that ...

I spent yesterday afternoon having the process done.  The Compton Hair salon itself is very relaxed, all the staff went well out of their way to make me feel at home, and Tom - who actually carried out my treatment - was, I have to say, utterly adorable.  We spent a long time chatting about my hair, and what I wanted from the treatment, before we got started and the chat continued throughout, so much so, I barely had to pick up my book! There was also a bit of an iPhone application face-off at one point, but I shall gloss over that, I have the least cool selection of Apps, ever.  I also had a chance to speak to Zoltan himself, but I'll bring you more about that in a later post.

The treatment itself isn't that complicated, your hair is washed twice with a special clarifying shampoo to open the hair cuticles, then the keratin treatment is applied and left to absorb into your hair. Your hair is then dried and straighteners are used to set it into it's finished style.  Here's how my hair looked at this stage:


Apologies for the poor quality of the iPhone picture there!  Now, if you wish, you can leave the salon at this point, and leave the keratin on your hair for a couple of days before washing it out, or you can leave it on for another 45 minutes and have it neutralised and removed at the salon.  I opted for this version of the treatment - I'm an instant gratification kind of gal, always have been! Once the keratin was removed, my hair was very roughly blowdried with fingers, NO styling products, brushes or straighteners were used at this point, and here's how it looked when I got home after a slightly rainy walk through Covent Garden:


Lookit that shine!  (Don't lookit the stupid expression on my face ...) Ordinarily after a few minutes in a damp atmosphere I resemble a dandelion clock after a particularly vicious static storm, or Marc Bolan after a nasty electric shock, so just to get away with a little light fuzzing at the ends is amazing. Especially after only five minutes under the hairdryer! Normally getting my hair this straight is about an hour-long job, and it's back-breaking, to boot.

I can't wait to try styling this myself, I specifically requested that Tom leave me with a little root lift, so when it dries naturally it'll be a bit more "bouncy" than it appears here.  I was delighted with my experience in the salon today, seriously, they're lovely people! And I absolutely love the results I've been left with so far.  I'll bring you a further post a little later in the week about how I've found dealing with it at home, I think the key part of any salon treatment is how your hair behaves once you try to replicate the results yourself!

It's important that you use an SLS-free shampoo and conditioner after the treatment, as sulfates strip away the keratin treatment, so I purchased the Onix products to ensure I get the best results, and I'll let you know my thoughts on those too.

You can find out more about Compton Hair here and more about the Brazilian blowdry itself here. Prices start from £145, and the treatment can take from 1 to 4 hours depending on the length and thickness of your hair.  If you do go, ask for Tom, and tell him I said hello!

The Small Print: This treatment was provided free for review purposes.  All reviews are honest, regardless of the source of the product.
Share:

Monday, 14 December 2009

Excited!


Get Lippie is going to be all about HAIR this week - if you're reading this on Monday afternoon then I'm actually visiting Zoltan Vargyai at his Covent Garden salon (Comptons) RIGHT NOW - okay, after my doctor's appointment, I will be - and I'll be experiencing the next generation of Brazilian Keratin hair straightening treatments! I've been desperate to get my hair professionally straightened for years and this appointment is something I'm looking forward to hugely.  I'm hoping that I'll look a little less like the Wild Woman of Wongo in the mornings afterward ...

Full story and details on Tuesday ...
Share:

Sunday, 13 December 2009

Makeover: Jane C

Another Sunday, and another makeover (or two) today!  Please meet Jane:


Jane's great, and I think she's one of the most naturally gorgeous people I've ever met, so having her volunteer for a makeover was a lovely surprise!  Jane was interested in finding out a simple look suitable for daytime, and trying out a more dramatic look too.  Here's what we came up with - and before we start, I must apologise for the quality of the pictures in this post, we lost the light quite dramatically towards the end of our session, and so some of the later pictures have a lot of shadows which I find really distressing!

So, for the daytime look,  as always we started with the base.  Jane is blessed with naturally creamy skin, so, instead of using a foundation, I used Benefit You Rebel in Light to even out her skintone:


I used a very tiny bit of ELF High Definition powder on Jane's T-zone, but there really wasn't a huge amount of corrective work that needed doing here.  We then moved onto Jane's eyes, I dug out my Bobbi Brown  palette, and used Flesh as a colour wash all over the lid up to to brow, then used Naked as a crease contour:


Jane uses a lot of grey shadows ordinarily, but we thought something a little different might work, so, as an eyeliner, we used a Korres pencil in blueblack - I love these pencils, they're buttery-soft and beautifully blendable, perfect for a novice user - to set off the browns in her eyes:


Then, we finished off with a little Lancome Hypnose, a dusting of Cargo Illuminator in Wind on the cheekbones, and a little beige lipgloss:


For Jane's more dramatic look, we removed the eyemakeup altogether and started from scratch.  I was determined to make this as simple as possible for Jane to be able to replicate at home, so I used a very similar application technique, and mainly just worked with different colours.


As a colour wash over the lid, I used Korres eyeshadow in Base 12s, which is a lovely taupe with a slight pink iridescence.  The iridescence made Jane a bit nervous, but once I explained that it's not actually a PINK eyeshadow, and it would just make her eyes seem a bit brighter, she relented and let me use it.  Then, to accentuate the crease, I use MAC Behold, which is a grey-taupe, and possibly the most useful eyeshadow I have in my kit:


I then applied an extremely thin line of black powder eyeshadow in place of liquid liner, and accentuated the lashes with a coat of Lancome Hypnose Drama (forgot to take pictures of this step - sorry!) Once the eyes were finished, I applied Ellis Red from Ellis Faas to Jane's lips, and the look was finished:


Personally, I love how this looks on Jane.  If I were to try to re-create this look, I'd probably do a little cheekbone contouring too - probably using Ilamasqua blush in Rumour - and add another coat or two of mascara.  I'd also make sure the lighting was right!

Thank you very much for being my sitter, Jane, I hope you enjoyed the session as much as I did.


Share:

Friday, 11 December 2009

Today's Interview Look


Hair freshly coloured? Check. Eyeliner freshly flicked? Check. Lips slicked with balm? Check. Nervous? Check.

Hate interviews, but think it's important to look polished.

Wish me luck, peeps!
Share:

Thursday, 10 December 2009

My current skincare regime

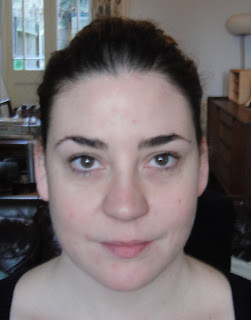
Don't worry, I'm not going to subject you to pics of my skin with no makeup on - well, maybe just the odd one ...

What I'm using at the moment:

Daily:

Nude Facial Cleansing Oil - I wasn't too sure about this at first, I'd heard so many raves about it, people seemed to really like the smell, and I found it more than a little overpowering, to be honest.  It smells, to me, like hippies, sort of musky, and patchouli-esque.  It's not unpleasant, but compared to the light, fresh and minty smell of the Origins Liquid Crystal I've been using for the best part of the last five years, it's very heavy, and took some getting used to.  But, that aside, I love this stuff, it's a rich, thick oil that melts anything you have on your face, and then rinses away to leave you with soft clean and velvety skin.  And if you don't want to use a muslin cloth with it, you don't have to as it rinses away perfectly well with just a splash or two of warm water.


Next, I sploosh about four or five drops of Elemental Herbology Cell Food Serum onto my face and neck:

It's hard to describe what effect this has on your face - normally I don't bother with serums at all, finding them too heavy and greasy for my face, which tends to lead to breakouts, but this is very light, and seems to just soothe my skin whilst protecting it from the horrific weather we're having at the moment. I just find my skin loves this, lines seem to be smoother, and my skin is altogether more well-behaved when I'm using it. I think it's a product that's very quickly become one of my all-time favourites.

Then, as I described last week, I moisturise with this:


Which is a lovely rich, and matte moisturiser, perfect for cold, wet, wintry days.

Then, on a bi-weekly basis, I've been using this:


Which is the Elemental Herbology Facial Kit, which I wrote about here, I shan't bore you with re-hashing that post all over again, but I will leave you with a shot of it in action:


I think my skin is in better condition than it's been for a long time, and I'm really happy with it. What are your winter skin care essentials?
Share:

Wednesday, 9 December 2009

Organic Wednesday - Badger Balms


So, a couple of weeks ago, I mentioned lip balms and asked for some suggestions for new ones. I really shouldn't be asking for recommendations, as a bit later on that day I went to my lip balm drawer (what, you mean you don't have a drawer devoted purely to lip balm?)  and found these babies.  Actually, the pic above shows only some of the Badger Balms I have, there are a few more hanging around.  I'm a big fan of them, in case you can't tell!

About Badger:

The original Badger "Healing Balm" is based on a concoction of  extra virgin olive oil, beeswax, castor oil, aloe vera and essential oil of sweet birch (it smells very like root beer, in fact!), and was invented in 1995 by Bill Whyte of New Hampshire.  The brand has since diversified from this one balm into aromatherapy products, hand care, lip care, body butters, soaps and sunscreens.  Badger don't test on animals, only use organic (food grade) ingredients and contain no petrochemicals.

Lippie Says:

I really like these formulations, unlike balms containing petrochemical ingredients, these don't just soothe your lips whilst they're actually sitting on your lips, but keep on protecting and soothing even after there's no balm visibly left on your lips.  Some more mineral-oil based balms can actually leave your lips feeling worse after they've worn off, but not these.  I discovered them via their "Healing Hands" balm, which I've used as a hand cream, and I also swear by their cuticle cream, which is a lovely lemon-scented butter, which works wonders for your nails, I discovered. My favourite of the lip balm sticks is the Chai Rose flavour, which I think has been discontinued, much to my distress.  I also really like their relaxation balms, I don't, in all honesty know how effective they are as aromatherapy products, but they smell nice, and they're lovely to use.

But, don't just take my word for it:


Mr Lippie says:


"Not being someone who regularly uses skincare products of any kind, I was a touch dubious when Get Lippie thrust a small tin of Badger ‘Healing Balm’ upon me, with many exhortations to ‘USE this, dammit!’. Opening it didn’t really help my qualms, as I was faced with a malignant yellow substance that was sticky/slimey to touch, and a waft of overpowering Menthol odour drifted out. I really didn’t think that extract of Badger was supposed to smell like this (nor was I sure what healing powers it had for dry skin), but I gamely resolved to try it anyway. I’ve got dry skin on my elbows (the word ‘scaly’) has been used), so I applied this to them once a day for about a week. The smell disappears in small quantities, the stickiness washes away quite easily, and, luckily, my elbows have not turned yellow. And, more to the point, it actually seems to work – which is nice. My elbows are actually becoming significantly smoother. So, overall, a thumbs up."

High praise indeed, if you ask me.


Editors Note:  No Badgers are harmed in the making of Badger Balm - there are no animal ingredients in any of the products from the range, except beeswax. 
Share:

Tuesday, 8 December 2009

Nail of the Day - Rococo Vayder

If you follow me on Twitter at all, then you might already know I've fallen for Rococo polishes in a big way.  Yes, they're expensive, but all the ones I've tried are so pretty, and the wear on them is simply fantastic, usually at least five days without any signs of tip wear or chipping.  Here's my latest purchase:


It's called Vayder and it's an opaque black with iridescent micro-sparkles.  In the picture it looks like a silver glitter, but under artificial light these little sparkles light up like diamonds, I love it.  The above pic shows two coats for full opacity, and a seche vite top coat.   There's no gritty feel from the glitter on my nails, either.

I now own three Rococo polishes, all in colours slightly different to what's in my usual colour wardrobe, from left to right here, there is Vayder, Utility and Underground:


Also, I want to show you a before and after of my nails now I've been using  my ultra top secret nail regime for a few weeks:


It might not look like much to you, but for me to have ALL of my nails visible from the other side is amazing to me!  Another couple of weeks and I'll reveal all, but this new nail routine is something I'm astonishingly happy with, and I'm beginning to think my nails actually look okay instead of being something I'm really ashamed of and frustrated with.

What are the winter nail colours you're loving at the moment?
Share:
© Get Lippie | All rights reserved.
Blogger Template by pipdig