Beauty Without Fuss

Popular Posts

Recent Posts

Wednesday 2 July 2014

Bare Mineral Marvelous Moxie Lipgloss in Hypnotic


Lipgloss isn't something I associate with Bare Minerals very much.  Lipstick, yes (their Marvelous Moxie range is very well, and aptly named), and of course, there is their iconic range of mineral foundations and powders, but ... lipgloss?


Look at it.  LOOK AT IT!  Oh, those prismatic pigments, this is so pretty!


And with flash, so you can see how the colour changes in different lights:


:sigh: so pretty.  So very, very pretty.

Here's how it swatches in different lights:


Hmn ... lets try again from a different angle:


Okay, once more?


It's definitely more of a layering gloss, this one, I think.  Here it is over Max Factor Lipfinity Just in Love from the other day:


Can you tell the difference from the original below?


So, Hypnotic it may be in the tube, it's rather ... subtle in the flesh.  Lovely to look at, but simply not that exciting to wear, I'm afraid!  It's a nice, non-sticky gloss, however, with a little hint of peppermint flavour,  just a shame it's a bit underwhelming out of the tube.  Some of the other BareMinerals colours are much, much better in the gloss formulation, I'll show you those soon.

Available from Debenhams costing £16.

This post: Bare Mineral Marvelous Moxie Lipgloss in Hypnotic originated at: Get Lippie All rights reserved. If you are not reading this post at Get Lippie, then this content has been stolen by a scraper

Share:

Tuesday 1 July 2014

By Terry - Cheek to Cheek: Cherry Cruise and Tint to Lip: Pink Palace


I'm a sucker for a stain.  Well, some stains, anyway - tea, spag bol, toothpaste not so much (I'm a mucky pup) - gimme a cheek or a lip stain, and I'm happy.   Particularly a lip stain.  I love my bright lipsticks, as some of you might have noticed, but it drives me bananas when they don't last.

Enter By Terry, with a couple of stains perfect for the cack-handed muppets amongst us, and I'm happy to report that they're amongst the more affordable products in her range too, which is good news!

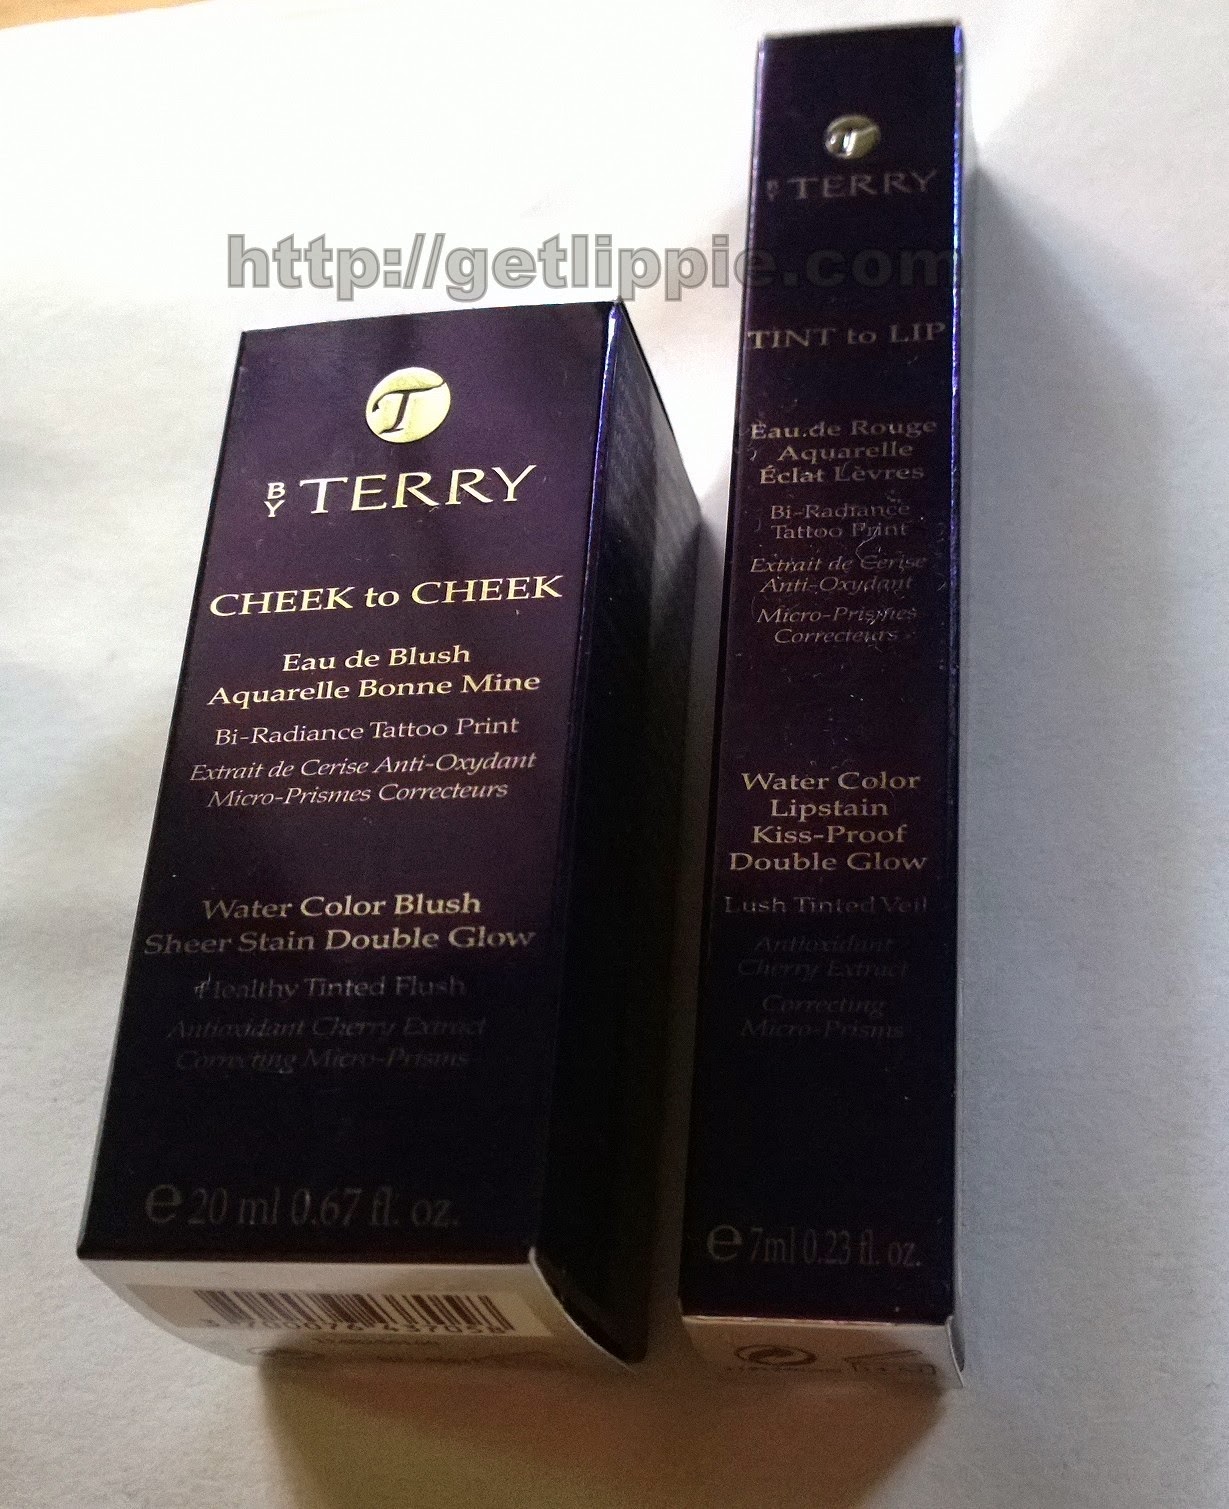
First, Cheek to Cheek in Cherry Cruise:


 Such a pretty, bright cherry red!  It comes with an innovative dropper applicator and a pop up lid:


 The formula is bi-phase, one layer is the red pigment (referred to as a syrup in the literature, but it's not as sticky as this might make it sound), and one layer is silver shimmer, you can shake to mix the two, and have a slightly more opaque and definitely more shimmery colour, or you can just leave the shimmer to settle to the bottom of the bottle and use the "syrup" alone.

Best thing about this formula is that it is blendable.  We have all seen cheek stains that stain from the very first instant it comes off the brush - STRIPES! - and have ended up with dolly-cheeks as a result, but with this one, you just drop a drop (two if you're braver than I am), rub it onto the fingers of both hands and blend into your cheeks.  You'll have around a minute to play, and you won't get those little tell-tale circles on your mush.

However, nothing budges this stuff.  It'll look the same when you come to take it off as it did when you first applied it, and that's fabulous. Just make sure you have kind lighting in your bathroom the first time you use it, as it can be easy to overapply when you're still getting used to it.  I warn you!

Now, the Tint to Lip in Pink Palace, in the same two-phase formulation as the Cheek to Cheek above, it's purely for your lips:


Here it is both without the shimmer, and shaken to show the more opaque shimmery formula.  A cooler-leaning raspberry pink, it is unusual for a lipstain in not going completely fuchsia as you might expect on the lips.

It is ... fairly ... long-lasting.  It won't survive a sandwich, but a couple of cups of tea won't scare it completely off.  Personally, I prefer the look of the tint without the shimmer on the lips, I think it looks a bit frosty with the shimmer and that isn't a good look on someone my age, whatever the shade, but the colour, for me is perfect.  One coat is just enough to give my lips a whisper of colour, but you can build up the pigment for a more intense look.


Here you can see the differences between the colours more clearly.  A bright cherry red, and a clear raspberry.  Here's how they apply on the skin:


OBVIOUSLY I've overapplied!  But you can see how the products stay runny when applied to the skin, which is what allows you some blending time.  I wiped half of this off, and blended them out:


Again you can see the (slight) differences between the colours, and the sheen you get from shaking the product up.  However for the cheeks, you really do only need a single drop, I probably applied enough for four cheeks here.  The lips you'll probably need about two dips with the doe-foot sponge, more if you want to layer up.  Both products have the classic By Terry rose scent, but it wears off quickly, and you don't have that nasty chemical after-taste with the lipstain.


Cheek to Cheek costs £29 and Tint to Lip is £22, which, in By Terry terms, is practically pocket change.

The Fine Print: PR Samples.  Pictures for this post were taken with a Nokia Lumia 1020 lent by Microsoft.

This post: By Terry Cheek to Cheek and Tint to Lip originated at: Get Lippie All rights reserved. If you are not reading this post at Get Lippie, then this content has been stolen by a scraper
Share:

Monday 30 June 2014

Max Factor Lipfinity Revisited


Lipfinity was launched by Max Factor in 2000, but there was always something rather ... nineties about them, if you ask me.  It was the brown-ness.  They were firmly stuck in that rust rut that I always associate with the late 90's, where blush, shadow and lipstick were usually the same terracotta shade.  Get Lippie doesn't really do brown.

Especially not like this:

She's so beautiful.  I'd look like an Oompa Loompa. More so than usual, I mean.

I'd just look like my face was dirty.  Monochrome brown is a great look for some, but ... well, it's not for me.  Brown is what I think of when I think of Lipfinity though, I can't deny it.

But, I was re-introduced to the range recently (hey, only 14 years behind the curve, never say we're not trendsetters here at Lippie Mansions), and I was delighted to notice they had some really lovely BRIGHT colours! Not a brown in sight!


Here we have shades (L-R):

006 - Always Delicate: beige-peach
024 - Stay Cheerful: lovely cool pink
120 - Hot: tomato red
146 - Just Bewitching: creamy coral
335 - Just in Love: raspberry

Yes, yes, I know, beige is a kind of brown, shut up!  There's nothing rusty about these colours though, they're gorgeous.


Hot and Just in Love have a hint of gold and silver shimmer respectively, but the other three are cream shades.  The shimmer is barely (if at all) perceptible on the lips, but it just stops the colours looking too flat in the tube.


Even thought I'm not at my most comfortable in "nude" shades, 006 Always Delicate is wearable for me because it contains a lot of pinkish-peach, and it's good for adding a polished look to a no-makeup face.  I don't look as much like a corpse as usual in this one.

My favourites, as you might have guessed if you're a long time reader, are the red and the deep raspberry pink, and it's always a delight to have a long-wearing non-feathering formula in bright shades.  Application is the normal two-stage slight faff, the slightly dry pigment layer (which works best if you apply two extremely thin coats, rather than one thick one):

335 Just in Love
And then you follow this up with the glossy silicone layer:

335 Just in Love

Colours apply true to tube (this is one very thin layer - it would have been far more intense with two), and will last through tea, coffee, wind, rain, sunshine, and hail.  But not chips.  Never chips. The pigments in Lipfinity are oil-soluble, so chips, lard, cream cakes, mayonnaise etc will all eat through the colour and leave you with the red (pink/peach/coral) ring of doom if you're not careful.  Most cleansing oils and balms will get rid of them at the end of the day, but you might have to scrub a little with your facecloth to get the final stubborn remnants off.  Oh, and invest in a decent lip balm for nighttime, this will show up every fault on your lips, if you've neglected them. If you're a fan of Lipfinity already, then you'll love these colours.  If you're not ... well, there's nothing new here aside from the pigments.

Well played Max Factor!  Nice colours all, and it's great to have long-lasting colours at an affordable price, they cost £10.99 each at Boots, but there are always offers on ... Compare that to one Guerlain Rouge G, Tom Ford or Chantecaille Lip Chic (all in the £30+ bracket) and you have yourself a bargain.

What have you revisited recently?

The Fine Print: PR Samples.  Photos for this post were taken with a Nokia Lumia 1020 lent by Microsoft.  It's a phone, in case you were wondering.  with a bloody good camera.  I'll review it properly one day.  I haven't used my DSLR since it arrived, I'm *that* lazy.

This post: Max Factor Lipfinity Revisited originated at: Get Lippie All rights reserved. If you are not reading this post at Get Lippie, then this content has been stolen by a scraper
Share:

Wednesday 25 June 2014

Nail Candy by Donnie & Ginny Greer (and introducing Emily!)

So, I'm always getting asked if people can do guest posts, but when you get waylayed by the birthday girl at her own party, begging to do nails for the blog, you can't really refuse, can you? So, without further ado, I present you the latest addition to the Get Lippie team, the gorgeous, the incomparable, the INCREDIBLY TALL, Emily Maben!

By Emily

I don’t actually remember agreeing to be ‘special nails correspondent’ for Get Lippie, it was my birthday and I’d had a few cocktails, natch. But I was delighted the following morning, with a suitably horrific hangover, to find a message confirming the beginning of my blogging career.

So…I’m Emily, and I’m going to be trying, testing and reviewing (and no doubt spilling all over my sofa and clothes) every nail product I can get my hands on, just for you. I don’t claim to be an expert…I have no training whatsoever, but have amassed a rather large collection of varnishes, tools, books, stickers and embellishments over the last few years and love experimenting with new techniques. Sometimes my attempts look like a hot mess, sometimes they look ace and I spend all day staring at my lovely SHINY nails.

As I MAY have mentioned, it was my birthday recently and my lovely team at work gave me this fabulous book: Nail Candy!


Written by Donnie & Ginny Geer, two sisters who started out as nail bloggers, this kitsch delight contains a wealth of nail art ideas and inspiration, with full instructions and clear images. I’d say some of the techniques are quite advanced, butwith a little bit of experience and the right tools I think everyone will find something to love here. Kitten nails with pointy ears (squeeee!), basic striping, dotting and half-moon techniques, artistic paint splatter effects and Harajuki style 3D cutesiness.


I decided to have a go at something simple and opted for the Watercolour manicure. Following their instructions I used two coats of Barry M Blueberry and let them fully dry, before roughly blobbing other shades of blue on top, with a little bit of silver for good measure. While the blobs are still wet you load of wide brush (I actually used an eye-shadow brush) with acetone and then you sort of smoosh the colours together to give a watery paint effect. Finally apply a top-coat and voila…erm, well a watercolour effect that I can’t work out if I like or not.


With a bit of practice (and perhaps better choice of colours) I think this could look fantastic. Have you tried this technique yet? How did you get on?


Emily. x

Share:

Tuesday 24 June 2014

Anubis by Papillon Artisan Perfumes


By Laurin


Generally speaking, I’m quite happy to live in 2014. I do have the occasional fit of Mad Men-inspired melancholy, but although I’d be quite happy to have regular access to 60’s style hair and music, I’m decidedly less keen on 60’s style access to contraception and career opportunities. So despite its aesthetic deficiencies and frankly appalling lack of whiskey decanters in offices, I remain gladly in the 21st century.


What I’m not so keen on is much of modern perfumery. I rarely write about new releases, and that’s because they so rarely move me to any words beyond, “Eh…” To my mind, the word “modern” when applied to perfumery translates to “clean and bland”, or if we’re being polite, “minimalist and commercial”. Exceptions abound, of course: the Italian house Nu_Be pulls off the neat trick of crafting perfumes that are both interesting and easy to wear. No one would ever accuse Frederic Malle of playing it safe. And if all else fails, there’s always Mugler. But for the most part, I ain’t buying it.


That’s why I’m genuinely excited about the launch of three new scents from the nascent English brand Papillon ArtisanPerfumes.  Papillon is the baby of Elizabeth Moores, and its three debut fragrances are truly stunning creations. I’m obsessed with both Tobacco Rose and Anubis, and I struggled mightily to decide which to review first. Early bets are on Tobacco Rose being the best-seller, but the audacity of Anubis is too compelling to resist.


According to Egyptian mythology, Anubis was the jackal-headed god of the afterlife and was strongly associated with funeral rites and mummification. Liz tells me that she named the perfume after the ancient deity partially because it went through so many reincarnations before it was exactly right, but it is also worth noting that many of the materials in the composition would have been available in some form or another to the ancient Egyptians.


Smelling Anubis for the first time is akin to burying your face in a vintage suede handbag lined with silk. It envelops you in rich, dusty warmth that sings with anticipationAt first sniff, the bitterest orange peel note hangs in the air for a fleeting moment before seamlessly melting into a rich heart of rose,smoky Egyptian jasmine and pungent pink lotus. This is also where spicy immortelle and a medicinal, meditative frankincense Rivae show up and never quite fade, even as the fragrance dries down into saffron, buttery suede and an overdose of sandalwood. Anubis is striking in its originality, but easy to wear and never veers into the “rough-riding cowboy” territory of some of my favourite leathers such as Montale’s Aoud Cuir d’Arabie or my beloved Lonestar Memories. But what an act of bravery it is as part of a first collection! Commercially, I imagine it would have been a much easier sell to launch a sparkling citrus, or yet another fresh take on a white floral. And yet, here we have a dusty, erotic leather rendered in smoke and flesh. This is not a perfume for the masses. It’s a perfume for perfume lovers.


When I was eighteen years old, I saw the English Patient for the first time. Since 1997, I’ve probably clocked up another fifty viewings minimum. It’s still my model for what a healthy romantic relationship ought to be: passionate, furtive and in all likelihood, ending with fevered whispers in a remote cave. Anubis, for me, is the personification of Count Almásy’s weathered copy of Herodotus. After the plane crash, when the history is already between the pages and needs only silence and a willing pause to reveal itself. “Listen,” it says 


Papillon Artisan Perfumes launches its first collection of fragrances Anubis, Tobacco Rose and Angelique from June 24th at http://www.papillonperfumery.co.uk/. They will be available in Les Senteurs from early July, but you can get a sniff in the Seymour Place branch now. They’re worth the trip.

Share:

Friday 20 June 2014

Estee Lauder Double Wear All-Day Glow


By Get Lippie

The BB cream craze (not to mention the CC/DD..ZZ/whatever creams) has largely passed Get Lippie by, to be honest.  After the first wave of original Korean BB creams hit the blogs, a bunch of brands leapt onto rebranding what had been rather lacklustre tinted moisturisers as BB creams, and I got totally fed up of the hyperbole, so I've been ignoring them.  I always said I wouldn't bother with BB creams until brands actually brought out new formulations instead of simply calling old products new names.  And so, after only about, what, three years or so?  Get Lippie is finally getting on the BBandwagon ...


So, what is a BB Cream then? :cough: well, basically, it is a tinted moisturiser, but it's meant to be one with high SPF coverage, and with definite skincare benefits, which is where a lot of the original "BB" creams lost me, as they were essentially cosmetic products rather than skincare.  You should be able to, in a pinch, wear your BB cream without a moisturiser underneath, and with many, you (or, rather, I should say, *I* simply can't).

Anyway, I've been trialling Estee Lauder's Double Wear All-Day Glow, which is their first BB-Cream from their best-selling Double Wear line for quite a while now, and I really like it.  As you can see from the above, it's quite a thick formulation, but it spreads well over the skin.


Compared to some other BB creams on the market, this is quite highly pigmented, which is what I like about it.  Mind, Double Wear is known for its longevity, and it's nice to report that the All-Day Glow lasts very well too.  It has a slight powdery finish on the skin, but it has great light-to-medium coverage which is very buildable.


My hands are fairer than my face, for some reason, so, whilst this looks a bit yellow on my hand there, it's a great match to my face, and the slight yellow tone does a good job of balancing out my red patches.


Blended out, this has slightly less of a dewy finish than I expected from the name, but this means it needs little, if anything in the way of powder, which is handy! This is Intensity 2.0, but the range has 8 shades in total, I'd probably prefer Intensity 1.0 for winter, but as a summery coverup Intensity 2.0 works well for me.

Lasting power is very good owing to the slightly more opaque than a normal BB, I get 8-10 hours out of this.  If it's a very hot day, I may need to powder down slightly in the late afternoon, but that's only to be expected.  As a summer alternative to the original Double Wear foundation, this is great, lighter and sheerer than the original formulation, and more glowy than Double Wear Light, it's a lovely formulation.  It costs £29 from leading department stores.


The Fine Print: PR Sample - Photos for this post were taken with a Nokia Lumia 1020 lent by Microsoft.

This post: Estee Lauder Double Wear All-Day Glow originated at: Get Lippie All rights reserved. If you are not reading this post at Get Lippie, then this content has been stolen by a scraper


Share:

Thursday 19 June 2014

How to do Concealer


By Luke

Picture this: You’re sat round a dinner table and someone asks what it is that you do, so you tell them, and they immediately throw their hands over their face, and whimper “don’t look at me!!”. Does that happen to you? No? Well, to me it does. This is normally followed by a whole slew of questions, a beckoning of girlfriends, and that staple favourite question of straight men to makeup artists: “so do you do drag?”

I don’t mind this (save for the drag question), I am quite happy to talk makeup and skincare, depending on the location (funerals not so much) imagine staring into open casket and “well we think mother’s best feature was her lips so if you could just emphasise that....”

However, one of the things I get asked about by far the most is concealer. This is closely followed by foundation, but I’ll cover that in a later post. It seems that concealer is a bit of a mystery for a lot of people. Where do you put it? How do you put it on? Which concealers actually, you know, conceal?  The fact is that there are a ton of concealers out there, but very few are actually doing a good job of ‘concealing’, or even staying put. So, let me take you through what I use nearly every day of my working life. After 15 odd years of painting faces, I believe I have finally nailed this concealer lark.

First off the bat, there are a gazillion different textures of concealer. Solid, creamy, waxy, et al, and there are different textures for different things. As a very general rule:
  • Solid/waxy (palette) are for the face. They warm up and cool down with your face so don’t move.
  • Creamy/liquid (wand/pot) are for under the eye. Nourishing, and more flexible for that sensitive area.
If it’s a spot, or the odd blemish, the more yellow the concealer is, the better it will be at covering that angry red look. Redness is really what you are trying to diminish here. No concealer, no matter how opaque will ‘get rid’ of the bump or the texture. Just get rid of the colour. No bags will be got rid of unfortunately.

Face – How to use it
  • A good synthetic brush for smaller areas is perfect. Synthetic because it doesn’t absorb any of the product.
  • Only cover the area that NEEDS covering, and not muller it so that you end up with this huge blob of concealer screaming at you from your otherwise perfect face.
  • Dot just over the bit that you want to cover, and pat it in.
  • Set with a tiny bit of a fine face powder.
  • For larger areas, use a fluffy brush that will have an ‘airbrush’ effect over the area.
  • Concealer will pretty much ALWAYS go on AFTER your base. If it goes on before you are likely to rub it all off again.


Laura Mercier Secret Camouflage. £26. Multi award winning, and been around for a good 14 years or so for a reason. There are few that top this in terms if it’s ability to cover, and actually value for money. It’s divided into two tones, and this on first glance can be a little confusing. The reason for this is that there are no two places on the face that are the same colour so it gives you the control over the colour and tine to match where exactly you are trying to cover. I appreciate that this ‘mix your own’ method can appear to be a bit of a faff, but in actual fact, it is incredibly effective, and well worth spending that little bit of extra time to get it covered.


Louise Young have a similar concept that is also excellent. Three tonal concealers that are designed for the face, AND the under eye areas. Again, you may need to have a play around and mix to get the exact colour, and correct tone, but at £20 AND a brush included you really can’t beat these for value.

For under the eyes, it would be advisable to find one that is probably about 60 -70% opaque rather than total coverage. It doesn’t look terribly natural, and also is more likely to look heavy and obvious.


The trick with undereyes is to get rid of that blue/grey area right from the corner of your eye, on the side of your nose, to about ¾ of the way under your eye. Pasting concealer all the way along the undereye area is a bit of a waste to be honest. The other trick is to use enough to actually cover. I often see people putting an amount so small on that there is absolutely no benefit whatsoever. Don’t fear it!


A fair amount is fine, and if it’s too much keep patting it until it looks as close to your natural undereye as possible. It’s only make up, it does come off. Be bold with it! The best I have used are Clinique’s Airbrush concealer. A handy little pen with a brush in several colours that are perfect for almost all skin tones. It also has some radiance to it that brightens in a very subtle way. Not ideal for the face, but excellent coverage.


The other one I absolutely love is the NARS Radiant Creamy Concealer. In a wand so super easy to use the coverage on these are mighty, and the finish is just superb! Only a tiny little bit is needed.


Tools

These are very important. Here is a section of some of my favourite concealer brushes for under eye, and for the face. It isn’t really good enough to use your finger, tempting though it is as a) not terribly hygienic for your undereye area, and b) you do not want a honking great finger print in your concealer.


Going from top to bottom


  • Glamcor Mini Finish brush. A great mixture of natural and synthetic hair to ‘airbrush’ concealer on. Great for under eyes, and also great for buffing in a little concealer on the face. (Available from www.preciousaboutmakeup.com)
  • Laura Mercier Secret Camouflage Brush. Cut small, and to a point so the flat edge of the brush can get a fair amount under the eye, and the point of the brush can be used to get a precise dot over the area you are trying to cover on the face.
  • M.A.C 219 brush. SUPER fine for those really tiny areas of coverage. Tiny veins, and small blemishes, this puts the concealer on almost imperceptibly. Takes a little time, but well wirth the effort.
  • Glamcor Mini Contour. Slightly fatter, and purely synthetic for a full coverage finish on larger areas. Good for scar discoloration and also darer points of birthmarks etc...
  • Finally, there is absolutely no need to spend out on special brush cleaner. I have and continue to use a good antibacterial washing up liquid (fairy for some reason seems to work best for me) for all my synthetic brushes, as it’s excellent at removing grease. All of it.

The Fine Print: These are all items from my professional kit.

This post: How to do Concealer originated at: Get Lippie All rights reserved. If you are not reading this post at Get Lippie, then this content has been stolen by a scraper
Share:
© Get Lippie | All rights reserved.
Blogger Template by pipdig