Beauty Without Fuss

Popular Posts

Recent Posts

Sunday 25 October 2009

Makeover: Sarah C

Something a little different this week.  Meet Sarah:


Today we're replicating a makeup we designed for Sarah a couple of months ago for a fancy dress party, and my inspiration for the look was Theda Bara. As always, we start with the base:


We've used a mixture of foundations to match Sarah's skin tone, then powdered it down with a smattering of Benefit Bluffdust.  Then it was onto the eyes, and we decided to use MAC Paint in Artifact, which is a lovely burgundy shade:


I applied this in an almond shape on the eyelid, then drew out the outer edges into a pointed shape.  After that, I added lashings of MAC Feline eyeliner to make it even darker:


After that, of course, time for mascara:


And then lips, we needed something dark, but still flattering, so we chose Gash by Urban Decay, as it's a really good dark red.  Sarah has lovely shaped lips for the bee-stung look, so I just exaggerated her cupid's bow a little, and drew the colour slightly inside her natural lipshape. There was no need for blush with this look:


And here's how the whole thing looked when we put it together:


I love how this looks, dramatic, different, yet still wearable for a night-time special event.

Here's the before'n'after:


Share:

Sunday 18 October 2009

Makeover: Sarah

I love doing makeovers, I love seeing the transformation you can make in someone's deportment and demeanour just by giving them a little colour, even with a relatively simple transformation like this week's:

Meet Sarah:


Sarah's gorgeous.  I love her cheeky freckles, and she has beautiful grey-blue eyes.  Talking to Sarah before her makeover, she wanted a quick, simple, easy, and above all GLAM look from her makeover today.  Always happy to oblige, this is what we created.

First off, creating the base.  Sarah is worried about patches of uneven colouration, so we used her MAC foundation, and applied it with a sponge, using a rolling motion evenly all over her face, then followed with a light layer of MAC Blot to set it.  Sarah had wanted to cover up her freckles completely, but I suggested that we leave them showing as they're a) very attractive and b) very difficult to cover up without turning your face into one big freckle!


I wanted to play up the colours in Sarah's skintone, and accentuate her eyes, so I thought a golden peach shade was in order.  I used Benefit Creaseless Cream Eyeshadow in Gabbi, and applied that all over her lids. In the centre of each lid,  I used a small amount of golden shimmer powder just to accentuate the colour, and add a little highlight. :


Then, I added a small touch of dark navy liner, just to further accentuate her eyes:


I smudged that out a little, and added the finishing touches.  Blush (MAC Mocha)


And a little lipgloss (MAC Strobe)


And here's the finished look:


So there you go, quick, simple, and hopefully, GLAM!


Share:

Saturday 10 October 2009

Holdover Makeover and Foundation Review

Okay, it's a couple of days late, I apologise, but here's the latest pics of the FotW I promised you on Thursday.

First of all, the obligatory shot of me without makeup. I'm shiny, and my pores are ENORMOUS:


It is also 6.30 in the morning, hence the simplicity of this make up, and my dopey expression. First things first, this complexion needs foundation, and needs it quick! 

So, a layer of  L'Oreal Studio Secrets foundation in Gold Ivory, and a dab of Benefit Bluffdust later, here's what you get:


Nice and matte and even. Now, I quite like the L'Oreal foundation, it applies well - and easily - and you don't need to use a huge amount to get good coverage. Admittedly, I really only use it on my T-Zone and to cover up some of the redness I tend to get around my nose. The foundation has a built in brush, but I find the bristles are a little too short for it to be really useful for blending, and I worry about the hygiene issues of not having a separate applicator, but for makeup in a hurry, it's not a bad choice - as far as application goes, it's actually fairly foolproof!

That said, it's not very long lasting.  It gives good coverage for the first two hours or so, then wears off pretty quickly, especially around the nose - where skin tends to be oilier - and after four hours or so, I find it's pretty much entirely disappeared, and/or been absorbed into my skin.  I find this with a lot of High St foundations though, ranges like Rimmel and CoverGirl and the like are cheaper mainly because they use less pigment and setting agents.  However, this is being sold as a "Pro" range, and it's not, as the High Street goes, all that cheap (currently £15.99 at Boots, though I paid about a tenner for mine a few weeks ago), so this lack of durability is very galling. It's not something I see myself buying again, I'll be honest.

However, onto the rest of the makeover ...

After applying my foundation, I usually do my eyes first, and that's what I've done here.  As I'm going for a quick, office-suitable look, I apply UDPP, a colourwash of the Bare Escentuals Bravo, then line the upper waterline only with a smudge of MAC Feline eyeliner, and add a single layer of Lancome Hypnose Drama in Black:


I have hooded eyelids, and it's hard to get a shot of how the eyeshadow looks on my lids from directly in front, but it's a lovely soft, shimmering silvery-brown colour, with a but more depth than you'd expect from that.  It's a loose shadow though, so it really, really, really needs a primer underneath to "lock" it in place.

Once my eyes are done, I add blusher (Chanel Rose Defile - the colour of which I love, even as I HATE the texture of the powder. Chanel are only really getting their act together with regards to their powder cosmetics right now, and the way all their old products dry out, and harden so quickly and have a tendency to be rather under pigmented is infuriating) and Bare Escentuals Buxom lipgloss in Brandi.

Here's how the colours look together:


And here's how it looks from the front:


 Again, my stupid hooded eyelids make it difficult to see the shadow that's applied, but you can see a hint of greyness there. I think I've gone a little too heavy on the blusher there, but that's because the lighting in my room - there is NO natural light in my bedroom at 6.30am on a weekday morning at the moment, so I have a tendency to overapply in the mornings, so before taking this last shot, I blended it out a bit:


So there you go, a simple work look that takes - if you're not trying to photograph it in a dark room! - about 7-8 minutes to apply, start to finish.

I think I need a fringe.
Share:

Wednesday 7 October 2009

Face of the Week

I'm a very lazy person, and i appear to be addicted to routine at the moment, so whatever makeup I find myself wearing on a Monday is what I tend to find myself wearing for the next few days! Here's the products I've been wearing this week, it's very plain and simple, but quick, and pretty.


Organic Surge Blissful Daily Moisturiser (which I'm trialling for a blog post later this week)
Benefit Bluffdust - which I love for dealing with my red patches!
L'Oreal Studio Secrets foundation in Gold Ivory
Chanel blusher in Rose Defile
Urban Decay Primer Potion (depotted)
Bare Escentuals Glimpse e/s in Bravo
MAC kohl pencil in Feline (inner upper eyelid only - have I mentioned how much I love that look, and this eyeliner? Well, I do!)
Lancome Hypnose Drama in Black (of course!)
and the look is finished off with a tiny slick of Bare Escentuals Buxom lipgloss in Brandi.

Pictures of the finished look will appear tomorrow ...
Share:

Friday 25 September 2009

Eye of the Day - Updated!

So, I decided that yesterday's picture of my eyemakeup wasn't the clearest, so I've redone it:


And here it is with the Urban Decay eyeliner in Ecstasy more clearly visible:


A cheery look for a Friday me thinks.

Products used:
MAC Paint - Untitled (as base)
MAC Dovefeather in the inner corner
by Terry Black Grape in the outer corner
Urban Decay liquid liner in Ecstasy
Lancome Hypnose Drama one coat.
Share:

Sunday 20 September 2009

Makeover: Jane

Meet Jane:


Jane is a good friend of mine, and she's kindly agreed to be my first model in my makeover series.  Jane's 47, works in a University, and has amazing bone structure.  Ordinarily, Jane doesn't wear much make-up beyond a touch of mascara and some Vaseline on her lips, and today we are going to create a glamorous and sophisticated evening look.

The first thing to do is to even out skin-tone with a touch of base, Jane is a little prone to high colour around her cheeks, nose and forehead, so we concentrated on those areas:


We used MAC stick foundation here in NC25, and I used that as a concealer in the corners of her eyes, and a touch of matching MAC Concealer underneath her eyes too. In order to counteract Jane's natural tendency to redness, I used Benefit Bluffdust to set and finish off the base.

Here's how Jane looked after some serious blending:


Jane has beautiful blue eyes, but they need a little more framing, so before we got started on her eyes properly, I filled in her eyebrows a little using Bobbi Brown Blonde eyeshadow:


Just a dab'll do ya ...

For Jane's lids, I used Bobbi Brown Champagne Truffle shimmer wash, with Stone to define the crease:


In the flesh, the Champagne is actually more of a golden-apricot shade which complements Jane's eyes perfectly.  I then went on and added Chocolate as an eyeliner, and finished with two coats of Max Factor 2000 Calorie mascara.


To finish, I added MAC Blushbaby, and a touch of Bare Escentuals Clear radiance to Jane's cheeks, and for her lips, we used Estee Lauder lipstick in Sugar Honey:


Presto!  A lovely, sophisticated - glowing! - look, that can be toned down slightly for the daytime too.

Here's the obligatory soft focus glamour shot:


All photos - except the last - shot in pure daylight and unretouched.

Many thanks to Jane for being so patient and lovely, here's hoping you enjoyed it!
Share:

Saturday 12 September 2009

Review - Eyeshadow Primers - The Results!

So, some 13 hours wear later, here's how we're looking:


There's some significant fading on both, but this is an eyeshadow that lasts an hour, maybe two without a primer, so that's only to be expected. Both also have creasing, but again, on an eyeshadow that ordinarily simply disappears into the ether, this is really to be expected.

If I were judging this simply on end-of-the-day looks, I'd have to declare Urban Decay the outright winner. However ... the skin on my left eye (with the UD) simply isn't as comfortable on the right, it feels a bit drier, and tauter, somehow. The MAC eye (on the left there) feels like I have nothing at all on my skin. When I went to blend these creases back in, I found that the UD eye stayed firmly creased, but with the MAC one, it was still possible to get rid of the line. This all makes the winner tougher to call than I expected ...

Urban Decay definitely makes your make up last longer, there's no doubt about that. But, this longevity at the cost of a certain amount of comfort, and there's the fact that you have to be quick, and certain, with your application, as once your make up is on, it's not going to be moved.

So, let's break it down in marks out of ten for the specifics:

Packaging
MAC - 8/10 - cute "oil-paint" tubes!
Urban Decay 6/10 - packaging that makes it impossible to get the last few applications out. I've had to cut tubes open before now.

Application
MAC - 8/10 - Just a tiny dab on your fingertip will do both eyelids
Urban Decay- 8/10 - sponge tip applicator spreads product evenly over eyelids.

Colour Trueness
MAC - 7/10 - Colour trueness was good, in isolation, but ...
Urban Decay - 9/10 - not as good as the Urban Decay.

Blendability
MAC - 7/10 - once colour was on the eye, it was fairly easy to blend in, and add more, if needed.
Urban Decay - 3/10 - colour could be blended, but only with a LOT of effort, and if you added too much, well, you were stuck with it, unless you wanted to remove it and start all over again.

Wear
MAC - 7/10 - Definitely faded, and creased by the end of the evening. But shadow and liner, still visible!
Urban Decay - 9/10 - Definitely kept your makeup (and it's creases!) in place. This baby was going nowhere!

Comfort
MAC - 8/10 - didn't make make up feel heavy, and stayed comfortable throughout the day
Urban Decay - 6/10 - no heaviness, but the eyelid definitely felt drier as the evening wore on.

Overall:
MAC 45/60
Urban Decay - 41/60

So, our winner is:

MAC by a very small margin! MAC's ease of use and comfort just edged it as the winner for me, over UD's poor packaging design, and lack of blendability. Sorry Urban Decay!
Share:

Review - Eyeshadow Primers

Today, I've decided to to a side-by-side product test. Two of my all time favourite products are MAC Paint (which I use as an eyeshadow primer, as well as a colour) and Urban Decay Eyeshadow primer. Up until now, I'd be hard pressed to say which was better, so I'm trying them both out at the same time, with an eyeshadow that I already now disappears in the blink of an eye ... so here goes:

WARNING: This post will contain pictures of me without makeup.

Stage one: In which our blogger goes barefaced

At this stage, what I mainly notice is that I've neglected to groom my eyebrows, no matter, won't be making that mistake again! What I also notice is that the MAC Paint on my right eye (left on these pics) reflects the light a little more than the Urban Decay primer on the left eye (right in these pics), I think this is because there is a little hint of shimmer and pigment in the MAC, which the UD is missing.

Stage Two: Wherein the experiment begins in earnest


At this stage, with both eyes open, there is little difference, but with my eyes closed, you can see that the UD primer is definitely better at grabbing the pigment, and the colour is truer. I'm using a loose shadow from Bare Essentials (Smoked Clay), which is a nice greenish grey, but that's hard to pick up with your brush. However, there is a price to pay for this extra pigment being visible, as you'll see in the next stage.

Stage Three: Wherein the colour deepens

I thought that the shadow I was using was too wishy-washy in the first pics, so decided to go for another layer of colour. When applying this, I realise that the Urban Decay is damned difficult to blend over. In fact, it's damn near impossible to blend over after it's had a chance to set for a minute or two. This means that there is a visible line in my socket-crease on my left eye (on the right there), which I'm finding infuriating. Blending is important, vitally important, to any good make up, and the Urban Decay simply won't let you do it.

Stage Four: In which my mascara is uneven.


Here, I've finished adding my eyeliner, and just wanted to see what the difference was between no mascara and one layer of Hypnose Drama (upper, pic) and with two layers of mascara (lower). What it has done is highlighted the fact that I have thicker lashes on my right eye, but longer lashes on my left. I'll be sticking with one coat from now on, I think.

Stage five : in which the finishing touches are revealed

I got around to powdering, adding blush and putting on some lipstick (Ellis Faas in L307, a lovely glossy coral shade) but not fixing that damn eyebrow. That's obviously why I'm looking so unhappy.

Stage six: In which your blogger fixes her hair, and her expression
There we go, I've covered up my pointy spock-ears, and am feeling more human again.

Verdict:

At the moment, they're fairly evenly matched. Whilst you do get a better coverage, and colour trueness with the Urban Decay, this is outweighed with the MAC Paint being easier to blend with. Now, I'm going to see how this look lasts throughout the day, and report back.

Products used:
Urban Decay Eyeshadow Primer
MAC Paint in Untitled
Bare Essentials powder shadow in Smoked Clay
Revlon Wet/Dry Liner in Chocolate
Lancome Hypnose Drama in Black
Bare Essentials Blusher in Poppy
Benefit Bluff Dust face powder
Ellis Faas Glossy Lip in L307
Share:

Tuesday 8 September 2009

Products I Simply Can't Live Without

Okay, I said there was going to be a follow up to my follow up (look, I know what I mean) post earlier, so here it is, these are the products I either use on a daily basis, or recommend to my clients regularly:

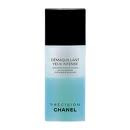
Chanel Precision Bi-Phase Eye Makeup remover: I have used EVERY eye make up remover on the planet (it feels like!) and this is the only one I've been able to buy more than once. So many of them sting, aren't suitable for contact lense wearers, leave a soapy film on your face, or - and this is the killer - don't remove all of your mascara. I'm a big fan of the liquid liner, and full-on tranny lashes look, so it takes some removing. The best thing about this product is that you don't have to scrub at your eyes at all, just soak a cotton wool pad in a few drops, hold it to your eye for about thirty seconds, then rub gently, v e r y gently, and all your mascara will come off like a dream. And no stinging. Did I mention it doesn't sting?

Origins Liquid Crystal Cleanser: Oh, it breaks my heart, but Origins discontinued this last year, and I'm still not over it. I have attempted to stop using products that contain SLS and parabens over the last few years, as I realised that foaming cleansers were contributing to my flaky, blotchy, dry and SPOTTY skin. I found this, and my skin has never looked better, even as I rapidly approach my, er ... mid thirties*. Cleansing with oils feels weird at first, but, once you realise that the "taut" feeling you get after using a foam cleanser is actually your skin drying out and crying for moisture, you realise that this is what your skin is supposed to feel like after cleansing! I have three bottles of this left in my cabinet, and when they go, I'll be on the prowl for a replacement.

* Those of you who know how old I really am can stop laughing now. Thank you.

Bobbi Brown Tinted Moisturising Balm: I'll be honest. I'm lazy. Lazy, lazy, lazy. Most days, I simply can't be bothered with both moisturiser and foundation, so I slap on a layer of this, and I'm all set for the day. I love it because it has a fair amount of coverage that's unusual in a moisturiser product, and as well as evening out my occasionally blotchy skin tone, it's also an excellent moisturiser - which, ironically, can be many a tinted moisuriser's downfall, they just don't soften the skin! Plus, it's choc-a-bloc full of essential oils, and it smells wonderful. I have seriously dry and sensitive skin at times, but when I'm wearing this, you'd never notice. It leaves you with a lovely dewy finish, which is perfect for the day time.

MAC Blot: This is simply the best powder ever for avoiding shine. Sometimes, the BB tinted balm can leave me a little too dewy (who knew that would ever be a problem?) and a light dusting of this over the top is more than enough coverage. I love that the coverage you get is almost invisible, and that you stay matte for hours. This (alongside eyeshadow primer) is probably the product I recommend most to my personal shopping clients. It's simple, relatively inexpensive, will last a very long time, and it WORKS.


Benefit Creaseless Cream Eyeshadow: Man, I hate cream eyeshadows. They crease, they're greasy, and they wear off your lids in about 30 seconds. Not this baby, it stays where it's put, and it stays there till you take it off. I have a real love/hate relationship with Benefit, when the product works, they are very, very good, but so very often, they're a triumph of cutesy packaging over substance, and when they're bad, they can be extremely expensive cosmetic disasters. These eyeshadows are one of Benefit's triumphs for me, the colours stay true (although they will fade a bit over the course of a 12 hour day) but they're easy to apply, they don't crease, and they are well worth the outlay. The colour selection is slightly limited, and if you don't like shimmer, then you're out of luck, but give them a try anyway.


So, there you go. Sadly, there's nothing trendy here, and nothing too obscure (though I hope I'll be forgiven including something discontinued here!) but, these are my baseline products, ones I myself use very regularly, and ones that have been proved to me over and over again that they work. Many of my happiest customers wander away with at least one of these products, and I hear from them all the time how pleased they are with them.
Share:
© Get Lippie | All rights reserved.
Blogger Template by pipdig