Beauty Without Fuss

Popular Posts

Recent Posts

Wednesday 13 August 2014

Golden Touch Intimate Waxing - Soho


By Laurin

When I got back in the saddle after my divorce, I noticed a curious statement on about half the profiles of any given online dating service: “I love London, but equally love escaping the hustle and bustle for a relaxing weekend in the country.” Not me. I spend 95% of my time happily cocooned within Zones 1 and 2, believing absolutely in Peter Ackroyd’s pronouncement that “London is so large and so wild that it contains no less than everything.” Soho, especially, is the balm of my soul and since I no longer spend a sizeable portion of my time and income drinking there, I have resolved of late to concentrate all my grooming services within its streets. If I clock up enough hours here, I reason, I will simply be absorbed into the pavement of Brewer Street, and we shall never be parted again.

The only problem with this, as far as I can see, is the matter of cash. Central London beauty services are indisputably more expensive than their local counterparts, and it adds up quickly if you happen to need a haircut, waxing, and nails done all in the same month. It’s not unheard of to pay £50 or more for a bit of below-the-belt grooming in some branded salons, because who wants to put their ladyparts on the line just to save a few quid? At least, not unless a tube of Canesten is your idea of a “holiday kitbag essential”.


But lo, West End Workers! I bring you glad tidings in the glittering form of Golden Touch Waxing, which is now operating out of the Bodhi Clinic in Ingestre Place (just off Broadwick Street). It’s owned by Hannah Salisbury, a cheery New Zealander who is just striking out on her own after years working as a trainer for other waxing emporiums. She doesn’t do facials, massages or pedicures. It’s all waxing, all the time for Hannah, and she’s bloody good at it too. I’m not going to get too graphic about what I had done because this isn’t Vice and I promised Madame Editor I wouldn’t. Let’s just say it involved a large country in South America and it was, by Hannah’s own definition, an “intimate wax”. That means everything off, from belly button to coccyx. Moving swiftly on then, here’s what you need to know:
  • Nobody in the hair removal business seems to bother with the pretence of modesty any longer. It’s all “knickers on the chair” and not a paper thong in sight.
  • But thankfully, they do all provide wet wipes for you to “freshen up” before the treatment, which incredibly kind when it’s late July and you’ve just spent half an hour hurtling between underground locations in a sweltering metal box deemed unfit for livestock (known locally as “the Tube”).
  • You get special wedge pillows pushed under your hips on each side to prevent lower back strain when you’re asked to open your knees. I’ve said it before, but small concessions to a client’s comfort during a treatment is what impresses me more than any technique. This is one of those small but utterly luxurious gestures.
  • If the phrase “open your knees” already has your cheeks burning, fear not. Hannah puts you completely at ease during the treatment. We chatted about restaurants, the correct and incorrect way of holding your friend’s newborn baby and her plans for World Waxing Domination. It felt more like having a coffee with a friend than completely exposing myself to a person I’d met only ten minutes earlier.
  • Hannah uses hot wax, which adheres to the hair as opposed to the skin. It doesn’t require the use of strips to remove the product, and it is about 98% less painful than traditional waxing. Which is to say that I barely noticed anything was happening at all.
  • When the treatment is finished, it all goes a bit ‘Our Bodies, Our Selves’. You get a hand mirror, and Hannah steps out of the room while you inspect her handiwork. If you spot a stray that her eagle eye has missed, you can call her back in to deal with it. This was appreciated, but unnecessary in my case. I could not spy a hair out of place, so to speak.
  • A full Hollywood or Brazilian costs £35. In my experience, this is a bargain for Central London.

I never thought I’d be able to say I’d had a pleasant bikini wax, but so I did. If waxing is your bag, I can wholeheartedly recommend The Golden Touch. And, to make it even better, Hannah is offering our readers £5 off any service over £30, or a free eyebrow or upper lip wax. All you have to do is quote Get Lippie when you book.


The Golden Touch (www.thegoldentouch.co.uk) is in the Bodhi Clinic at 14 Ingestre Place, W1F 0JQ. To book, call 020 7734 4184.


This post: Golden Touch Intimate Waxing - Soho originated at: Get Lippie All rights reserved. If you are not reading this post at Get Lippie, then this content has been stolen by a scraper
Share:

Monday 11 August 2014

Boots Opticians and Protect Lenses


By Get Lippie

I've been a glasses wearer for nigh on 40 years now, and, I'll be honest, I hate wearing my glasses.  Years of being told I was an "ugly duckling" in my smeared pink plastic NHS frames (complete with eye patch for several years, to boot) as a child, followed by decades of movies and TV using "beautiful woman in glasses" as shorthand for "ugly woman in need of makeover" as a trope , has left me feeling far more comfortable when I'm not wearing my glasses.  I don't feel "beautiful" in my specs, ever, so discovering long-wear contact lenses was a happy day for me.  I know other women don't have this problem, and I see beautiful women looking amazing in their glasses every day, but I feel self-conscious in mine whenever I wear them.


Now, whilst I don't feel beautiful in my glasses, what if you could use your glasses as a beauty aid?  Bear with me, it'll make sense, I promise.  The skin around your eyes is the thinnest skin on your body, and as such, it's the most vulnerable to sun damage, caused by UV rays.  We all know that sunglasses should also protect your eyes about UV rays, but did it ever occur to you that your everyday glasses should too?

I was invited to take an eye test at my local branch of Boots recently, and find out more about their services, and their now-standard "Protect" lenses.  It's been a long time since I've had a Boots eye test, and I was pleasantly surprised at how thorough and professional their sight test now is.  I've always been a sufferer of both myopia (short-sightedness) and hyperopia (long-sightedness) after a series of operations on my eyes as a young child, but as I've got older, I've developed a touch of astigmatism (where the shape of the eyeballs is slightly irregular - rugby instead of soccer balls, if you will).

This time around,  Boots lead me to the - slightly depressing! - conclusion that I can add presbyopia (where the lens has trouble focusing on nearby objects) to that list too.  Simply put, this means reading glasses are now a necessity ... I've been having trouble focusing on beauty product packaging for a while now, but reading glasses had totally passed me by as a possibility!    I refused varifocals though, I'm not that old.

The Boots eye test also checks for signs of  glaucoma, alongside high blood pressure, and diabetes, both of which can show signs in the eyeballs before the patient might notice any other symptoms. They also photograph the optical nerve and the blood vessels in the eyes to check on your general optical health too.  All of these tests checked out well for me, which is a great relief, but it's good to know that Boots are prepared for all these eventualities.

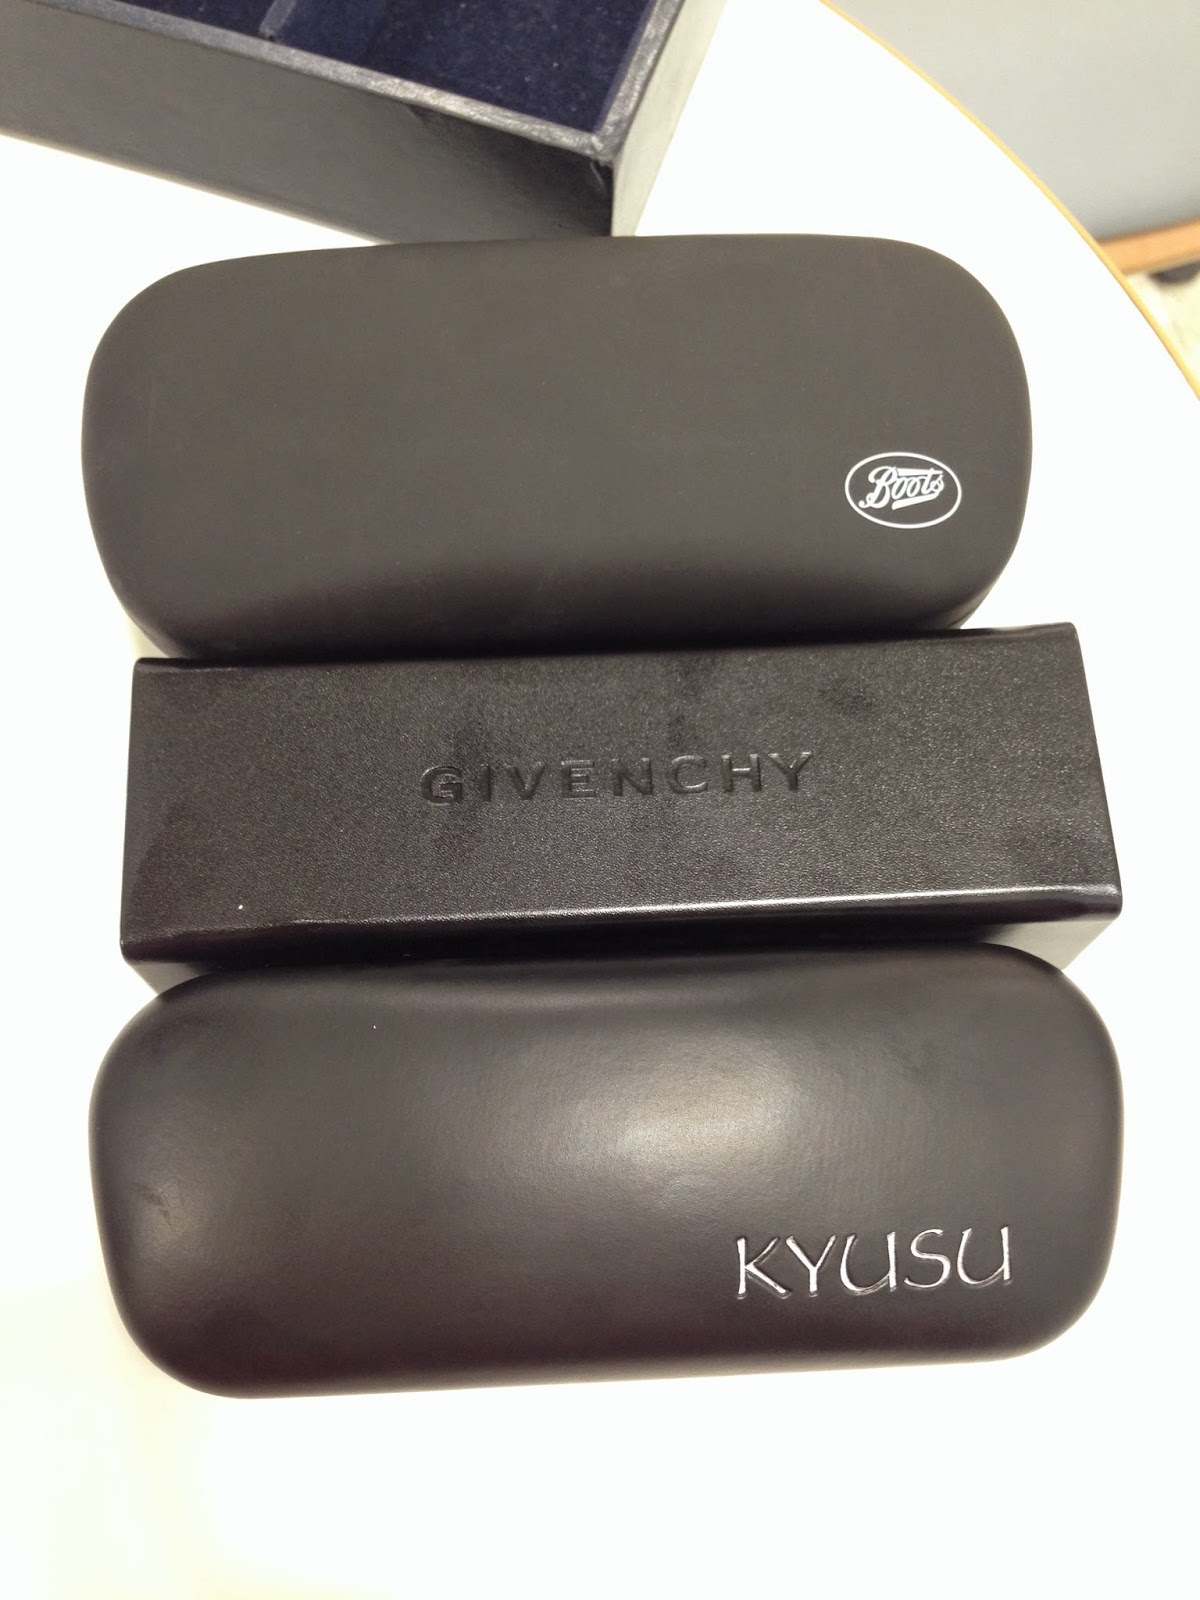
New "every day" glasses by Givenchy.

But, back to all things beauty and UV rays.  Boots are now including their  "Protect" lenses in the price of all frames. Previously, they were only available for an extra charge of £40. Oh, and how happy was I to see that they now label their prices on their frames as the "complete price"?  It makes such a difference -  how many times have you picked out some frames, only to drop them in horror when the full price comes up?  Or is that just me?   Anyhoo: Protect Lenses.  They come with a special coating on both sides of the lenses which will stop UV rays getting to the skin around the eyes (which is ten times more susceptible to UV rays as anywhere else on the body) from both the front and being reflected off the back of your lenses from light hitting from behind you.  In effect, these lenses offer you an sun protection equivalent of SPF50, whether they are tinted or not!  They will also protect you from the UV rays given out from your computer monitors and tablet computers - they're all ageing!

I'm fully dressed, I promise you.
These are my new reading glasses made by Kyusu, I went for a slightly bigger frame for these, as you tend to look down when you are reading.  In addition to UV protection, Protect lenses are also scratch resistant and reflection-free, which is good for reading, particularly on backlit screens. However, I went (as I always have to owing to my prescription difference), for the thin and light option on both my reading and distance lenses, for which you do still have to pay an extra charge.

Yup, fully clothed.  Honest.
For my sunglasses (Boots own frames) though, I didn't bother with the thinner lens option, and I've not noticed them being particularly heavy in wear.  I like that you can pick the level of the tint you require, which is good, as I always simply just pick the biggest, blackest sunglasses you can get in the store, and presto, these were the result!

I've found the new lenses to be extremely (even remarkably) clear, and very easy to adjust to in wear. The thin and light lenses really are just that, and don't leave red marks on your nose because of the weight of the glass in the frames.  I have other, smaller, glasses with so called "thin" lenses in them which I hate wearing for more than a couple of hours at a time because they leave a ridge in my nose!  None of the glasses featured here do that.  Of course, I may just have picked lighter frames this time ...

An eye test doesn't just test how well you can see, it can give you a health check at the same time.  Likewise your new glasses won't just help you see better, they might just help save your skin too.  You will still need SPF facecream too though ...  You can find out more about Boots Opticians and their lenses here.

The Fine Print: Get Lippie was a guest of Boots Opticians. The sight test and one of the pairs of glasses in this piece were provided by Boots for review purposes.  However, several pairs of the glasses in this feature were purchased at the author's own expense.  This is NOT a sponsored post.

This post: Boots Opticians and Protect Lenses originated at: Get Lippie All rights reserved. If you are not reading this post at Get Lippie, then this content has been stolen by a scraper
Share:

Wednesday 6 August 2014

Leopard Print Nails with Nails Inc, Barry M and Sally Hansen


By Emily


Leopard print nails are a bit old school now…but still a favourite of mine! Every time I leopardize (made up word) my nails I get a huge amount of compliments, and no-one ever thinks they are hand-painted! So if you want to add a bit of Grrrrr to your mani, here’s how!


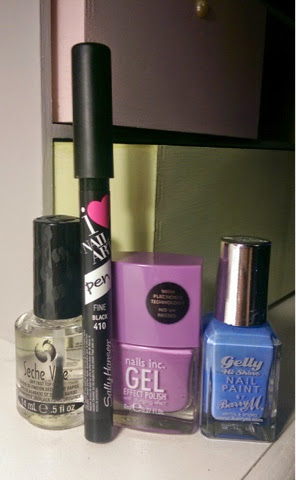
First up, two coats of polish, you can choose any colour you like, doesn’t have to be traditional leopard colour! I used Nails Inc. Gel Effect Polish in Lexington Gardens: it gives great coverage in two coats.


Once your base colour is dry, use a contrasting colour (I used Barry M’s Gelly Hi-Shine in Blueberry) to create the patches. Simply dab the brush onto your nail, in irregular patches. You don’t need to be neat, but be careful not to have too much on the brush, or you’ll get 3d blobs.


Once your patches are dry use a nail art pen in black to carefully outline each of the patches, and add some extra dashes and dots in-between. You’ll need a steady hand, but I practice on a piece of paper before starting on my nails, to get the right flow from the pen. I used a new pen this time, Sally Hansen’s I Heart Nail Art Pen…and it’s brilliant! It gives a fine line and is much easier to control than any other nail art pen I’ve used.


Finally, after a bit more drying time, slick over a decent top coat (I use Seche Vite ALWAYS!) to give a glossy finish!


Let me know if you give my Leopard Mani a try!


Share:

Friday 1 August 2014

Chantecaille Autumn Winter 2014: 15th Anniversary Palette

By Get Lippie

You have to have a heart of stone (or at least a deep, deep hatred of taupe, you sick puppy) to be able to resist the annual Chantecaille Charity Palettes.  Usually items of huge beauty devoted to a single animal cause, tigers, turtles, butterflies and such, it can be difficult to bring yourself to use them.  Out next month, the Chantecaille 15th Anniversary Palette is certainly a thing of beauty, and it's very wearable too.  I steeled myself to try it out recently:


Clad in the brand's trade-mark pewter livery, the palette comes complete with a facsmile of Sylvie Chantecaille's signature across the top, and inside we have, instead of the usual three eyeshadow shades and a blush, just three eye shades, which makes this a far more compact and portable option than the larger four pan options:


Three shades, each embossed with a different animal.  The deep aubergine liner shade has an elephant, the slightly warm vanilla highlight comes complete with a monarch butterfly, and the elegant coppery-taupe has a turtle.   All the shades are very wearable, and are very sheer in use:


This pic is slightly more representative of how the colour appear in the flesh, it's shown alongside a couple more pieces from the collection that I'll show you later.  However, here is how the colours swatch:


The colours here are swatched over bare skin.  Chantecaille isn't particularly known for its deeply pigmented products (which, if you're over the age of, say, 35 or so, is a bit of a blessing.  You'll see), so these swatches shouldn't come as much of a surprise.  However, if you swatch over an eyeshadow primer (and I never wear shadow without a primer), then you'll see a huge difference:


The shades are complex and flattering, but admittedly, they're not hugely dramatic, though you could create a great smokey eye with this, it's also a lovely wearable daytime palette too.

Unusually for the normal Chantecaille charity palette, this supports three foundations:  The David Sheldrick Wildlife Trust, the Monarch Butterfly Fund and Widecast, which respectively support elephants in the wild, butterflies, and, of course, sea turtles.

It'll be available from SpaceNK next month - will you be picking one up?

The Fine Print: PR Sample.

This post: Chantecaille Autumn Winter 2014: 15th Anniversary Palette originated at: Get Lippie All rights reserved. If you are not reading this post at Get Lippie, then this content has been stolen by a scraper
Share:

Wednesday 30 July 2014

Flower Power: Ciaté Flower Manicure


By Emily

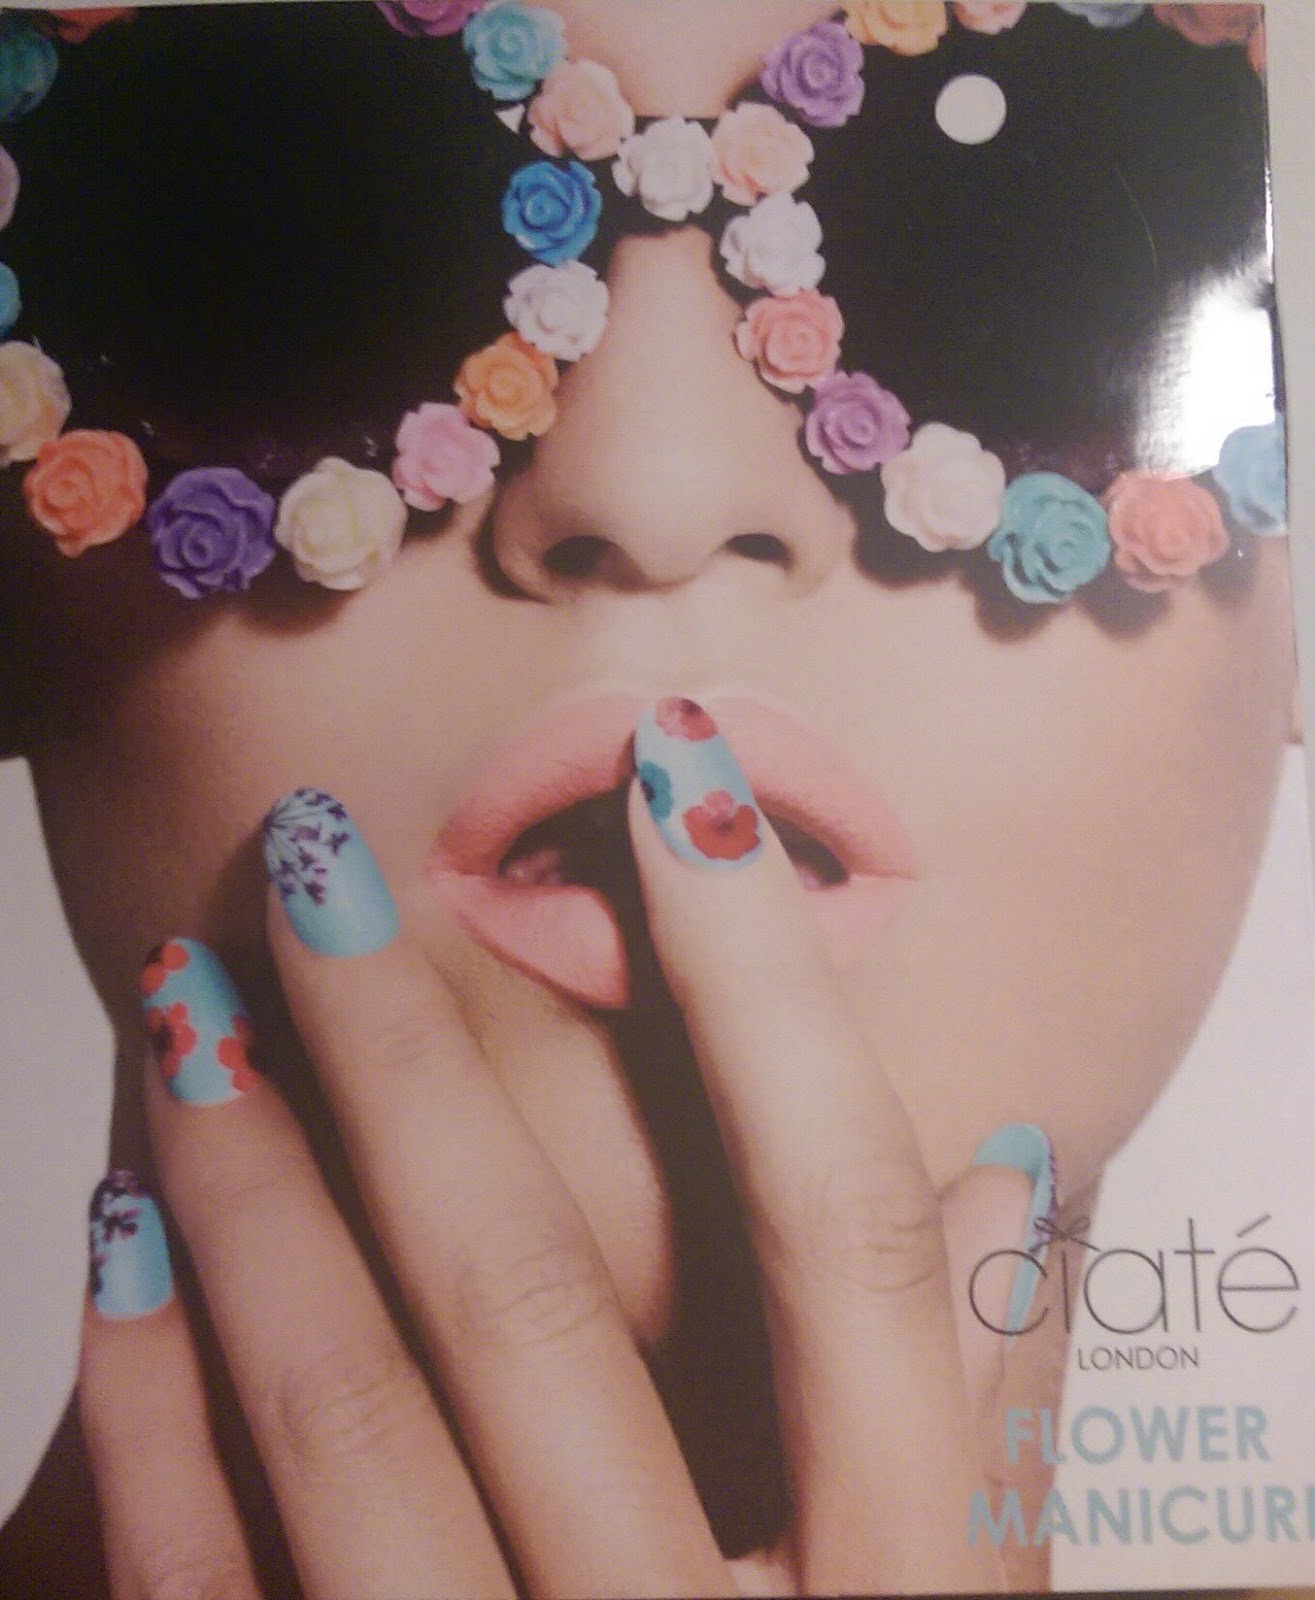
Oooooh, PRETTY! Flowers on pastel nails! I’m hyperventilating!

So yeah, I’m easily pleased. However, this fabulous ‘Bada Bloom!’ Flower Manicure from the geniuses at Ciaté contains all you need to create a super-summery floral nail. These guys have got manicure innovation nailed (sorry). It IS a bit fiddly, but the end result is worth it, I promise.


The set contains a mini paint pot in a pastel blue called Ferris Wheel. It’s a pretty colour but doesn’t give great coverage. I had to use three coats to get an even finish, which equals A LOT of drying time. Luckily Countryfile was on and it was John Craven’s 25th anniversary, so I was enthralled and the drying time just flew by.


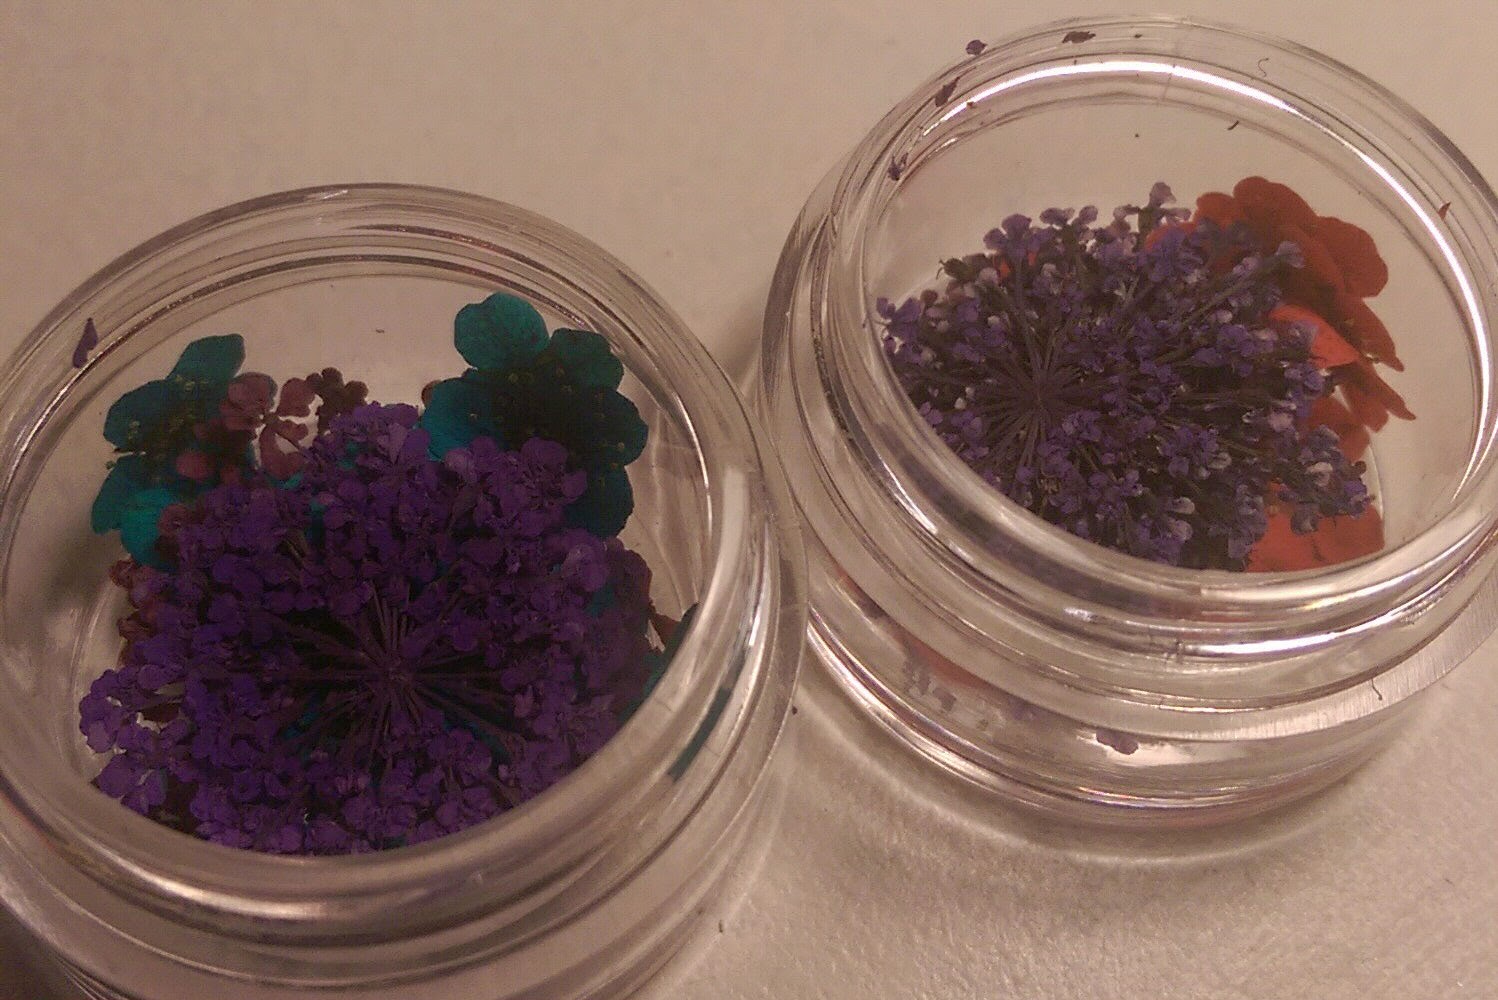
Once your colour is completely dry add a slick of the topcoat (included in the set) to one nail and with tweezers place the dried flowers onto the wet topcoat. Push down gently (with the tweezers) to get the flower to adhere to the topcoat and lie as flat as possible. Repeat on each nail, placing the flowers irregularly and mixing up the colours, until the flower fairies would be WELL JEL.This would work really well on one or two feature nails, but I decided to go the full hog, because, no reason.


Finally, over the top of the flowers you apply the top-coat to seal them to the nail and add a glossy finish. You can then file off any flower bits around the top of the nail: I used a pair of small nail scissors to take off any larger sections.

It is quite a long process, but totally worth it I think. The mini-pansy flowers lie flatter on the nail but I prefer the effect of the purple flowers, even though they are more 3D.


I don’t imagine this is very long-lasting but for a special summer night this is a super-pretty manicure and great value too. The set includes a mini paint pot, a full-size top coat, two pots of flowers (I’ve got loads left), tweezers and a basic nail file; for just £18. And that equals some serious blooms for your buck.  

The Fine Print: PR Sample

This post: Flower Power: Ciaté Flower Manicure originated at: Get Lippie All rights reserved. If you are not reading this post at Get Lippie, then this content has been stolen by a scraper
Share:
© Get Lippie | All rights reserved.
Blogger Template by pipdig