Beauty Without Fuss

Popular Posts

Recent Posts

Tuesday 20 October 2009

Organic Wednesday - Makeover Special!


So, something a little different this week.  As promised, every Wednesday I'll be seeking out and reviewing organic beauty goodies, but this week I'm bringing you a makeover first, and a full review later.

I've heard a fair bit about Plant Love over the last few weeks, and when Puresha offered to send me some of their range of cosmetics to try in a makeover, I jumped at the chance!  Plant Love is vegan, free from paraben, phthalates, petro-chemicals, and synthetic dyes and fragrances.  I love the fact that all the packaging is compostable, and is manufactured under carbon-neutral conditions, it makes my inner hippy happy.  I don't let my inner hippy out much, she tends to disagree with my inner control freak, but I'm digressing a bit here.  So, on with the makeover!
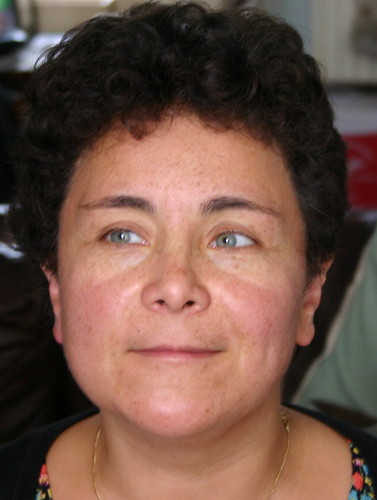
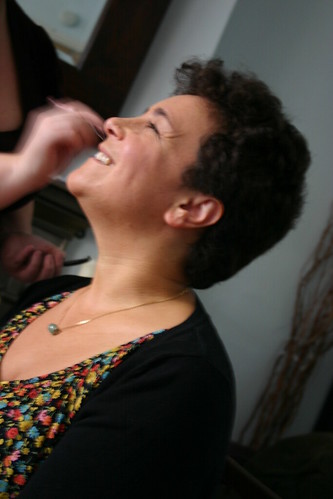
Meet Genna:


Genna's been offering to sit for a makeover session for weeks, but as she's a vegan I've been waiting for the right opportunity to come along, Plant Love seemed like an ideal fit.  Genna already has an excellent beauty regime of her own, but when we were planning this session one idea kept coming up: "California Beach Babe", and as that's what she wanted, that's what she got ...

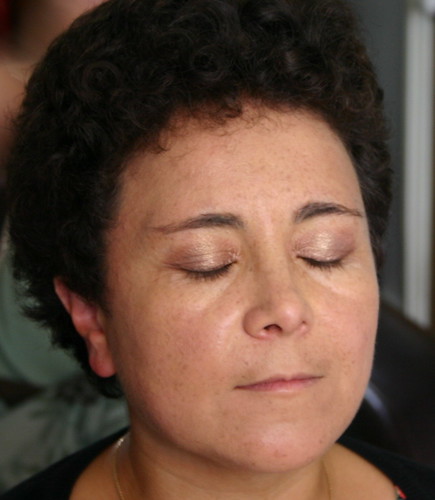
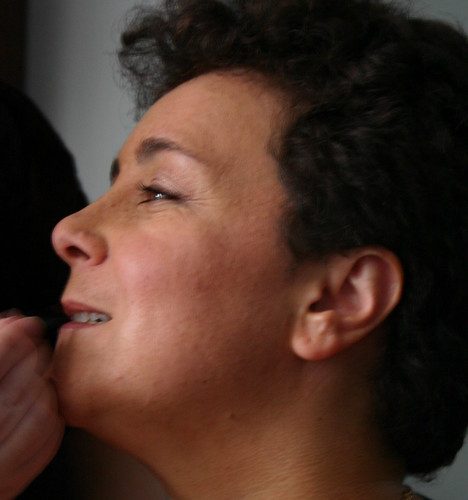
First off, we used Genna's normal foundation as a base - looking tanned and glowing doesn't necessarily mean looking like a tangerine, then started straight in using PL's eyeshadow in Parakeet:


It's a lovely coppery shade, that makes Genna's blue eyes a lot brighter.


Once that was in place, we defined Genna's top lid with PL's eyeshadow in Sparrow:


Then we added a layer of eyeliner in bronze to her lower lids:


A layer of Genna's usual mascara (sadly, the Plant Love line doesn't carry a mascara, which is a real shame judging by the quality of the rest of the products), and we also added a little definition to Genna's eyebrows:


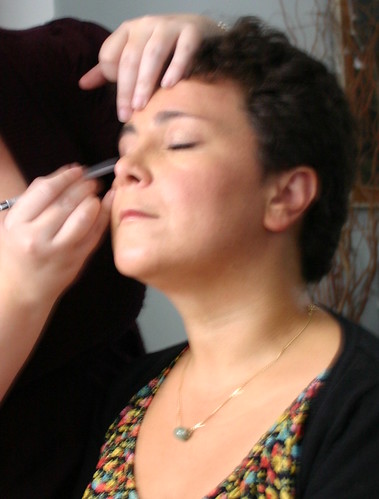
Genna's eyes were now finished, and we were ready to add more colour.  Using Plant Love's Natural Baked Illuminator in "Wind", which is a bronzer, blush and highlighter in one, I used it on Genna's cheekbones and temples, then added just a touch to her nose and chin for a bronzed effect:


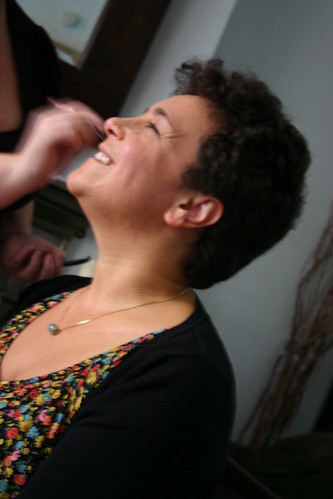
Naturally, no look is complete without lipstick so we added a (very light) layer.  For this look we had chosen Joshua Tree which is a lovely shimmery pinky-brown:


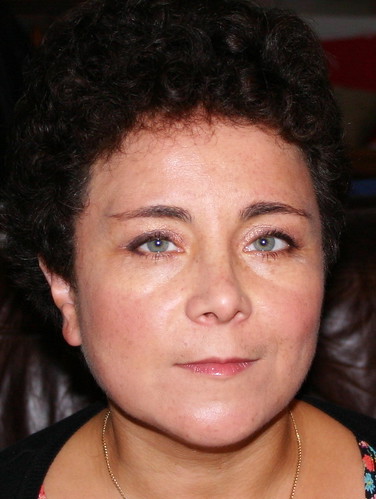
And we're done!  Here's the finished look:


Subtle, simple, and softly glowing, I think it looks great.  Have a look at the before'n'after:


If you click on any of the pictures, you can see an enlarged version of them, please do! I'd like to thank Genna for being so patient, Puresha for being so generous, and the lovely Neville Fenn for taking today's wonderful pictures.

Full reviews of the products used will appear tomorrow, but I can let slip that both Genna and I have adopted at least one of these products as new daily staples, they're great!

Share:

Monday 19 October 2009

Makeover - Bizarre Ball Revisited

Remember Sharon? She was going to a Bizarre Ball, and we tested a makeup look for her a few weeks ago.  Well, the ball was on Saturday, and we redid the makeup for it. 


Taking into account what we did last time, I didn't take the black as far up the browbone this time, and gave it a more pronounced winged shape at the edges.  Oh, and I used MAC Greasespaint for the black, much, much easier than a powder.  Still love that green!
Share:

Sunday 18 October 2009

Makeover: Sarah

I love doing makeovers, I love seeing the transformation you can make in someone's deportment and demeanour just by giving them a little colour, even with a relatively simple transformation like this week's:

Meet Sarah:


Sarah's gorgeous.  I love her cheeky freckles, and she has beautiful grey-blue eyes.  Talking to Sarah before her makeover, she wanted a quick, simple, easy, and above all GLAM look from her makeover today.  Always happy to oblige, this is what we created.

First off, creating the base.  Sarah is worried about patches of uneven colouration, so we used her MAC foundation, and applied it with a sponge, using a rolling motion evenly all over her face, then followed with a light layer of MAC Blot to set it.  Sarah had wanted to cover up her freckles completely, but I suggested that we leave them showing as they're a) very attractive and b) very difficult to cover up without turning your face into one big freckle!


I wanted to play up the colours in Sarah's skintone, and accentuate her eyes, so I thought a golden peach shade was in order.  I used Benefit Creaseless Cream Eyeshadow in Gabbi, and applied that all over her lids. In the centre of each lid,  I used a small amount of golden shimmer powder just to accentuate the colour, and add a little highlight. :


Then, I added a small touch of dark navy liner, just to further accentuate her eyes:


I smudged that out a little, and added the finishing touches.  Blush (MAC Mocha)


And a little lipgloss (MAC Strobe)


And here's the finished look:


So there you go, quick, simple, and hopefully, GLAM!


Share:

Saturday 17 October 2009

Nail of the Day - Zoya Coco

I don't do these often, as I'm completely cackhanded at applying nail varnish, but I had to post about this colour, I love it so much.  It's a lovely, velvety, chocolatey-purple shade, not too warm, and not too brown. It's a cream finish, with no shimmer or glitter.  It's rather unusual, and reminds me a great deal of the colour of proper, old-fashioned cocoa powder in the tin.

Zoya's varnish is a massive cult in the US, and should really be better known in the UK. Their formulas are  toluene and formaldehyde free (and vegan friendly!),  and though the the varnish itself s a bit thin and runny  (I found it very streaky after one layer) but I was very pleasantly surprised at how rich the colour was after two coats. The above pic is of two coats and is finished with a layer of seche vite top coat.

I got my polish from Organic Pharmacy, but you can buy it online in the UK from Nail Care Club for £9.29 a bottle.

Have just realised the colour matches my blog (nearly!) maybe that's why it was calling to me in the shop ...
Share:

Friday 16 October 2009

Organic Wednesday - Organic Surge

The Background:

A couple of weeks ago, I was one of the lucky winners of a competition run by the lovely people at Organic Surge.  The prize was a girly night out at an exclusive screening of Sex and the City, and, alongside plying us with wine and popcorn, we also all received a goody bag filled with their range of skincare treats.

The Blurb:

I had a great time, it was lovely to meet some of the people behind the brand, and chat to them about how excited and positive they are about the company and what they're trying to do.  The competition was to celebrate Organic Surge's nationwide launch at Boots, which they're very happy about, rather unsurprisingly!   Founder Alan McKenzie told us that it was his dream to produce a range of ethical skincare products untouched by "harmful" chemicals at an affordable price, and that for every product sold a proportion of the proceeds are used to support the Kenya Children's Home and Watoto charities.

What really interested me was that this is a budget range, and yet every product is free of
  • Parabens, SLS, sulphates
  • Synthetic perfume
  • Chemical antioxidants mineral oils, petroleum, propylene glycol
  • Aggressive foaming agents
All of which is more than good enough for me to introduce them as my first review for my Organic Wednesday review!  And yes, I know it's not Wednesday, but there have been some refurbishment issues here at Lippie HQ ...


The Review:

In my goody bag, I received (full size!) samples of their Eye Gel and Daily Cleansing Wash alongside a jar of their Blissful Daily Moisturiser for Normal skin, which is what I'll be reviewing today.

For what is basically a cheaper brand, the packing of all their products is surprisingly sturdy, the moisturiser comes in a decent size glass jar, which was a pleasant surprise.  Once you open it up, you're greeted with the cheery and uplifting smells of rosemary and lemon oils which is a nice way to start your day.

The cream, in the pot, appears thick and rich, but on application it's actually pleasantly light and is very easily absorbed (in my case, possibly a little too easily absorbed, about which more later).  It disappears readily into the skin, and doesn't leave an oily residue, which is nice.  I also found it had a slight mattifying effect on my skin which I think will be welcomed by some oilier skinned people.  The scent doesn't linger too long after application, which is good, there's not a lot worse than being able to smell your skin care products all day.

The Rating: 7/10 

It's cheap (currently £7.99 at Boots), does what it says it will, and smells lovely.  As a basic moisturiser, albeit one without SPF, it's a very nice one.  I have quite dry and sensitive skin, so I found that it wasn't quite moisturising enough for me, but I'd very happily buy the Super-Intensive Daily Moisturiser version of it instead.  I've been using it now for three weeks, and haven't had any issues with sensitivity or spots, so I'm sold!

Share:

Tuesday 13 October 2009

Lip of the Day - Studio Secrets 411

Today, I wore my new L'Oreal Studio Secrets 411 lipstick.  It's a lightly pink "nude" shade, and I bought it as part of my ongoing quest to find the perfect nude lipstick.  What I want is a lipstick that'll make it not look too obvious that I'm wearing it, yet give me a polished look.

Here's how it looked on:


L'Oreal have arranged their Studio secrets by hair and eye colour, which is a fad I thought went out in the late eighties.  I'm also bemused by the blurb on the stand that says "light brunettes" should go crazy with colour on the lips, then provide a selection of all nude shades to "go crazy" with.  It's a nice lipstick though, gave a good coverage after just one coat, and didn't wear off too quickly.  It lasted till lunchtime without really needing touching up, even though the transfer onto cups was dreadful. It feels moisturising when you're applying it, but I think after a few hours of it totally wearing off, my lips feel slightly drier than they did this morning.  The colour doesn't quite work for me, I don't think, but it doesn't make me look dead, which is a nice change for a nude.

But we really have to talk about the packaging.  I like the idea of the clear central section - so you can see what colour the lipstick is without taking the lid off- but this packaging just doesn't work for me.  It looks cheap.  In fact, it's beyond cheap-looking, it is cheap.  The plastic feels flimsy and brittle in the hand, and the top just barely snaps into place, so it doesn't feel very secure.  It's a shame, as this isn't cheap lipstick, it's currently £8.99 at Boots, many of the budget ranges do better packaging than this, it's the sort of plastic that will shatter if it gets left at the bottom of your handbag.

All in all, I give it 6 out of 10.  Nice lippie, shame the packaging belies the price.
Share:

Monday 12 October 2009

Makeover: Seona - The Return

This is Seona:


Some of you will have seen Seona on the blog before from when I did her wedding makeup.  Seona's a good friend, and was one of the first to volunteer for another makeover when I had the idea for this series a couple of months ago.

After sitting down and discussing what Seona wanted from this session, it was hard to decide, Seona wanted both a lesson on how to do a smokey eye, but ... wanted to use some "exotic" colours.  She's been using a lot of browns and bronzes lately, and thinks she's been stuck in a bit of a makeup rut.  In the end, we decided to do a bit of both.

Browns and bronzes really suit Seona, but we decided to use purple as an accent colour today, but first, we need to sort out the base:


Seona doesn't need much coverage at all, so we just smoothed in a light layer of Bobbi Brown Tinted Moisturising balm in Light, then followed that with a dusting of MAC Blot to remove shine.  Then, to even out the colour on Seona's eyelids, we added a thin layer of my (recently depotted) Urban Decay Primer potion to her eyelids:


Then, we applied a colourwash of Trish McEvoy eyeshadow in Cashmere (a lovely pinky-purply brown shade) all over the lid:


Then, to accentuate the crease, and add some definition, we added Trish McEvoy eyeshadow in Sugar Plum in a v-shape to the outer corners of her lids:


Once this was blended out, we added Trish McEvoy Definer shadow in Deep Amethyst as a liner to her upper lid:


And went back to Cashmere for her lower:


Again, we smudged that out, and added a layer of Max Factor Masterpiece Mascara, then added blush (MAC Blushbaby) and finished off the look with a slick of Bare Escentuals Buxom Lipgloss in Dolly:


And here's the finished look:


However, when we were finished, I didn't think this was "exotic" enough - it was a lovely daytime smokey eye, but I realised we could take it to a nighttime look very easily by adding a brightly coloured eyeliner, so out came my trusty bottle of Urban Decay liquid liner in Ecstasy:


And presto, the day look became a night-time one!  Here's the obligatory (and specifically requested by Seona) soft focus "glamour shot":


We had great fun, and I'd like to say a massive thank you to Sarah for acting as my photographer.
Share:
© Get Lippie | All rights reserved.
Blogger Template by pipdig