Beauty Without Fuss

Popular Posts

Recent Posts

Monday 10 August 2009

Where Have I Been?

Good question!
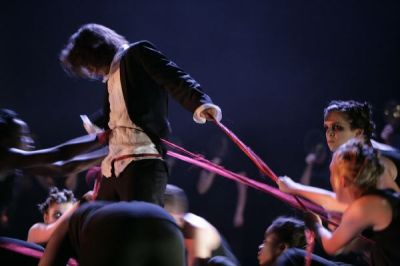
It’s all been a bit hectic chez Get Lippie, I spent half of the summer designing and producing make ups for Blackheath Halls’ production of Orpheus and Eurydice, which was great fun – especially the young Laban Dancers who played evil spawn in the Hell section, and had to be made up like skulls! Really tested my skills to the limit there … and my patience at times, but it was both aces and skill.
Hell demons
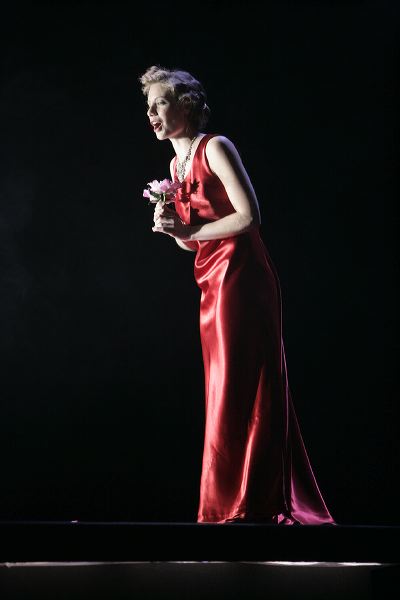
I also designed Amor, who had to look very sophisticated and beautiful, this was by far the best make up I did for the show, also took longer than the dancers:
Amor
Sadly, you can’t really see that she’s wearing A LOT of make up – it’s what I think of as a classic French make up, porcelain skin, bright, bright red lips, and a thick line of black liquid liner. This was from the initial make up test run, we beefed it up for the performances and added an almost smokey eye to the classic French look. We were very lucky that we had amazing looking women in the show, so much so that my role was practically unneeded!
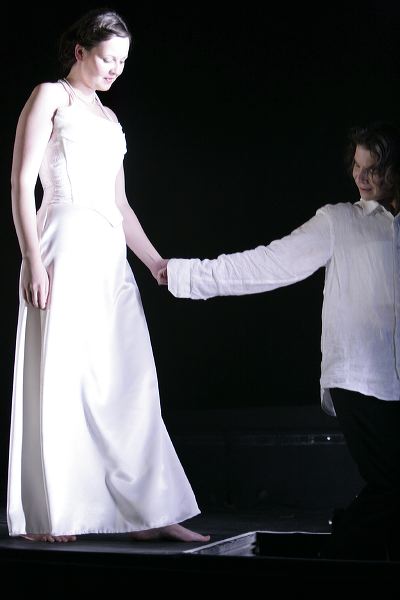
Finally, I had to produce a beautiful, glowing “bridal” look for the role of Eurydice:
Eurydice
You can’t see it too well here, but there are lots of corals, pinks and blush colours here, but I tried very, very hard to avoid the “painted dolly” look you can get sometimes for a bride. I think we got the glow down quite well though! Also in this pic, we have Orpheus, who basically needed cheekbones, a lower eyebrow, and general mattification. Luckily, the amazing Wendy Dawn Thompson had great cheekbones already, so there wasn’t a whole lot to do.
Have also spent a fair amount of time trying to get my personal shopping business in order, but more about that later …
Share:

Monday 2 February 2009

Hello!

I'm in the process of moving my posts from my old blog, but welcome! Some people might recognise the pieces on here already, but I've found them to be the most interesting posts from the blog that ran from 2004 onwards.

Keep checking back regularly for hints, tips, and general how-to's.

I'll be updating this weekly, and I'm hoping to have some interesting articles and the odd give-away too. Thanks for dropping by!
Share:

Sunday 1 February 2009

How To: Apply Liquid Eyeliner

I bring you the step by step guide to putting on liquid eyeliner ...

1) buy one with a good brush (fine, with straight bristles and a good natural point)

2) arrange dressing table/mirror/se
lf so that your elbow is resting on the table and the mirror is at eye level

3) tilt head back so that you are looking down your nose straight into the mirror with your eyes half closed

4) hold eyeliner brush like a pen

5) steady head with relation to face - depending on hand size/finger length/brush type you can either rest your chin on your hand or rest the tip of your little finger on your cheekbone - you'll need to practice a bit to find a comfortable position that leaves the brush pointing down at a slight angle so it clears your eyelashes and so you can still see the end of the brush clearly in the mirror. Keep both eyes open so you can judge distance properly

6) with the brush pointing slightly down and the tip right up against your top lashes, about 1/4 of the way along your lid (1/4 of the way out from your nose) sweep to far end of lid, staying close to lashes. Push a little harder over the middle half of the sweep, then gradually take the brush away so it is barely touching the skin by the time you reach the end of the line (tilt the line up a bit at the end if you are planning to go a little beyond the lash line )

And there you go! Piece of cake. Go away, try it. You'll look marvellous. Sorry, marvellous-er.

Share:

Saturday 31 January 2009

How To: Apply Smokey Eyeshadow

My own patented (in 2004!) technique for smokey eyeshadow...

Smokey eyes:

You will need

one fairly stiff eyeshadow brush
one medium sized mirror
eyeshadow of choice
eyeliner of choice
mascara


Technique:

Load shadow brush with shadow. Hold mirror beneath your chin, and look down into it. Close one eye, and push shadow - brush pointing upwards - into the line of your eye socket. At this angle, the socket line will be perfectly visible in the mirror. Re-load the brush with colour and do the same for the other eye.

Place mirror at your usual angle, and using the same shadow, colour in your eyelids. Make sure you push the colour well down towards the lash-line. This will be easier if you use the brush pointing downwards.

Check effect in mirror, the line where the shadow stops in the sockets should then be blended - you can use your finger or a blending brush -so that it there is no harsh line between the shadow finishing and your skin beginning.

Line eyes - with either pencil, or matching shadow using a brush - above, below, and inner rim if desired and add lots of mascara.

The trick is the looking down into a mirror and following the socket line - if you go too high up with the shadow, it looks wrong - and also, not using liquid liner, it's far too harsh.

Sometimes I do this without colouring in the lid after finding the
socket line, and it works astonishingly well as a softer, yet still smokey alternative. That's actually my usual office makeup, just colour in the socket line, eyeliner and mascara.
Share:

Friday 30 January 2009

How To: Use Hairsticks

Again, from the hugely helpful Binturong, how to use Hair Sticks.

1. Gather hair backwards as if about to put it into a low ponytail.

2. Twist and fold upwards as you twist, as if doing a french pleat (the instructions that follow are for a twist that starts with the right hand side going over the top when the hair is hanging down, so by the time it's folded up the 'smooth' side is on the left and the 'tucked in' side is on the right, if you twist the other way then reverse the instructions).

3. Hold hair stick behind head parallel with the floor with decorated end on the left.

4. Starting on the left of the roll of hair, poke the stick through to the right. The angle should take it slightly away form your head, so it starts quite deep and comes out on the right hand side halfway through the depth of the bulge (I'm not sure that's very clear - if the roll of hair were a baguette held vertically against the back of your head, the stick should go in where the bottom crust is, and come out where the cheese is in the middle)

5. Holding everything firmly in place, rotate the stick end over end while turning it 90 degrees (you see why I really need pictures?). Lift the decorated end out away from your head (keeping the stick parallel with the floor) - this should push the pointed end into your scalp. Keeping the point pressed firmly to your scalp, when the stick is pointing directly out from your head change direction and fold the decorated end up.

6. If you've manage to follow the previous instructions without completely tying your arms in knots, when the stick reaches vertical push it down through the roll of hair, keeping close to your scalp.

7. Repeat from (3) with second stick, but change the angles slightly so the sticks end up crossing over each other.
Share:
© Get Lippie | All rights reserved.
Blogger Template by pipdig