Beauty Without Fuss

Popular Posts

Recent Posts

Monday, 11 August 2014

Boots Opticians and Protect Lenses


By Get Lippie

I've been a glasses wearer for nigh on 40 years now, and, I'll be honest, I hate wearing my glasses.  Years of being told I was an "ugly duckling" in my smeared pink plastic NHS frames (complete with eye patch for several years, to boot) as a child, followed by decades of movies and TV using "beautiful woman in glasses" as shorthand for "ugly woman in need of makeover" as a trope , has left me feeling far more comfortable when I'm not wearing my glasses.  I don't feel "beautiful" in my specs, ever, so discovering long-wear contact lenses was a happy day for me.  I know other women don't have this problem, and I see beautiful women looking amazing in their glasses every day, but I feel self-conscious in mine whenever I wear them.


Now, whilst I don't feel beautiful in my glasses, what if you could use your glasses as a beauty aid?  Bear with me, it'll make sense, I promise.  The skin around your eyes is the thinnest skin on your body, and as such, it's the most vulnerable to sun damage, caused by UV rays.  We all know that sunglasses should also protect your eyes about UV rays, but did it ever occur to you that your everyday glasses should too?

I was invited to take an eye test at my local branch of Boots recently, and find out more about their services, and their now-standard "Protect" lenses.  It's been a long time since I've had a Boots eye test, and I was pleasantly surprised at how thorough and professional their sight test now is.  I've always been a sufferer of both myopia (short-sightedness) and hyperopia (long-sightedness) after a series of operations on my eyes as a young child, but as I've got older, I've developed a touch of astigmatism (where the shape of the eyeballs is slightly irregular - rugby instead of soccer balls, if you will).

This time around,  Boots lead me to the - slightly depressing! - conclusion that I can add presbyopia (where the lens has trouble focusing on nearby objects) to that list too.  Simply put, this means reading glasses are now a necessity ... I've been having trouble focusing on beauty product packaging for a while now, but reading glasses had totally passed me by as a possibility!    I refused varifocals though, I'm not that old.

The Boots eye test also checks for signs of  glaucoma, alongside high blood pressure, and diabetes, both of which can show signs in the eyeballs before the patient might notice any other symptoms. They also photograph the optical nerve and the blood vessels in the eyes to check on your general optical health too.  All of these tests checked out well for me, which is a great relief, but it's good to know that Boots are prepared for all these eventualities.

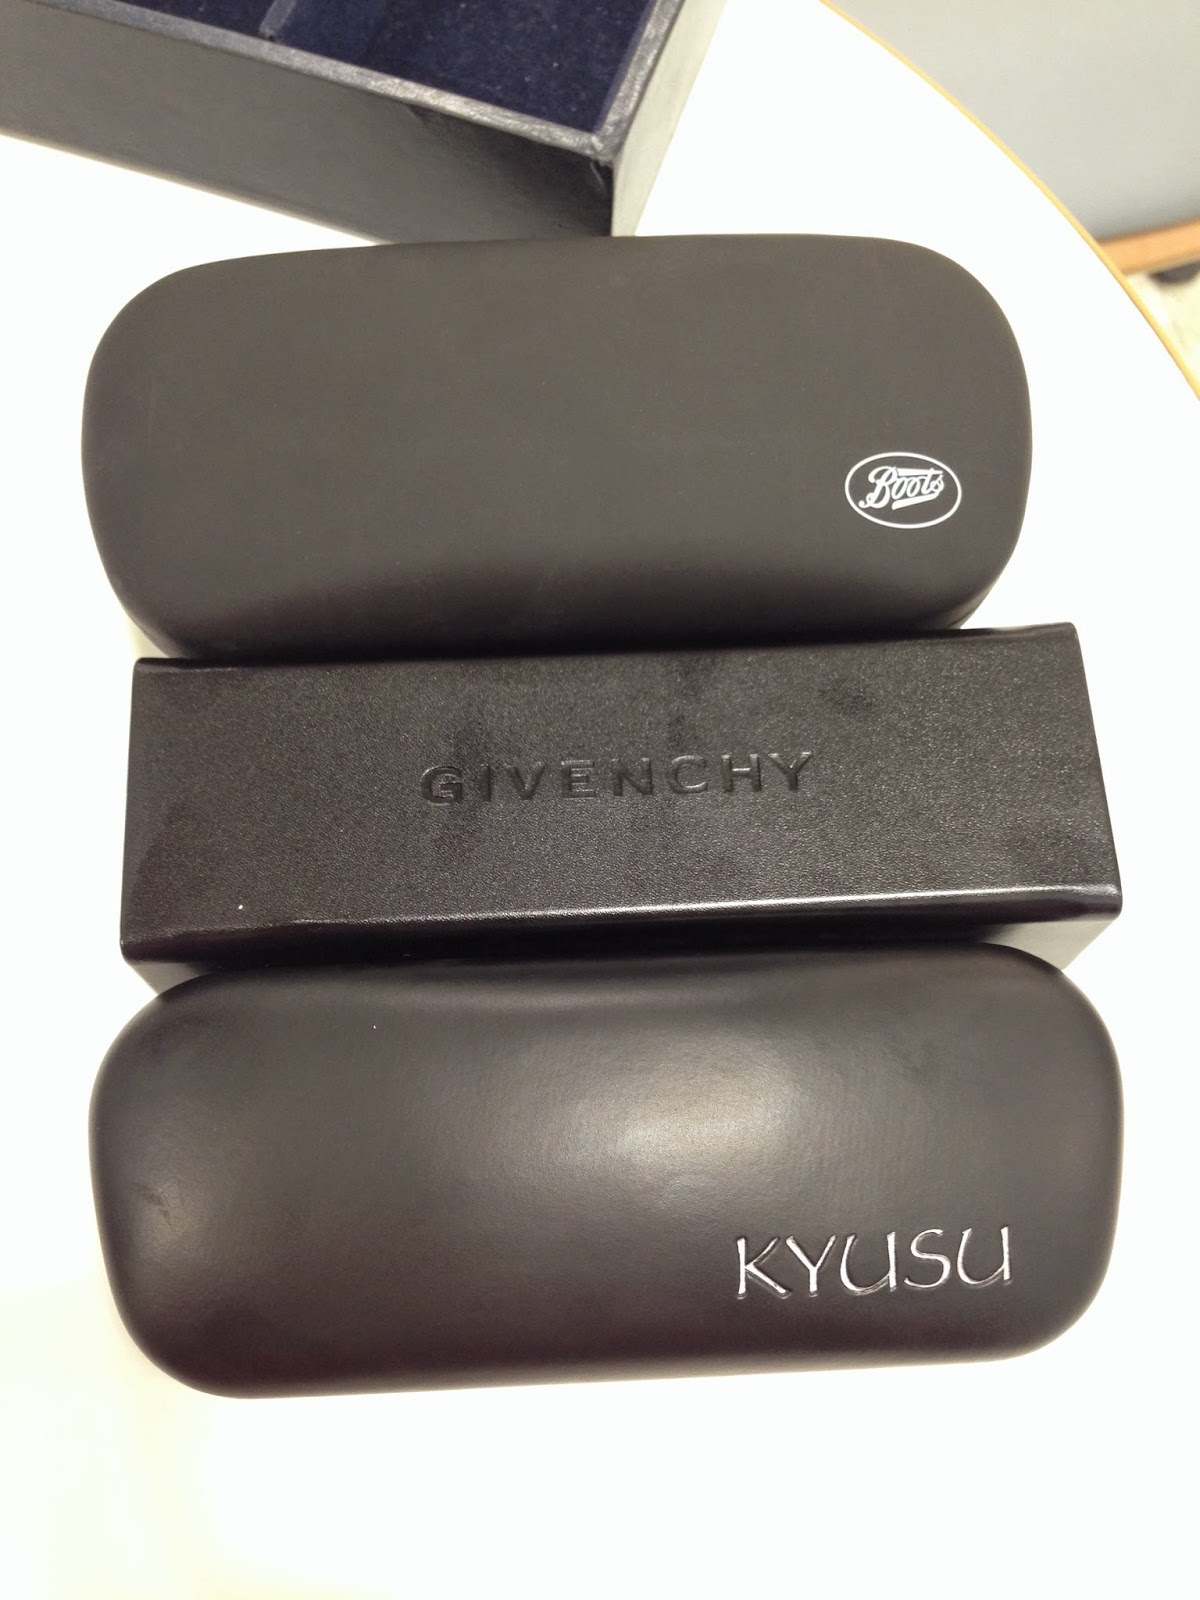
New "every day" glasses by Givenchy.

But, back to all things beauty and UV rays.  Boots are now including their  "Protect" lenses in the price of all frames. Previously, they were only available for an extra charge of £40. Oh, and how happy was I to see that they now label their prices on their frames as the "complete price"?  It makes such a difference -  how many times have you picked out some frames, only to drop them in horror when the full price comes up?  Or is that just me?   Anyhoo: Protect Lenses.  They come with a special coating on both sides of the lenses which will stop UV rays getting to the skin around the eyes (which is ten times more susceptible to UV rays as anywhere else on the body) from both the front and being reflected off the back of your lenses from light hitting from behind you.  In effect, these lenses offer you an sun protection equivalent of SPF50, whether they are tinted or not!  They will also protect you from the UV rays given out from your computer monitors and tablet computers - they're all ageing!

I'm fully dressed, I promise you.
These are my new reading glasses made by Kyusu, I went for a slightly bigger frame for these, as you tend to look down when you are reading.  In addition to UV protection, Protect lenses are also scratch resistant and reflection-free, which is good for reading, particularly on backlit screens. However, I went (as I always have to owing to my prescription difference), for the thin and light option on both my reading and distance lenses, for which you do still have to pay an extra charge.

Yup, fully clothed.  Honest.
For my sunglasses (Boots own frames) though, I didn't bother with the thinner lens option, and I've not noticed them being particularly heavy in wear.  I like that you can pick the level of the tint you require, which is good, as I always simply just pick the biggest, blackest sunglasses you can get in the store, and presto, these were the result!

I've found the new lenses to be extremely (even remarkably) clear, and very easy to adjust to in wear. The thin and light lenses really are just that, and don't leave red marks on your nose because of the weight of the glass in the frames.  I have other, smaller, glasses with so called "thin" lenses in them which I hate wearing for more than a couple of hours at a time because they leave a ridge in my nose!  None of the glasses featured here do that.  Of course, I may just have picked lighter frames this time ...

An eye test doesn't just test how well you can see, it can give you a health check at the same time.  Likewise your new glasses won't just help you see better, they might just help save your skin too.  You will still need SPF facecream too though ...  You can find out more about Boots Opticians and their lenses here.

The Fine Print: Get Lippie was a guest of Boots Opticians. The sight test and one of the pairs of glasses in this piece were provided by Boots for review purposes.  However, several pairs of the glasses in this feature were purchased at the author's own expense.  This is NOT a sponsored post.

This post: Boots Opticians and Protect Lenses originated at: Get Lippie All rights reserved. If you are not reading this post at Get Lippie, then this content has been stolen by a scraper
Share:

Wednesday, 6 August 2014

Leopard Print Nails with Nails Inc, Barry M and Sally Hansen


By Emily


Leopard print nails are a bit old school now…but still a favourite of mine! Every time I leopardize (made up word) my nails I get a huge amount of compliments, and no-one ever thinks they are hand-painted! So if you want to add a bit of Grrrrr to your mani, here’s how!


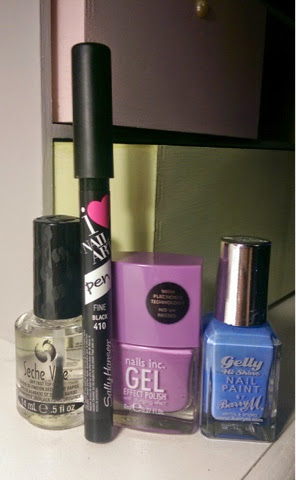
First up, two coats of polish, you can choose any colour you like, doesn’t have to be traditional leopard colour! I used Nails Inc. Gel Effect Polish in Lexington Gardens: it gives great coverage in two coats.


Once your base colour is dry, use a contrasting colour (I used Barry M’s Gelly Hi-Shine in Blueberry) to create the patches. Simply dab the brush onto your nail, in irregular patches. You don’t need to be neat, but be careful not to have too much on the brush, or you’ll get 3d blobs.


Once your patches are dry use a nail art pen in black to carefully outline each of the patches, and add some extra dashes and dots in-between. You’ll need a steady hand, but I practice on a piece of paper before starting on my nails, to get the right flow from the pen. I used a new pen this time, Sally Hansen’s I Heart Nail Art Pen…and it’s brilliant! It gives a fine line and is much easier to control than any other nail art pen I’ve used.


Finally, after a bit more drying time, slick over a decent top coat (I use Seche Vite ALWAYS!) to give a glossy finish!


Let me know if you give my Leopard Mani a try!


Share:

Friday, 1 August 2014

Chantecaille Autumn Winter 2014: 15th Anniversary Palette

By Get Lippie

You have to have a heart of stone (or at least a deep, deep hatred of taupe, you sick puppy) to be able to resist the annual Chantecaille Charity Palettes.  Usually items of huge beauty devoted to a single animal cause, tigers, turtles, butterflies and such, it can be difficult to bring yourself to use them.  Out next month, the Chantecaille 15th Anniversary Palette is certainly a thing of beauty, and it's very wearable too.  I steeled myself to try it out recently:


Clad in the brand's trade-mark pewter livery, the palette comes complete with a facsmile of Sylvie Chantecaille's signature across the top, and inside we have, instead of the usual three eyeshadow shades and a blush, just three eye shades, which makes this a far more compact and portable option than the larger four pan options:


Three shades, each embossed with a different animal.  The deep aubergine liner shade has an elephant, the slightly warm vanilla highlight comes complete with a monarch butterfly, and the elegant coppery-taupe has a turtle.   All the shades are very wearable, and are very sheer in use:


This pic is slightly more representative of how the colour appear in the flesh, it's shown alongside a couple more pieces from the collection that I'll show you later.  However, here is how the colours swatch:


The colours here are swatched over bare skin.  Chantecaille isn't particularly known for its deeply pigmented products (which, if you're over the age of, say, 35 or so, is a bit of a blessing.  You'll see), so these swatches shouldn't come as much of a surprise.  However, if you swatch over an eyeshadow primer (and I never wear shadow without a primer), then you'll see a huge difference:


The shades are complex and flattering, but admittedly, they're not hugely dramatic, though you could create a great smokey eye with this, it's also a lovely wearable daytime palette too.

Unusually for the normal Chantecaille charity palette, this supports three foundations:  The David Sheldrick Wildlife Trust, the Monarch Butterfly Fund and Widecast, which respectively support elephants in the wild, butterflies, and, of course, sea turtles.

It'll be available from SpaceNK next month - will you be picking one up?

The Fine Print: PR Sample.

This post: Chantecaille Autumn Winter 2014: 15th Anniversary Palette originated at: Get Lippie All rights reserved. If you are not reading this post at Get Lippie, then this content has been stolen by a scraper
Share:

Wednesday, 30 July 2014

Flower Power: Ciaté Flower Manicure


By Emily

Oooooh, PRETTY! Flowers on pastel nails! I’m hyperventilating!

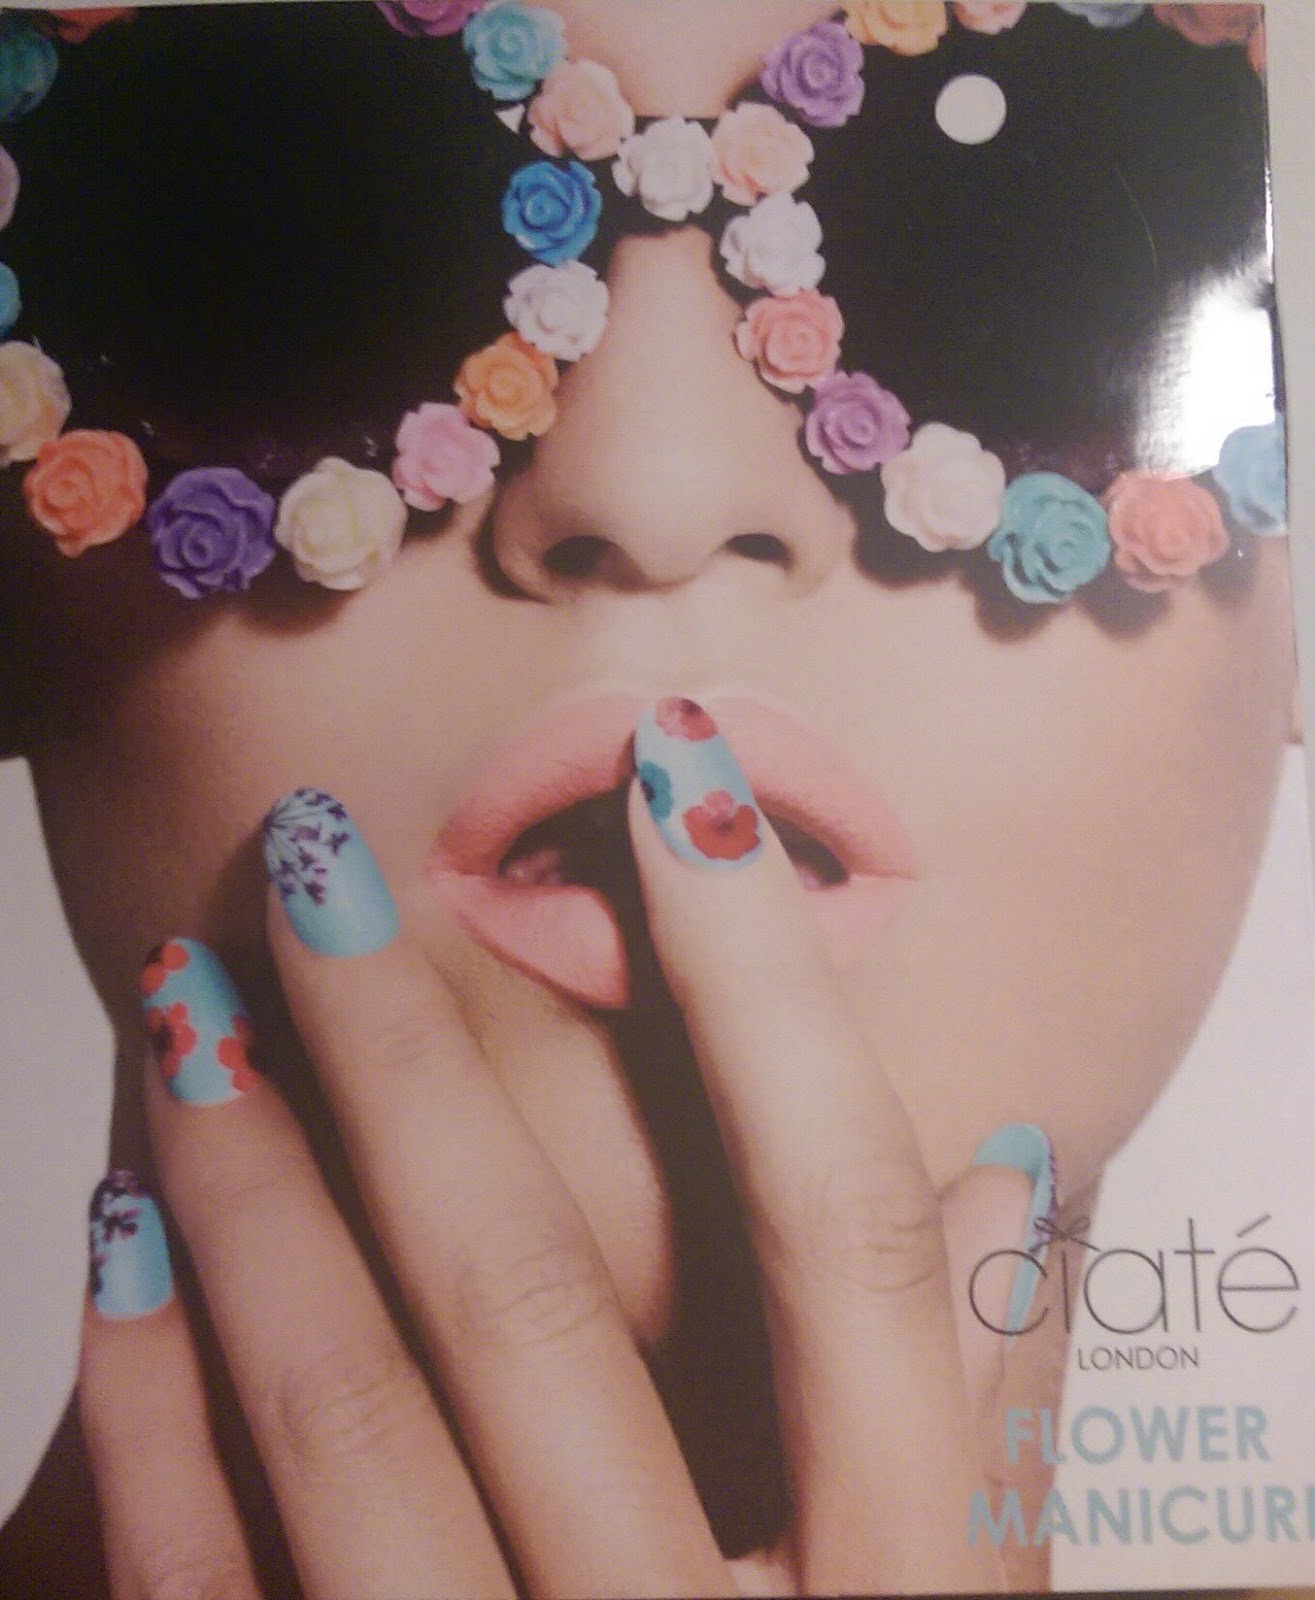
So yeah, I’m easily pleased. However, this fabulous ‘Bada Bloom!’ Flower Manicure from the geniuses at Ciaté contains all you need to create a super-summery floral nail. These guys have got manicure innovation nailed (sorry). It IS a bit fiddly, but the end result is worth it, I promise.


The set contains a mini paint pot in a pastel blue called Ferris Wheel. It’s a pretty colour but doesn’t give great coverage. I had to use three coats to get an even finish, which equals A LOT of drying time. Luckily Countryfile was on and it was John Craven’s 25th anniversary, so I was enthralled and the drying time just flew by.


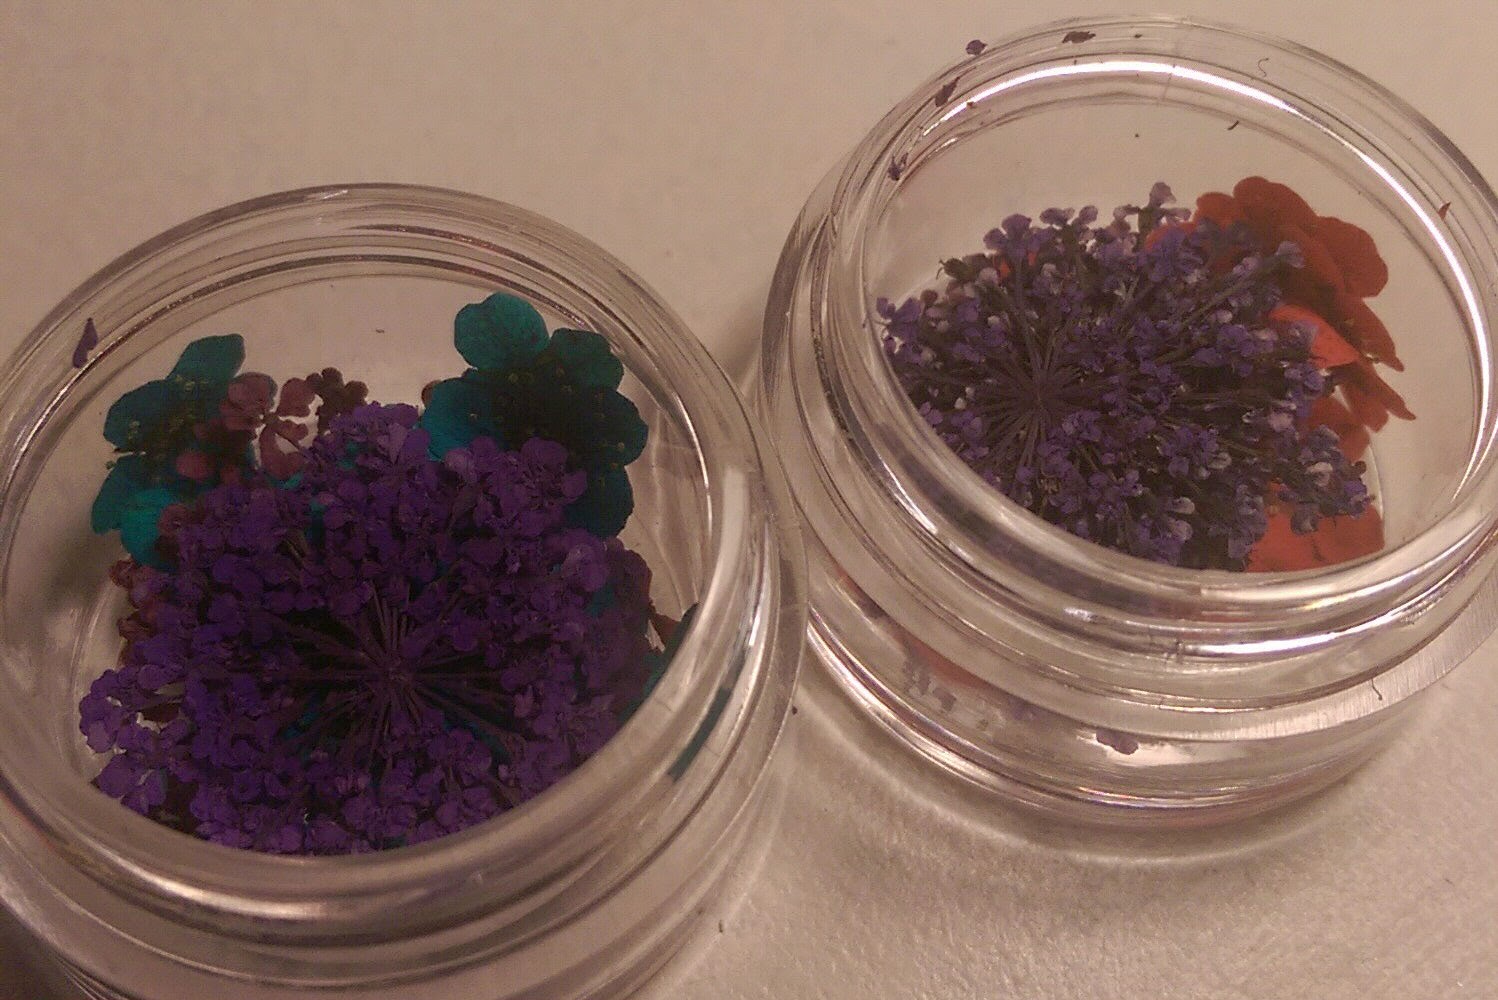
Once your colour is completely dry add a slick of the topcoat (included in the set) to one nail and with tweezers place the dried flowers onto the wet topcoat. Push down gently (with the tweezers) to get the flower to adhere to the topcoat and lie as flat as possible. Repeat on each nail, placing the flowers irregularly and mixing up the colours, until the flower fairies would be WELL JEL.This would work really well on one or two feature nails, but I decided to go the full hog, because, no reason.


Finally, over the top of the flowers you apply the top-coat to seal them to the nail and add a glossy finish. You can then file off any flower bits around the top of the nail: I used a pair of small nail scissors to take off any larger sections.

It is quite a long process, but totally worth it I think. The mini-pansy flowers lie flatter on the nail but I prefer the effect of the purple flowers, even though they are more 3D.


I don’t imagine this is very long-lasting but for a special summer night this is a super-pretty manicure and great value too. The set includes a mini paint pot, a full-size top coat, two pots of flowers (I’ve got loads left), tweezers and a basic nail file; for just £18. And that equals some serious blooms for your buck.  

The Fine Print: PR Sample

This post: Flower Power: Ciaté Flower Manicure originated at: Get Lippie All rights reserved. If you are not reading this post at Get Lippie, then this content has been stolen by a scraper
Share:

Monday, 28 July 2014

ByTerry Rose Infernal Collection: Eye Powder-Kajal, Rose de Rose, and Baume de Rose Fig Fiction


It's too darn hot right now, and when that happens, my mind always starts to think wistfully about cooler seasons, I'm not a happy summer bunny, alas.  Not to mention that I always prefer the Autumn and Winter makeup collections to the ubiquitous summer bronze (with a splash of "unexpected" blue) that we've been seeing all summer every summer since, well, time began.

ByTerry is one of my favourite brands, and this micro-collection of makeup staples (the wider collection has two fragrances and some really lovely skincare, which I'll tell you about another time) is a lovely one:


Yeah, 'scuse the finger marks, I couldn't wait to try the lipbalm.  Sorry!  Not sorry.
Consisting of a triple-shade blush in Rose Infernal, a powder eyeliner in Oriental Black, and for the first time the iconic lip balm, Baume de Rose comes in colour! There are six shades, and this is number 5 Fig Fiction.


The Rose de Rose contains three shades, a pink-coral, a salmon-peach, and a pearly pink highlight.  It comes complete with a small brush, and a good-sized embossed mirror.  It does kick up a lot of dust on application, but it's really nice - pinker than you'd expect - colour on the skin:


This has been applied with a heavy hand to get the colour to show up in pictures, but a lighter application leaves you with a sheer pink rosy glow that looks almost lit from within.  The different colours are probably too small to be able to get to the individual shades with the average blusher brush, but the pan is a great size for swirling. The powder smells divinely of roses, as does almost everything in this collection.


I do love a powder eyeliner, I own an entire set of the Guerlain loose kohls for example, and this is a good one.  The tip of the applicator is actually a sponge, which is really handy, as it adds a bit of flexibility to the application process - Boots No7 did a limited powder liner with this kind of tip a few years ago, I've always wondered why they didn't bring it back to be honest - and with a black this black (for it is indeed very black.  Indeed) you're going to need all the help you can get when you're putting it on:


It blends out easily, and a little goes a long, long way, so if you want to do a soft but intense smokey eye, this is great.  You can see from the swatch above that there is not much grey in the formulation, so you're not going to end up with a wan, pale grey smokey eye here.  You will get a lot of fall-out with this - it is the nature of the beast with eyeliners of this nature, to be honest, there's no avoiding it - so I suggest you do your eyes first and then do the rest of your make up, and especially your base, afterwards.  It lasts and lasts, particularly on the waterline, and barely fades at all.  I've not noticed any staining, but this is a great BLACK liner.


I'm not a massive fan of the original Baume de Rose, to be honest.  It's actually a great balm, and has a really nourishing formulation, but the milky film of colour it leaves on the lips is, for me, a killer.  With that in mind, I may have given a tiny whoop of delight when I saw the six new shades of Baume de Rose recently.  This is Fig Fiction, a sheer and easily wearable plum colour.


Anything that isn't milky on the lips is a winner for me, and the sheer but not unpigmented colour is great.  With the same gorgeous rosey scent as the original, this feels nourishing and cushiony on the lips, but it IS a balm, and therefore won't last very long.  It's a pleasure to reapply (even though it does come in a pot, a particular bugbear of mine), so this shouldn't be too much of a hardship.


The ByTerry Rose Infernal collection will be instore from September (the blush costs £72, and the eyeliner will cost £29) but the coloured Baume de Rose collection is in SpaceNK now, and they cost £35 each.  I'll be picking up Cherry Bomb and Bloom Berry come payday ...

The Fine Print: PR Samples

This post: ByTerry Rose Infernal Collection: Eye Powder-Kajal, Rose de Rose, and Baume de Rose Fig Fiction originated at: Get Lippie All rights reserved. If you are not reading this post at Get Lippie, then this content has been stolen by a scraper


Share:

Friday, 25 July 2014

ARK Skincare Derriere Facial


By Laurin

When I first agreed to contribute to Get Lippie at the beginning of this year, I imagined filing some light-hearted musings on perfume each week, maybe with a few words on moisturiser here and there. I did not expect to spend my mornings rollerballing napalm onto my bottom, or my evenings applying thigh creams that caused my flesh to stick together like sweaty plastic cheese slices. And so it was last week, when I found myself en route to the ARK Salon in Putney to test their brand new “Derriere Facial”, that I realised that I had unwittingly become Get Lippie’s Official @rse Correspondent. I’m updating my CV even as we speak.

Obligatory Disclaimer: Quick fix creams and treatments work for those who are either blessed with good genes, or those who already put in the work at the gym and need a bit of extra help. For anything greater, you need a plastic surgeon or a sorcerer, and I got kicked out of Hogwarts for lewd behaviour during Charms lessons. Sorry.

The Ark Salon sits on a busy stretch of Putney Bridge Road, flanked by a gourmet burger bar and a Brazilian barbeque joint. High quality skincare and delicious meat snacks pretty much covers all my basic needs, and I immediately begin making mental plans to relocate to SW15.


Inside, the spa is an oasis of calm and cool. I am greeted by Judy the spa manager, and spend the obligatory five minutes filling out forms of the medical variety. On the dot of 2:45pm, my therapist Georgina ascends the stairs to collect me for my treatment. Before she begins, she asks me what I’d like to achieve that day. The treatment can be adapted somewhat, depending on whether your main concern is cellulite, sagging or skin tone in general. I explain that I’d be happy to leave with smoother, more even-toned skin, and she leaves me to get undressed.


On my own in the room, the first thing I notice is the small shelf beneath the head of the massage table. It is, I am later informed, for resting your arms during the treatment. Hallelujah and praise be. At this exact moment, I know this is going to be great. I am convinced that it is these tiny concessions to a client’s comfort, these small, well thought-out gestures that ultimately make a treatment worthwhile. I always find massage tables slightly too narrow to accommodate my arms, so they usually end up tucked awkwardly beneath my body, where they start to fall asleep halfway through the treatment.

I remove my skirt and put on the Tarzan-chic paper knickers provided to spare the client’s blushes. It’s less the thong I anticipated, but more of a hospital style banana hammock. The treatment itself follows the general format of a facial, but on your bum. It begins with gentle body brushing on the full length of the leg, after which Ark’s own cleanser is applied to the area and buffed away with a body scrub. The treatment then moves on to steaming and a gentle massage with a personalised blend of serums. At this point, I start to nod off. This almost never happens when I have a massage or facial – the circus of my mind is open for business twenty-four hours a day. Again, I am impressed. A masque is applied, and Georgina massages my feet while it does its business. The treatment ends with the application of a light body lotion and you’re left to get dressed in peace.

Telling your friends that you’re off to let a stranger rub ointments into your bum sounds like a confession best left to the wee hours of the morning and the bottom of a bottle of Bombay Sapphire. I was a bit apprehensive that the Derriere Facial would be awkward and maybe a bit embarrassing, but it turned out to be one of the nicest beauty treatments I’ve ever had. The entire experience felt tailor-made with the client’s comfort in mind, from the aforementioned arm-shelf to the serene yet unobtrusive music that played in the treatment room. My only complaint was that it was over after 45 minutes. I would have been happy to lay there in a state of quiet repose until dinner, when I would at least have a legitimate excuse to pop next door for a burger.

I felt so relaxed when I left the spa that I would have been pleased to think of it as a happy hour spent on a sunny afternoon. A week later though, I looked in my mirror and realised that actually, my bum was looking Mighty Fine, thank you for asking. I felt others ought to experience the benefits of this, but sadly I was alone in my house.  If you’re off on holiday soon, or you’re just really vain (hi!), or you just like beauty treatments in quiet rooms that smell gorgeous, Ark is a hidden gem in South West London that is absolutely worth a visit. Go now. Your bum and anyone who has the pleasure of walking behind it will thank you.


The ARK Derriere Facial is £49 for 45 minutes. Details on how to book can be found at http://www.arkskincare.com/find-a-skincare-centre/ 

The Fine Print: Laurin was a guest of Ark Spa. Pictures courtesy of Victoria Waite at Ark.  

This post: ARK Skincare Derriere Facial originated at: Get Lippie All rights reserved. If you are not reading this post at Get Lippie, then this content has been stolen by a scraper
Share:

Wednesday, 23 July 2014

How to do: Foundation


By Luke

Oh sweet mother of god there are a lot of base products out there aren’t there? Foundations, tinted moisturisers, BB creams, CC creams, and everything in between. What are they, and what is best for you? Where on earth do you start?

Well there are a whole host of bases available, and all are good for different things, like, different times of year, different skin types. Any one person should ideally have at least two of the following list in their arsenal, in my humble opinion.

TINTED MOISTURISER


Light, translucent. Gently evens skin tone without covering too much up. You should be able to see your skin underneath and have it not feel heavy, or opaque. Ideal for on makeup wearers (who ARE you people??!!) and summertime. Comes in a variety of textures (oil free, radiant) and finishes (matte, dewy). Generally a fluid type, but sometimes comes in a compact. NOT a replacement for skincare generally. Just a name for a super sheer makeup.

GOOD FOR: A little bit of coverage, the summer time, when you don’t want to much on, generally everyone who wants a light easily applied makeup.

BAD FOR: Anyone that has hyper pigmentation (they generally will not cover this) or anyone that requires a fuller coverage base.

I RECOMMEND: There are a lot of these, but I like the Laura Mercier tinted moisturiser a lot Amazing array of colours, and textures, and I also love the Chanel Vitalumiere Aqua (available nationwide, £32) . Less choice of colour, but a really lovely finish, and is virtually weightless. It also has light diffusing particles that are imperceptible, but work really well. Will need to give this a really good shake before you use it though. The NARS Tinted Moisturisers (available at www.NARSCosmetics.co.uk, £29) are also amazing, and have a high SPF too. Tend to use these when I’m working outdoors.

FOUNDATION

There are lots to choose from here. Comes in all manner of finishes, dewy, to matte. All different types of coverage also, from really close to what one might consider a tinted moisturiser, to a full coverage where nothing shows through. All different types of texture available, generally for different skin types. Creamy for dry, oil free for blemish prone, or shiny, compact foundations for ease of use, to sprays, and the list goes on. Just so you know, I have yet to come across a foundation that I can’t make look amazing, regardless of the price, and the quality. It’s not good enough to slap it on, you do need to spend a little bit of time, not hours, but a bit of time working it so you get what you want from it. Colour is perhaps the most important thing here. But generally nowadays they are all pretty good.

GOOD FOR: Anyone that requires a bit more coverage, perhaps the more problem end of the skin spectrum.

BAD FOR: Anyone who thinks you need a foundation ‘for evening’. Not necessarily. Anyone that doesn’t want to cover 70% of their features. Anyone that doesn’t want to spend a little bit of time working a base on.

I RECOMMEND: Lord so many. But in my kit I have the YSL Le Teint Touche Eclat which I adore. Light coverage, and dewy finish, and comes in a great range of colours, I use these a lot and am forever running out. The Clinique Repairwear Laser Focus foundation (available nationwide, £29) is another one I love. Not wild about the range of colours here, could be more, but generally found that it’s a good match for just about everyone. Has amazing skincare benefits too. Another one of my all time faves is Bourjois Healthy Mix Serum (available at www.superdrug.com, £8.99)). Amazing stuff. And so reasonably priced and smells delicious. Also I do like the Givenchy Teint couture foundation (available at www.houseoffraser.com, £32.50). Great coverage, not too heavy, and a really nice finish on it. Particularly for skins that can’t make their mind up if they are dry or oily.

MINERAL POWDER

Generally formed of minerals (no surprise there) which act as a sort of flat pigment that sits over the skin, and when ‘buffed’ provide coverage. Lots of different ones on the market with varying degrees of quality and effectiveness. Generally contain a natural (as in not added) SPF due to the nature of the product, and the materials used. NOT a face powder in the traditional sense. Has little to no oil absorbing quality, and if it does, sorry. It aint a mineral powder proper.

I RECOMMEND: Well, there is a well known brand of this particular type of makeup that frankly, I just can’t get along with. I find it overpriced and frankly, rather chalky looking. AAAANYWAY, I hate to bang on about them, but the best mineral powders I have ever used are the Laura Mercier ones. They come in two formats. Pressed and loose, they cover well, have a good range of colours. Some may struggle to match up, but few will, and they last a while too. (£31, available nationwide)

GOOD FOR: Generally speaking anyone that is particularly sensitive (unless it’s a mineral sensitivity), anyone that wants a quick and easy application as these are generally brushed on.

BAD FOR: Anyone with very dry skin. Despite not having a huge talc content, they are still a ‘powder’ so can look a bit arid on dry skins. Anyone who wants to look totally matte. They DO NOT absorb oil in the way a setting powder does. Older skins may struggle with these too, as they can show up fine lines.

BB CREAMS
Perhaps the most misunderstood, overused new term in the beauty market to date. Save for that awful ‘hypoallergenic’ rubbish that means zilch, but that’s a rant for another post. BB creams are not tinted moisturisers, and tinted moisturisers are not BB creams. A lot of BB creams on the market are IN FACT tinted moisturisers under a zeitgeist name. BB Creams were invented in Germany, not Malaysia as is commonly believed, by a Dr who wanted her clients to be able to wear a base that covered the rather inflammatory effects of her aggressive anti ageing facials that would also benefit the skin. The BB (or blemish balm, not beauty balm) was born. A unique product, with pigment suspended in rich skincare that evened out tone and redness and also helped the skin to heal. It was quickly adapted by the Malaysian market as a staple favourite, and then of course we heard about it a mere 10 years later, and acted like it’s the second coming. The formula since has been diluted down and down to such an extent that to be honest, if you are considering a tinted moisturiser or a BB cream, there is so little in the difference, you could quite easily use either to the same effect.

I RECOMMEND: There are few actual BB creams out there. Dr Jart (available at www.boots.com, from £9) is the closest I have come across. I am not wild about the colour of them though, but they feel nice and are easy to use. Without doubt, the best one I have ever used is the Stila 10-in-one HD Beauty Balm (available at www.boots.com, £26). Not strictly a BB cream, but has the same effect. I used this on myself when I had a quite reddening lactic acid peel, and it worked a treat. Love the finish on this. Another one I like is the Rodial BB Venom Skin tint (available at www.rodial.co.uk £35).

GOOD FOR: Anyone wanting to try something OTHER than a tinted moisturiser. Anyone who wants an uber natural finish, with the added benefits of skincare.

BAD FOR: Anyone expecting a fuller coverage.

CC CREAMS

Yet another product that has been around for eons, just rediscovered and given a new name. Commonly known in the industry as colour correctors, I have been using similar incarnations of these for nigh on 10 years. Now though, some have the benefit of a smart delivery system that means instead of effectively staining the skin, which is what they used to do, they become part of it, similar to the way a BB Cream pigment is delivered, and are thus much easier to use, and less like to make you look like Shrek.

I RECOMMEND: I am extremely old fashioned and tend not to use these, as I go for the colour correctors instead. That said some really nice ones have landed on my desk over the last year or so, My fave is the Clinique Moisture Surge CC Cream (available at www.debenhams.co.uk, £30). I have heard stories that despite the name, it can leave the skin feeling quite dry, but adequate skincare underneath sort of stops this. It does now also come in a handy compact. The Bobbi Brown ones are also good and come in a variety of colours for different concerns.

GOOD FOR: Anyone with high colour, or feels their skin could do with a ‘boost’ of radiance or more even tone. There are different colours for different needs. Green for anti redness, peach for dullness etc...

BAD FOR: Anyone who wants coverage. These work together with your base to make a more flawless appearance.

DD CREAMS 

I have no idea. Not sure I want to know either. See: cynical marketing efforts by beauty companies.

Tools

To use a sponge or a brush? I would probably guess that 7 out 10 women do not use either, as it’s seen as a bit cumbersome, and takes a bit more time. Well, this isn’t necessarily the case. There are a whole host of tools to apply foundation that can make the world of difference to the finish. Here is a very general guide:
    A sponge should never be used wet! I hear this happening a lot. No. Just no. It will affect the foundation to such an extent that I am pretty sure you’ll be looking at about 20 minutes of good wear. Always use a dry sponge, preferably one you can wash and re use.

    There is no real benefit to using a sponge over a brush or vice versa, it really is personal preference. As a very general rule, a brush will place the foundation well, and buff it in, where as a sponge is an excellent idea for moving the product around, and blending it around the edges of the face.

    No sponge or brush need be used with a BB Cream or tinted moisturiser. They are too sheer really for this sort of application. Fingers all the way here.

    Please for the sake of your poor face, make sure that you CLEAN your foundation brush and/or your makeup sponge. Even if it is just you who is using it, it will still gather all sorts of bacteria so a good wash once a month (or more) is HIGHLY advisable. This can be done simply with some hot water, and some washing up liquid. Dry them flat on a tea towel overnight.

    A little foundation from the bottle or pump on the back of your hand rather than dipping it into the bottle itself is advisable. Hygiene being incredibly important here.
I RECOMMEND: Just your common or garden makeup sponge from Superdrug. I prefer the Oval shaped ones as they are easier to get into the smaller areas of the face than the triangular ones. To me, it makes no difference if you use a latex free sponge or not. Save for should you have an allergy to latex.


BRUSHES

I recommend the following:

MAC 187: Large head of duo fibre hairs. One set synthetic, one set natural. All cut different lengths so excellent for buffing in any foundation. I just go in circular motions all round the face. Don’t be afraid by the ‘seams’ this brush leaves initially in the foundation, as soon as you keep buffing, they disappear to a flawless finish.
MAC 183: Same as above, but with a smaller head, great for getting into smaller areas, or if the 187 is a little intimidating. Both available at www.MACcosmetics.co.uk

Estee Lauder Foundation Brush: Perfectly sized, and cut to place foundation. Using the flat side of the brush you literally paint it on, until you have the desired finish. Available nationwide.


Glamcor Finish Brush: Superb buffing/finishing brush. Huge head on it again with the duo fibres that are shorter. Excellent for finishing a foundation by gently using the very tips of the fibres to gently buff over the surface of the base to really give a flawless finish. Available at www.preciousaboutmakup.com

This post: How to do: Foundation originated at: Get Lippie All rights reserved. If you are not reading this post at Get Lippie, then this content has been stolen by a scraper
Share:
© Get Lippie | All rights reserved.
Blogger Template by pipdig