Beauty Without Fuss

Popular Posts

Recent Posts

Monday, 22 March 2010

Eyeliner Masterclass featuring MakeUpByKaty

I'm always being asked how to do eyeliner, so, I thought rather than have you deal with my rambling thoughts on the matter, I'd ask an expert on your behalf!  Please welcome the astonishingly talented international makeup artist Katy, from Make Up By Katy, (who also blogs under the same name, which you can see here).  Take it away, Katy:

***

Hi Girls,

I've been asked by a few people to take them step by step through my eyeliner technique. I do try and show this on my video tutorials but will admit that I often skip over it so as to get to the fun part which is the colour! However, this is a very important part of all my looks so I think it's a good idea to go through it, step by step.


Firstly, I use a cake liner, this works better than a gel liner and especially safer than kohl. This is a Kryolan cake liner, the very best that I have found. It doesn't smudge, flake or run and it's a true black. It's also available in other shades such as brown and navy which are worth getting for a softer look. The brush needs to be synthetic, tightly packed and totally flat. No slants, no domes and definitely NO points. The cake liner needs to be mixed with a small amount of water to create a paste. Think of the texture as being similar to runny mascara.


Let's start by going through application of Step 1.   This takes a steady hand so it might be worth sitting down and resting your elbow to create a pivot. You can use your free hand to lift the lid slightly, or, as shown just place the brush under the lashes and press and wiggle right into the roots. Start in the centre and work outwards, then from the centre inwards. The end result should look like the 3rd picture along. Ideally there won't be any liner on the inner rim. If there is, simply take a cotton bud, dampen and gently run along to remove. I take the liner from lash end to lash end. Going right into the inner corner is much more dramatic, so probably best saved for evening.


Step 2 is similar to Step 1, although the brush now sits on top of the lashes. This is not to create a liquid liner effect. This should be placed in the same point as before, in-between the lashes. As you can see, the lashes are pulled down and the end of the brush is hitting the same spot as from underneath. This helps to darken the roots of blonde eyelashes, as often mascara won't reach this part. The end result of this is a clean, defined look. If mascara is put on, this line disappears and all that is left is the impression of fuller, thicker lashes. Nice!

This eyeliner trick can be worn alone, or with a soft shadow for a natural look. I'm going to take you through how to create a smoky eyeliner look using just a kohl pencil and one brush.


Above are 3 brushes, from left to right: Shu Uemura Kolinsky Brush 10F, Laura Mercier Corner Eye Brush and Laura Mercier Smoky Liner Brush. These would all be suitable to use for this step but would give different finishes. The longer and larger the brush head, the more smudged the liner would be. I wanted a reasonably small smudge so I used the Smoky Liner Brush.


I used my favourite Kohl pencil. Prestige Total Intensity Pencil. I urge you to give this a try. It's under £5 from Boots! I'm just doing a line along the top in this demonstration.


Note how I have the pencil on its side. This is the easiest way to run the pencil along the lashes as you can almost use the lashes to rest the brush on. The issue of wiggling the pencil in-between the lashes to darken the roots is no more as the cake eyeliner is already there, creating a base for your kohl.

I start in the centre, above the iris and work outwards, coming to the inner corner at the end. I wanted to open my eye up with this technique so I have lifted the liner in the centre as opposed to creating the width at the outer corner.

Before smudging


To smudge I take the brush and run gently along the edge of the line, pulling upwards as I go as I'm not looking to pull the line outwards. Note how I'm holding the brush at the same angle as the pencil. I'm using the long edge of the brush as opposed to the fine point.  The end result should look soft, blended and subtle.

Below is the end result, sans Mascara. For an evening transformation, I'd simply take the pencil, dot very subtly under bottom lashes and use the Shu Uemura 10F brush to work right into the lashes. To intensify further, I'd line the inner rim too.


I hope this has been helpful and interesting!


Until next time,

Katy

***

Don't forget you can see more of Katy's beautiful and helpful tutorials on her blog at http://makeupbykaty.blogspot.com/ Thank you so much for creating this masterclass for us, Katy! I hope my readers find it useful.
Share:

Sunday, 21 March 2010

Mini Makeover - Ruth

Yes, it's a mini-makeover again this week, mainly because I AM the world's worst photographer, and I owe Ruth a massive apology as a result.

Anyhoo, on with the "show", as they say!  Please meet Ruth:


Ruth is someone I've known virtually for longer than I care to remember, but up until her makeover we'd never actually met in the flesh!  Ruth runs Love it Love It Love It (should be live this weekend!) which is a website that sells the most amazing clothes for babies and toddlers in BRIGHT colours - none of this pastel rubbish.  Please go take a look if there's a child in your life, there are some gorgeous clothes on there, and I'm going to be placing a couple of orders myself soon!

Okay, because the photos I took were so dreadful, we're going to skip straight to the after:


Ruth was looking for a funky look, so I told her we were going to do PINK!  And we did.  I think Ruth was a bit scared I was going to make her look like a refugee from 1986, or something, but I think I succeeded in avoiding that particular fate. Well, hopefully ...

Products used:

Benefit You Rebel Light
Benefit Bluffdust
Milani Runway Palette in pink
Bourjois Ultra Care Mascara in black
Cargo Plantlove Illuminator in Wind
Lipstick Queen 15 minutes of Fame gloss in minute 3

Here's an entirely gratuitous pack shot of the Milani palette, it's not very pigmented, and the colours can be a little chalky, and difficult to blend as a result, but they're very pretty shades, and it cost only £3.49 from Beauty Base in Westfield:

Share:

Beauty Blog Link Love

 Over at theNotice, Rae shares an amazingly pigmented bright blue eye -- done with shadows from the drugstore!


This week, Louise gets an (almost!) exclusive look at a Lancome mascara that has them queuing down the aisles in Harrods, and promises better lashes in a month.
 
Yinnie Dances with the fairies with her fairy inspired EOTD.
 
Phyrra dishes with Britton from Haus of Gloi for this month's Indie Spotlight at Fresco Phyrra.


Blaq Vixen Beauty decides to treat her skin to a Clinique Even Better Clinical Dark Spot Corrector Regimen!

Retrodiva checks out three new innovative drugstore foundations. See which ones she would recommend!
 
Krasey Beauty takes a trip across the pond to bring you complete swatches and a review of MAC's newest, Give Me Liberty of London.
 
Looking for a great cream eyeliner that won't break the bank? Lipglossiping may have just the thing...
 
Sophie from melovemakeup talks about how much she loves Trilogy's Everything Balm.
 
TheLipPrint adds a little more Allure to her life with Chanel.

Michelle at Lipstick Rules laments her Liberty Of London lipstick purchases... but then finds a way to make it work!
 
Check out the swatches of Yummy Mummy by butter LONDON at Makeup4All.
 
Lisamarie from Beauty Crazed falls in love with the 10 year anniversary editions of Lancôme Juicy Tubes!
 
Follow Jellyminx's step-by-step tutorial for a pinky-coral look for Spring.
 
Over at Music and Make Up, Jo celebrates her birthday with a purple smokey eye courtesy of MAC's Violet Pigment.


***


Beautywoome has a giveaway with Europe's coolest new beauty brand. Win 1 of 10 Ellis Faas Ellis Red lipsticks.
 
Audrey Dao is giving away $89 worth of Napolean Perdis makeup as part of her 1 year blog anniversary.
 
Mz More at The Glamorous Gleam is having a giveaway in honor of her 200+ Followers. Check out the goodies galore!
 
Cindy from Prime Beauty gives you the Golden Ticket to win a Bliss "Best of Bliss Set".


Hope you enjoyed this week's Link Love! See you soon :)
Share:

Saturday, 20 March 2010

Shameless plug!


One of my lovely readers - Nick, look out for her in a makeover soon! - has nominated me for a Little Blog award on the Dorset Cereals website.  If you click here to vote for me, you could win yourself a prize, too!
Share:

(Not Quite) A Hair Disaster ...


Was at the hairdresser yesterday, and this is the fruit of their labours.  It's beautifully shiny, and I love how they dried my hair, although it dropped quite drastically on my rainy walk to the tube, but ... well, I did NOT enjoy my salon experience all that much.

I've mentioned before that I find trying new hairdressers a bit stressful, particularly when it comes to colour, and yesterday's experience wasn't one that'll have me beating a path back to to this particular salon's door, I'm afraid. During the initial consultation, the stylist ignored my requests not to make it too dark, and completely dismissed my suggestion that maybe she could mix two shades, (the sample swatch was a really "flat" brown, and my hair has a lot of red in it, naturally, and I wanted the colour to reflect that).  Then, she called over another colourist with the express purpose of having two people telling me I was wrong.

Nice.

The rest of the colour process was fine, two colours  were mixed and it was pretty uneventful (except being repeatedly called "hunni", which drove me nuts, "Are you alright, hunni?" "Do you need a magazine, hunni?" "I'll just be another hour with this other customer, hunni, okay?" Seriously I could practically see the heart-shaped dot over the i), and after the least relaxing, and actually quite painful rinse-out - seriously, I spent the entire thing in a flinch, and I LOVE having my hair washed! - I went over for the blowdry, with another stylist.

And I loved it! She asked me if I wanted something bouncy, and she did a wonderful job, just what was needed.  My hair was glossy and full of body, bounce and shine.  Simply perfect.

But ... the colourist then came over, and pronounced "See! Not too dark at all! We knew what we were doing all along!".  Well, actually, it is too dark - and it hasn't escaped me that it would have been darker still if I hadn't put put my foot down -  it's just not as dark as I was scared it was going to be.

But I was feeling thoroughly patronised at this point, so when she went on to point out the virtues of me not ever using permanent dye again (in that special voice people tend to save for the elderly, the insane or the foreign, you know the one I mean), I'd about had enough. I know I'm not trendy, I know I'm not young'n'funky any longer, and  I know I've made a few jokes recently about being senile, but I am not ready to be treated like an elderly maiden aunty who has just asked for a violet rinse in Toni & Guy ....

I didn't complain, because, really, how do you complain about being patronised by someone half your age?  And what would the salon have done anyway? My hair, actually, is fine, I just hated every moment of the experience!

Here's a pic to exmplify how much darker it is than usual:


Like I said, it's not bad, it's just ... not what I wanted.

So, can everyone tell me about their hair disasters please, so I don't feel too much like Morticia's granny any more?
Share:

Friday, 19 March 2010

Chanel Coco Rouge Swatches


I make no apologies whatsoever for featuring Chanel's latest lipstick offerings once again. Beyond gorgeous formulations, pigmented, light and beautifully moisturising, they're everything YSL Rouge Voluptes should be, but aren't (I'll give you my thoughts on those another time).


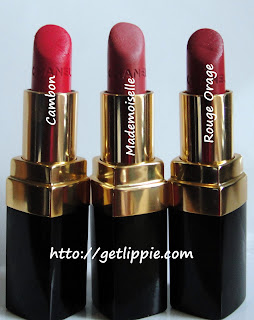
Since I unexpectedly picked up Cambon way back in January, I've since been out and bought two more, Mademoiselle, and Rouge Orage.  Cambon is a bright - BRIGHT! - hot pink, which leans towards orange, Mademoiselle is a lovely nude rose, and Rouge Orage is a soft blood-red.  I find the colours last three to four hours before they need a touch up.  There is a hint of the classic Chanel lipstick scent (which I happen to adore, but I know some people have a problem with scents), and they cover the lips perfectly in one swipe.

On the lips, Cambon:


Last time I swatched this, the pictures made it look rather too scarlet.  This is a much better representation of the colour, a hot, hot pink, with no real blue undertones.  A happy-making colour.

Mademoiselle:


This is the signature shade of the range, and possibly rightfully so.  I've seen a lot of swatches of this recently, and I think it's a very nice neutral, goes-with-anything colour and it seems to suit most people, though I've noticed it can look a fair bit redder on people with a lot of pink in their skin.  My hands are pinker than my face, and I've noticed the hand swatch is redder than the lip swatch as a result.  On my lips, however, it's a wonderful nude-shade.


I love this colour!  Haven't seem this one getting too much attention lately, but when I went on a mad swatching-frenzy in my local Debenhams recently (seriously, I got through a box of kleenex and half a bottle of their makeup remover, they hate me in there), this shade just called out to me.  It's a warm, but not too orange red, that's quite suitable for daytime wear.  It doesn't, in all honesty, look like anything out of the ordinary in the tube, dare I say it even looks a bit dull? But put this on skin, and it's beautiful.  It might just be my new favourite red, as it very wearable, and not too garish. Not as scary as it might look in the tube, well, I think so anyway.
Will you be trying any of the Rouge Cocos?  What's your favourite shade? Rouge Cocos are widely available now, and cost £21.
Share:

Thursday, 18 March 2010

My top ten brushes

Brushes
(Okay, it’s not actually going to be a top ten.  It’s not even going to be a top seven, as pictured, it’s a top eight – I’m a photographic-doofus, sorry!)

During Foundation Week recently, I mentioned my flat top kabuki brush a lot, and people on Twitter were asking me about my favourite makeup brushes as a result.  I’m not  a brush expert though, and many of my brushes are very, very old, but I do find myself reaching for a couple of classics over and over and over again.
In the same order as the picture:

brush 1

This is an old – a very old – MAC 218SE, a flat, animal-hair eye brush that is perfect for colour-washes.  It’s a very soft, silky feeling brush that grabs powder shadows well, and is great for blending.  I use this to add the base colour of whichever eyeshadow I’m wearing for the day (I tend to only use two different eyeshadow shades in most of my makeup looks).

Brush 2
This is a Benefit “Talent” brush, which is the one I use for applying cream eyeshadows.  It’s flat synthetic brush, which is a bit less “grabby” than the 218, it doesn’t pick up powders as well, but with a cream, it deposits a smooth veil of colour on the eyelid.  The rounded edge doubles up as an eyeliner brush, though it’s a bit wider than the eyeliner brushes I’ll talk about later.

brush 3
This is a very old Smashbox “pencil” or “bullet” brush, which I use entirely for defining the my eyelid crease, which is where I wear a darker shade in 80% of my own makeup looks. I find this technique makes my lids look less hooded.  Lots of companies make brushes like these now, but when I first got this one, around ten years ago, it was revolutionary!  This and the 218 are the two brushes I use on a daily basis almost without fail.

brush 4

This is the infamous flat-topped kabuki brush which is my latest obsession!  I received it in a swap from a lovely  US reader, and it’s had a centre spot in my collection ever since.  This one is from ELF, and it’s a round, densely packed brush, which is great for picking up liquids.  I put foundation on the back of my hand, dab the brush into the liquid, then “buff” it very gently into my skin.  I find it leaves an almost perfect airbrushed kind of effect when I use it.  I much prefer it to the flat “hard” foundation brushes (similar to the Benefit brush above, but larger), which I find can leave you a bit streaky.

It also works really well with powders – it’s a very soft synthetic, brush – and doesn’t leave you with a cake-y effect when you use it. I bought a back-up of this for powders.  For £3.50, this is a bargain!

brush 5

This is a MAC 266SE, which I find to be ideal as an eyeliner brush, in particular for using powder eyeshadows as eyeliners, which is something I do a great deal, to the extent that it’s a very rare day indeed when I use a pencil-eyeliner at all!  This brush is great because it’s fairly stiff, so it doesn’t splay when you press it against your eyelid, and unlike many cheaper versions, it’s thin enough that if you’re going for a very subtle thin liner effect you can do it.  I also use this for putting powder shadow on the waterline, which of course, I cannot possibly recommend anyone does, ever, but I do do it occasionally.  Allegedly.

brush 6
This is a MAC 224SE, which is a very soft, very fluffy synthetic brush that I use for blending.  Especially useful since I started using Urban Decay Primer Potion on a daily basis!  Doesn’t rub and tug your skin so much as using your fingers does.

brush 7
This is an ELF smudge brush, which has short, quite stiff (but yielding) synthetic bristles, it’s the most recent addition to my brush collection, and it’s one I like a great deal – in fact, it’s another one I have two of.  I use one for cream or gel eyeliners, I prefer it to the 266 for those, as there is less surface area for the product to dry out on as you’re applying them.  It’s also very good for tightlining, which is something I like to do to my upper lashes upon occasion.  I use the other one for cleaning up my cuticles after a messy manicure.  Again, excellent value from the people as ELF.

And last, but by no means least, my blush brush, which is a MAC 129SE (all my MAC brushes are special editions, I much prefer the shorter handles):

brush 8brush 9
It’s not the greatest blusher brush in the world, it’s slightly too scratchy, but it does give a nice soft finish to blush, when it’s applied.  Whenever you see me use Cargo illuminator, I’ve used this to apply it, as it doesn’t deposit the colour in clumps as some brushes can.  I also have a denser animal-hair brush from Smashbox, which gives heavier coverage, and as a result, I mainly use that one for contouring.  Which I don’t do often.

As for looking after my brushes, I tend to wash them with a brush cleanser or shampoo on a weekly/monthly basis depending on how often I’ve used them, and I give them a quick clean on a cleansing wipe immediately after using them on a daily basis.  My advice basically is to  spend whatever you’re happy to spend on brushes, (and if that’s nothing, then so be it! Make up is all about finding out what suits you, and that applies to application methods as much as colours and the like), but whatever brushes you have, look after them!  The vast majority of my brushes are around ten years old (some are even older, I have a Body shop brush here that’s got Barbara Daly’s signature on it!), but if it weren’t for the worn off numbers, and slightly chipped handles, you’d never know.

What are your favourite brushes?  What have I missed? What2 brushes do I absolutely need to make up my top ten?
Share:

Wednesday, 17 March 2010

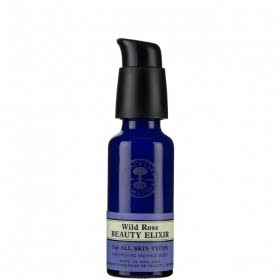
Organic Wednesday - Neal's Yard Wild Rose Elixir


I've mentioned Neal's Yard a few times before, I'm a big fan of their distinctively packaged, gloriously scented and usually highly natural products.  When the chance came up to take a look at their new Beauty Elixir, which is part of their Wild Rose range - I already own the balm, and the facial oil in this range too! - I jumped at it. 

Here's what Neal's Yard say about the product

A nourishing radiance boost for ALL SKIN TYPES
Luxurious new Wild Rose Beauty Elixir is enriched with wild rosehip oil, one of nature’s richest sources of antioxidant vitamin C, proven to help repair, firm and smooth the skin, ultra-moisturising hyaluronic acid, brightening turmeric, an anti-ageing peptide and the pure essential oils of frankincense and geranium. Use morning and evening after cleansing for radiantly glowing skin.


Then, once it arrived, I kicked myself quite thoroughly, as I realised I was already committed to trying out 42, 135,438,431,518 squillion other facial products so I did the decent thing and handed over the £42.50 bottle over to my friend Sarah.  Here's what she had to say about it:

"I'm not really one for make-up routines. My skin's lucky enough to have the makeup washed off it at the end of the day. So when Lippie asked me to test this Neal's Yard Beauty Elixir, I went a bit blank.

Me: "OK, I like Neals Yard. The bottles are pretty. What do I do with it then?"

Lippie: "It's a serum"

Me: "Uh..."

Lippie: "Just put it on before you apply moisturiser"

Me: "That's the greasy stuff in the jar that you made me buy, isn't it?" <-- well, I would have said that, except Lippie had THAT look on her face, so I nodded wisely instead.

Lippie: "Take a picture of your face before you start, then one about a week later, and tell me how you get on. Simple! Now pour me another glass of wine if you know what's good for you..."

I do know what's good for me, and arguing with Lippie isn't. 


I'm 43, with unevenly pigmented, ageing combination skin. It used be a zit factory; now it's just slightly dry.

The serum comes in a pretty, blue, typical Neals Yard bottle. I couldn't see an ingredients list, but the ads seem to imply that it has some kind of rose hip extraction. I suppose that means that it's Good For You. A bit of explanation about what the rose hips actually did for my skin that other plant extracts don't (apart from making it smell purty) would have been nice. I mean, does it calm the skin? plump it up? eliminate blotchiness and at least three of the Six Signs of Ageing?? (It's 10 Signs of Ageing now, do keep up - Ed)

Eventually I found some instructions in a corner of the label, which said, "Apply with fingertips in a circular massage motion".

There was no indication as to how much, so I experimented with two drops.The serum was cool and velvety on my skin, and absorbed after a few rubs. On the hand it felt quite rich, and smelled faintly of roses. My face looked considerably pinker after application, but calmed down after a few minutes. On went the usual winter face, and off I went to work.

Looking in the mirror after two weeks of daily treatment, I'd say that my skin is still unevenly pigmented, but ever-so-slightly pinker, clearer and smoother to touch. Clear smoothness: good. Extra pinkness: not so good. The pre-menstrual breakouts were fairly minimal too, though whether this was down to the serum or actually following a proper moisturising regime, I couldn't say.

As for the price tag; £42.50 is more than I would pay for any kind of moisturiser, especially one that may or may not work. It smells pretty and didn't burn my face off, so I'll probably continue using it until the weather brightens up a bit and I only need a bit of tinted moisturiser to loosen up my face. But I don't think I'll be rushing to replace it when/if it finally runs out."

Okay, whilst this possibly isn't the most glowing review ever (and, I remember the conversation somewhat differently, iirc the wine reference came a LOT earlier!), but, I will say this, I had dinner with Sarah last night, and she was glowing.  I could see the difference in her skin, even if she couldn't! If I could guarantee my skin would look as good after a couple of weeks use, I'd have snatched the bottle back there and then!
Share:

Organic Wednesday - A'kin Rosehip Oil

Two organic posts for you today!  First up, A'kin.

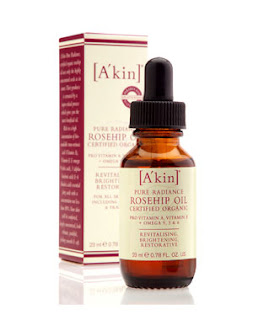
Part of the Australian Purist Company, A'kin promises the following about their products:

[A'kin] and [Al'chemy] products are formulated free from sulfates, parabens, ethoxylated and petrochemical cleansers, propylene glycol, silicones, phthalates, mineral oils, DEA and artificial colours.Our products are ingredient rich, vegan, 100% natural botanical aromatherapy and formulated without animal ingredients or animal testing.


I'd heard a lot of good things about their rosehip oil - rosehip oil generally is considered a great skin-loving ingredient, plus, I have very fond memories of snaffling my baby sister's rosehip syrup as a child, so was looking forward to trying this.  I used it for a couple of weeks, and found it to be a lovely moisture boost to my dry skin, but my friend Seona was looking to try some oils that had some therapeutic benefits after a disastrous trial of an oil-based cleanser, so, being the kind-hearted soul that I am, I passed my bottle along.  Here's what Seona made of it:

I was given A’kin Rosehip Oil to trial. The bottle tells me it has Pro Vitamin A, Vitamin E and Omega 9,3 & 6. It also says it’s revitalising, brightening and restorative. I’m always look for a bit of revitalisation for my skin, so I was looking forward to trying it.


The recommendation is to apply 2-3 drops to the face and neck, once a day for oily/combination skins or twice for other skins. I tried to use it twice a day for the first week, switching to once a day for the second week as I am just not organised enough and my skin is combination.

The oil itself is bright orange, which I wasn’t quite expecting as the bottle is tinted brown so you can’t see what you’re getting. This isn’t fragranced and smells of, well, plant is the best I can do. It’s not an unpleasant smell, just a very natural one. The packaging is a medicinal looking glass bottle with an old-fashioned dropper with rubber top. The dropper does collect a lot of oil in it, so I generally squeezed most of it straight back into the bottle to avoid accidentally using too much. That’s probably overcautious of me as the dropper does only dispense one drop at a time, making it very easy to control the amount you use.

A little of this goes a very long way, so the 2-3 drops direction is about right. I was pleasantly surprised by how quickly it absorbs, especially as I was using it in the mornings and worried I’d have to wait ages before applying make up. It sank straight into my skin and I could apply my tinted moisturiser almost immediately.

Results wise, I can’t say I noticed a massive change in my skin. My skin certainly felt soft, but it looked much the same as always. However, I do like this as a winter base for my tinted moisturiser. I felt like I needed a little extra moisturise and after applying the oil my moisturiser went on a lot smoother than without any sort of base. The other good point, and this isn’t on the bottle at all, but my hands looked a lot better from rubbing the excess oil in. Using this oil regularly meant all those little bits of loose skin around my fingernails disappeared, leaving me with much nicer hands.

Overall verdict: As an extra layer of moisture in winter I’d use this product, it was a nice extra boost. It just didn’t do much in the way of revitalising or brightening for me. Having said that, I do have fairly good skin and it might work better for someone with dryer skin than mine.

So there you have it, have you tried A'kin products, or rosehip oils on your skin?  How did you get along?

A'kin products are available from Wholefoods, and independent chemists.

The Small Print: This product came from my own collection, all reviews are honest and impartial regardless of the source.  Man, I could murder a Malteaster Bunny right about now.
Share:

Monday, 15 March 2010

Giveaway Winner!

Oh, I'm so pleased to announce that the winner of my recent OCC Liptar giveaway is ....


Silhouette Screams

Congratulations, lovely!  The winner was picked as follows: I asked MrLippie for a random number between 1 and 206 and he picked 176, which was Silhouette's second entry into the draw for being a follower.

Thank you so much to everyone for taking part, and don't forget there is still time to enter the draw on London Beauty Review  or place an order on The Make Up Artist Boutique with your Get Lippie discount code of LIPPIEOCC up until the 23rd March.

Normal blog-posting service will occur from Wednesday this week, thanks for bearing with me!
Share:

Sunday, 14 March 2010

Happy Mothers Day!


There's no makeover this weekend, as I'm on holiday, so, in the meantime here is a picture of some giant daffodils, and some soothing music.

Incidentally, my giveaway is now CLOSED, and all entries/comments are now being rejected, so please, STOP ENTERING! The winner will be announced tomorrow.

Hope all my readers have a wonderful Sunday!
Share:

Saturday, 13 March 2010

Giveaway Reminder


Just to remind you that if you haven't entered my OCC Lip Tar Giveaway yet (you can win your choice of the colours above!), that I'll be closing it at midnight tonight!  Posts left after this time won't be counted, even though I'm not making the draw until Monday evening.

Go leave a comment on this post and I'll make sure you're entered.

If you've missed the deadline for mine, then you can enter  the giveaway that's being hosted by the lovely and amazing Gemma and Sarah over at London Beauty Review (and if you're not following them already, why not?  Did I mention that they're lovely and amazing?  I should have, because they are!) which closes on Saturday 20th March at 12 noon prompt.

And if even that seems too much effort, then you just go and blimmin' well BUY yourself one or twelve, but don't forget to use your discount code!  Just enter LIPPIEOCC  at the checkout on the MakeUp Artist Boutique website, and they'll knock a lovely 10% off your entire order, just for you, but only till the 23rd of March, so get a wriggle on!

Good luck!

The Small Print: I am not affiliated with Make Up Artist Boutique, and recieve no payment either for these posts, or if you click any of the links contained within this post.  I may, however, have placed an order myself, so I'm actually LOSING money on this one ... ;)
Share:

Friday, 12 March 2010

Lip Balm Roundup.

I've been collecting lip balms again! I know I do a lip balm post seemingly every other week (there is a reason the blog is called Get Lippie, you know ...)  but the last few have concentrated on more natural ranges, and I thought that this week that I'd talk about some which are chock-full of chemicals and science an' t'ings. 

I'll do this in ascending price order, first off:

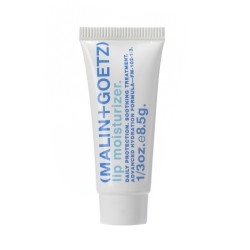
Malin+Goetz Lip Moisturizer (It's American, mmkay?)

What they say:

Scientifically synthesized to instantly restore and replenish, our hydrating lip gel is easily integrated for daily maintenance, prevention, and treatment of dry, irritated lips.  Absorbent fatty acids, unlike traditional oils and drying waxes and silicones that are often licked off or wiped away, nourish upon impact while offering a continual layer of hydrating protection throughout the day and night.  Fragrance, flavor and color free.


What Lippie says:

Putting aside the rather unappetising descriptions of "fatty acid hydration technology" on the packaging, this is actually a knockout lipbalm, you need only the tiniest amount of this silky-textured gel to soothe even the sorest of dry lips.  Applied lightly, it makes a great base for lipstick, and it's one you can instantly feel doing your lips some good.  It's unusual in that it's not a grease-type of balm, and it's totally non-sticky.

A little of this really goes a long way, so you can expect your £9 tube of this from Liberty to last quite some time.

Now for Dior Addict Lip Glow


 What They Say:


A balm which beautifies and enhances your natural lip colour, with a lasting effect. The result is immediate. Thanks to the “Colour Reviver” technology, Dior Addict Lip Glow reacts to the lips’ moisture levels for lips that appear rejuvenated, fresh, luscious and shiny.
Available in one shade, the SPF 10 formula, enriched with wild mango, continuously protects and hydrates.
Lips are soft and plumped, day after day


What Lippie Says:

80's-tastic packaging, or what?  This is another flavourless non-sticky gloss, but it's more traditionally "grease-based" than the Malin+Goetz formulation.  I find the colour effect to be very subtle, just leaving the faintest hint of baby-pink on my lips in a way that's really quite flattering. It's not at all dramatic though. It's not as good a treatment as the M&G, but it is quite moisturising, though the effect doesn't last all that long.  I suspect it wouldn't be as great for sore, or chapped lips as other balms, but it does have an SPF of 10 (not 15 as I was told in store).  It has a very soft texture in the tube, and I think it wouldn't last all that long in daily use, as you have to reapply it quite often.  Nice for a soft subtle look to your lips if lipstick and/or gloss just feels like too much effort.

Lip Glow costs £18.50 and you can find it in most department stores.

And finally:


Kaplan MD Lip 20
What they say: 

This is a lip treatment with a difference. LIP 20 is the first dermatologist developed lip treatment designed to moisturise, plump, contour & protect with SPF 20 - all in one. This lip balm is enriched with anti-ageing marine collagen, peptides and antioxidants, vitamin A, Black Cohosh, Seabuckthorn Berry extract. In addition, Hyaluronic Acid Filling Spheres are micro-injected into the lips to fill out lines & plump. Unlike most plumpers this doesn't irritate, it gradually builds your lips

What Lippie says: 

This one is so scientific that it took me a fair few minutes to figure out how to open the thing (you turn the bottom, the cute little lid slides up, then the balm pops out).  Seriously, I've been stumped by an Estee Lauder mascara tube recently, then this, and the other day, I couldn't figure out how to open a cardboard box. Either this means that designers are getting too clever for their own good, or I really am a cack-handed muppet.  I know which explanation I prefer ...

Anyhoo, onto the balm.  Unlike the other two this is a plumping product.  It definitely lives up to the "no irritation" claim, as you can't feel any cinnamon or peppermint oil on your lips whilst wearing and as a result it doesn't have that familiar "tingle" that you get wearing plumping glosses. It does have a flavour, albeit a very faint one.  To me it's very slightly sweet and the taste makes me nostalgic for ... er ... something! It's a flavour that reminds me of my childhood, for some strange reason, but for the life of me, I can't figure out what it is! It's driving me nuts, I don't mind admitting. Lip 20 also has an SPF of, you guessed it ... 20.

I have fairly plump lips anyway, so I don't use it for it's plumping effects - you can definitely feel you're wearing this one, out of the three balms here, this has the most slip on the lips - but it's a very glam, and almost sci-fi tube that'll have people marvelling at you when you use it in public. In a good way, I mean, not in a "look at that weirdo putting on lip balm" kind of way! I have the clear version, but I've heard extremely good things about the coloured versions too, there are four shades, from nude through to red.

You can get Lip 20 from - again! - the lovely, lovely people at Cult Beauty, and it retails for £22.50.

I always have a lip balm in my makeup bag, and I bet you're wondering which one of these has made it into that hallowed container, hmn?  Well, in sad/mad/bad (delete as applicable) confession time: they ALL have. My makeup bag always has about twelvety million lip products - and the occasional eyeliner wondering how the hell it got there - and all three of these balms are in there, I've been rotating their useage.

How many lip products do you carry around with you?


The Small Print: I bought some of these with my own actual money, and I was sent some of these to review.  I'm not going to tell you which is which, so ner.
Share:

Thursday, 11 March 2010

Eye of the Day - ELF and The Balm

 (Please ignore the stupid look on my face) 

This is a look I've been wearing a lot lately. I was sent some samples of the new ELF Cream Liner in Coffee, and The Balm Shady Lady 2 eyeshadow palette recently, and I have to say, I adore them both.  A closer look at the palette:


It's BEEYOOTIFUL.  Unlike many palettes, this one is endlessly versatile, and doesn't have any "random" shades thrown in just to make the numbers up, it's enormously flattering and will be suitable for a variety of skin tones. The shadows themselves are silky, buttery soft, and extremely blendable.  This has just become my desert-island palette, I've been carrying it around with me since it arrived.

The look I created above is a very neutral one, I used the pale pink (bottom right) on my mobile lid and brow bone, with the coppery brown (middle right) in the crease, and the taupe (top right) on the outer corner and as a liner underneath the eye.  Very quick, very polished, and very easy to kick up with a pop of any of the blue/purple/dark brown shadows on the left there as liners.

Here's a close up of the look:


Can't really recommend this palette highly enough to be honest, I love it.  You can buy yours from the lovely, lovely girls at Cult Beauty  for £38.  Pricey? Possibly, but you won't need any other eyeshadows for the rest of the year, if you get it, and these are really super-high quality shadows.

And I'm about to rave about the eyeliner as well.  Sorry, this is turning into a hella-gushy post!  I've always found ELF products a bit hit and miss, to be honest, but when they get things right, boy do they... I'm always dubious about cream eyeliners, sometimes they're difficult to use, being a bit "draggy", and then you have the transference problem if your eyelids are hooded at all, as mine are.


I used the shade "coffee" in a very fine line for this EotD, and I applied it with the ELF small smudge brush I bought recently.  It's very soft and smooth, meaning it can be easy to put too much on the brush, but I find just taking the excess off on the lip of the pot works fine.  You will probably need two passes of the brush over the lid to get the depth of colour you'd like, but with a formulation this soft, it's not a hardship!  The liner sets in a minute or two, and it's unbudgeable once it does.  (Is unbudgeable a word?  I guess it is now ...) No transferring to the crease, and no flaking or smudging on the eye, even when you wear it as a thicker, more dramatic line, as below:


As far as I'm concerned, this little baby has outperformed liners costing up to five or six times as much you can get hold of one for £3.50 from the ELF website. I'll definitely be buying the black and the blue, and I'll just have to live in hope that they'll eventually add a green and a purple to the range too, they're fantastic.

Okay, enough gushing from me (I'm really sorry, but you know perfectly well that I'm not this impressed with anything very often, so I hope you'll forgive me), what are your favourite beauty products at the moment?
Share:

Wednesday, 10 March 2010

Organic Wednesday - Melvita


After it's unscheduled two-week break, Organic Wednesday is back!  And it's back with some lovely treats, so sit back and have a look ...

Melvita are a French skincare brand - in fact they're the sister-company to L'Occitane - and they've just recently launched their products into the UK market.  They're Ecco-Cert compliant, and they promise that their products  contain:

No paraffin and no silicone.

No PEG (polyethylene glycol) and no PPG (polypropylene glycol).

No ethoxylated products.

No parabens or phenoxyethanol.

No formaldehyde or chlorine derivatives.

No synthetic fragrances or colouring agents.

No di-ethyl phthalate or nitromusk.

They also use no animal based products (aside from honey, in a couple of products), and do not carry out any animal testing, under any circumstances, as they are BUAV-approved.  Good news for my vegan readers!

There is a massive range of products to choose from, so I picked a few to showcase:

First off, the absolute star of the range - in my eyes at least: Naturalift.


Containing extracts of hibiscus seeds, chestnut, buddleia and beech buds, my (normal/dry, and fairly sensitive) skin just drinks this up, and is left smooth, silky and velvety as a result.  The cream has a faint scent of rose geranium, and sinks in very easily.  I adore it.  The cream is  of 99.11% natural origin, and 29.91% 0f the ingredients are organic. It claims to help with fighting wrinkles and signs of ageing, I've seen no evidence of that in my two week of using it as a night-cream, but it's still been a pleasure to use, and it's something I'll definitely look into purchasing again. Naturalift costs £30 for 50ml.

Rose Nectar Day Cream


Again, another cream that's a joy to use, scented as it is with rose oil - reminding me greatly of Ren Rose Otto bath oil - this is the cream I've been using as a day cream for the last few weeks.  It sinks in easily, and, as it's slightly less hydrating than the Naturalift, it makes a very good base for foundation.  The product contains rosehip oil, and an extract of rose seed, and is very gentle on even the most sensitive skins.  I find it very soothing, and love the scent.  This cream is 99.68% natural origin and 57.37% organic.  It costs £24 for 50ml. 

Apricosma Fondant Balm
This is a gloriously sweet-smelling body cream, that's rich and thick, and leaves you smelling a little of apricots, or other stone fruit.  Made of cocoa and shea butter, with hints of honey and thyme, it soothes your dry body parts, without taking a huge amount of rubbing in.  It is very sweet-smelling though,  and this scent lingers (it was a little to sweet for me, if I'm being completely honest) and if you're sensitive to smells, that might be something to take into account. The cream is 99.15% natural, 20.34% organic, and costs £19 for 150ml.

Two products I didn't get on so well with were the Eye Contour Gel, and the Foaming Facial Scrub, but this is because my skin is stupidly sensitive, and doesn't do well with gel formulations, or anything that foams, no matter how gentle.  I thought, rather than give you a negative review of a product that I know doesn't suit me, I'd ask one of you to review them for me, what do you think?


If you'd like the chance to review these products for me, please leave a comment on this post telling me why you'd be the best person for the job, and you MUST leave me your email address. Winners will be picked at my discretion, and two winning entries may be selected.  I'll make the decision on Monday 15th March, and products will be despatched by Wednesday 17th at the latest.

Look forward to hearing from you!

Melvita products are available to buy from the Melvita Home Page or from Lookfantastic who currently have a special offer, where if you buy any two Melvita products, you will get a free discovery pack worth £15!
 

The Small Print; Some of these products were sent as samples to review, some of them were presents.  Reviews are honest yadda, yadda, yadda, regardless of source, and so on.
Share:

Tuesday, 9 March 2010

Review – Lancôme Precious Cells Mascara

Lancome Precious Cells Mascara
I’m a massive fan of Lancôme mascaras, and have been ever since they first introduced the Hypnôse range! I always have one on the go, and one as a back up around.

Despite the occasional misfire – Hypnôse Onyx anyone? Seriously I thought that one was innovation purely for innovations sake, it was literally no different to the original formula – they’ve always been my “go-to” mascara brand, as well as being the standard I judge other mascaras by.

Discovering that Lancôme had yet another version out at the end of this month, and that there is a waiting list for it at Harrods, I - on your behalf, lovely readers - begged, pleaded, cajoled, threatened, and just basically harassed the bejebus out of Lancôme till they sent me one to try.

(Actually, none of that is true, I merely cried at them till they gave me one to shut up and go away)

I’m glad to say that I’m a big fan of this one.  I loved the Hypnôse Drama formulation, but found the curvy brush a bit of a trial. Being the cack-handed muppet that I am, a thick curvy brush is not my friend, especially not first thing in the morning …

Anyhow, the new brush irons out those wrinkles, being flat, and having short bristles on two sides, alongside longer bristles on the other sides (see illustration)

Lancome Precious Cells Mascara Brush

What this means is that I can pack on the mascara with the shorter side, then use the longer bristles to tease out my lashes, all just by turning the brush through 90 degrees! So simple, even a cack-handed muppet can use it. You get the benefits here of both a thin, and a thick brush, meaning you can use it whichever way suits you.

Here’s how it looks on my eyes:


Lancome Precious Cells Mascara 2

Now, I’ll be honest, it doesn’t – quite – give the full-on false-lash effect I love so much – though it’s pretty darn close - but I do actually have high hopes for this little tube.  And this is because this is Lancôme's first mascara to incorporate both skin, and haircare, technology into their formulation.  It is, in effect, an anti-ageing mascara.

Yes, I am aware of how silly that sounds, thank you. There are, however,  a few mascaras around making similar claims at the moment, but they’re all two-stage systems, Hypnôse is the first that does it in one step, with no fussy serums, and no two brushes first thing in the morning!

Here’s what Lancôme themselves have to say:

From 28 days, the formula enriched with our patented Lash Densifier Complex helps regenerate lash condition. With a visibly denser looking fringe, lashes appear longer, as though regenerated. Each day, Hypnôse Precious Cells helps you to reveal your lash potential.

I’ve been using the formula for two weeks now, and I’ve yet to see any particular difference in my lashes, but Lancome claim that this will stop my lashes falling out as often– something I’ll be delighted with, if it happens. I have much thicker lashes on my right eye, and much longer lashes on my left, and if this mascara helps even things out, I will love it for ever and ever, and ever, and ever … I’ll report back in a couple of weeks.

Lancôme Precious Cells will be available from Harrods on 28th March, nationwide from 1st May, and will cost £22.  Will you be investing?

The Small Print: I was sent this to review.  All opinions are honest, regardless of the source. No one reads these do they?  Hugh Jackman, naked! Told you.
Share:

Monday, 8 March 2010

Foundation Week Finale – Liquids

Chanel_VitalumiereI love liquid foundations, and have amassed a fair collection of them over the years. There are very many different formulations, and with liquid foundations, it can be a case of trial and error getting the right formulation for yourself.
There are two main kinds, ones that leave you with a dewy glow, and matte ones – but, of course, there are all kinds of gradations in-between.  Me being a dry-skinned kind of gal, I tend to favour more glowy kinds of foundations over the matte ones, but I’ll have a look at some good examples of both in this post.
Dewy
Foundations that give you a dewy finish can be heavier in oils, and therefore they’re better for drier, or more mature skins.  My absolute favourite foundation in this category is Chanel Vitalumiere, which I find leaves me with a lovely “glowing” effect, without making it look like I’m either sweaty or greasy.  It last pretty well, too, but the shade range isn’t all that wide (I find the pale shades pretty dark, and they don’t really cater for darker skins at all, which is a shame), but I like the air-free pump bottle, which means no messy spills!
Bourjois 10 hour sleep effect foundation is another good one, but I find it can my my (only slightly) dry skin look a little too shiny, and so I find that setting it with powder takes the edge off that.
Nars Sheer Glow is one that a lot of people swear by, but I found in my recent Nars makeover that it just made me look sweaty, even after a good powdering!  However, if you have really dry skin, it might be a good one to try out.
Matte
I’m not the best person to ask about matte foundations, as I find that many of the “oil-free” formulations that abound, like Lancome’s Teint Idole Ultra (which is actually an excellent foundation for greasier-skinned people) suck all the moisture out of my face after a couple of hours and leave me looking a little desiccated.  I also recently tried Bourjois Mineral Matte foundation recently (which is cutely packaged with it’s own tiny kabuki brush) but again, it just dried my skin out that little too much to be comfortable.
So, can dry-skinned people use a matte base without resembling an Egyptian mummy by lunchtime?  Surprisingly, the answer is yes! 
I recently discovered Rimmel’s Stay Matte formulation (okay, I may not have been the first person to ever have bought this one) and I absolutely love it!  Now, the reason I love it is probably because it’s not really as matte as it claims to be.  Personally, I’d describe the finish as a “satin”.  It doesn’t give me as dewy a glow as Vitalumiere, but there is definitely a lovely sheen to my skin when I’m wearing this.  Over the winter, Rimmel Stay Matte has been my default foundation, and currently, it’s the one I use as a benchmark for ALL foundations, it’s that good!  I also purchased a couple of back-ups …
Another one with a great satin, or “semi-matte”, finish is Bourjois Healthy Mix foundation, which I like a lot, but the texture is a bit more liquid than the Rimmel, and I think doesn’t last quite as well.
Application
With all my liquid foundations, I pour a little onto the back of my hand, and dab a flat-topped Kabuki brush into it, and use that to spread the foundation over my trouble spots (nose and T-Zone), then use the slightly denuded brush to blend it over the remainder of my face.  I then use my fingers to add a little more in place of concealer where I need it.  Sometimes, I finish with powder, sometimes I don’t, it depends on what I’m doing for the day.
That said, there’s no real right or wrong way to apply your foundation, the right way is simply the way that works for you.  For my makeovers, I usually use a disposable foundation sponge, but sometimes I use my fingers.  As long as you don’t end up looking like you’re wearing a mask, it’s all good!
What’s your favourite liquid foundation? How do you apply it, and what finish do you like?
Share:
© Get Lippie | All rights reserved.
Blogger Template by pipdig