Beauty Without Fuss

Popular Posts

Recent Posts

Sunday 13 December 2009

Makeover: Jane C

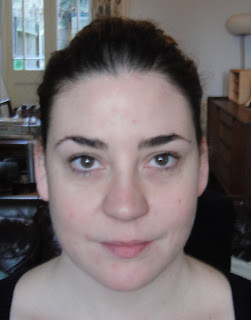
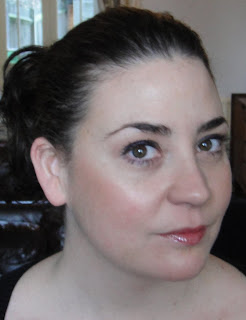
Another Sunday, and another makeover (or two) today!  Please meet Jane:


Jane's great, and I think she's one of the most naturally gorgeous people I've ever met, so having her volunteer for a makeover was a lovely surprise!  Jane was interested in finding out a simple look suitable for daytime, and trying out a more dramatic look too.  Here's what we came up with - and before we start, I must apologise for the quality of the pictures in this post, we lost the light quite dramatically towards the end of our session, and so some of the later pictures have a lot of shadows which I find really distressing!

So, for the daytime look,  as always we started with the base.  Jane is blessed with naturally creamy skin, so, instead of using a foundation, I used Benefit You Rebel in Light to even out her skintone:


I used a very tiny bit of ELF High Definition powder on Jane's T-zone, but there really wasn't a huge amount of corrective work that needed doing here.  We then moved onto Jane's eyes, I dug out my Bobbi Brown  palette, and used Flesh as a colour wash all over the lid up to to brow, then used Naked as a crease contour:


Jane uses a lot of grey shadows ordinarily, but we thought something a little different might work, so, as an eyeliner, we used a Korres pencil in blueblack - I love these pencils, they're buttery-soft and beautifully blendable, perfect for a novice user - to set off the browns in her eyes:


Then, we finished off with a little Lancome Hypnose, a dusting of Cargo Illuminator in Wind on the cheekbones, and a little beige lipgloss:


For Jane's more dramatic look, we removed the eyemakeup altogether and started from scratch.  I was determined to make this as simple as possible for Jane to be able to replicate at home, so I used a very similar application technique, and mainly just worked with different colours.


As a colour wash over the lid, I used Korres eyeshadow in Base 12s, which is a lovely taupe with a slight pink iridescence.  The iridescence made Jane a bit nervous, but once I explained that it's not actually a PINK eyeshadow, and it would just make her eyes seem a bit brighter, she relented and let me use it.  Then, to accentuate the crease, I use MAC Behold, which is a grey-taupe, and possibly the most useful eyeshadow I have in my kit:


I then applied an extremely thin line of black powder eyeshadow in place of liquid liner, and accentuated the lashes with a coat of Lancome Hypnose Drama (forgot to take pictures of this step - sorry!) Once the eyes were finished, I applied Ellis Red from Ellis Faas to Jane's lips, and the look was finished:


Personally, I love how this looks on Jane.  If I were to try to re-create this look, I'd probably do a little cheekbone contouring too - probably using Ilamasqua blush in Rumour - and add another coat or two of mascara.  I'd also make sure the lighting was right!

Thank you very much for being my sitter, Jane, I hope you enjoyed the session as much as I did.


Share:

Sunday 29 November 2009

Makeover: Sarah C - The Return

It's Sunday, and, as always, that means it's a makeover day Chez Lippie.

Remember Sarah C?
She had a pretty dramatic Theda Bara-style makeover last time, but she also wanted to learn how to use bright colours in a simple, and  subtle way.  We had a look through my entire eye-shadow collection - which took quite some time - and Sarah decided on MAC's Humid, which is a glorious tropical green shadow.  With Sarah's olive skin-tone, and gorgeous brown eyes, it was a lovely choice.

We used the same base as last time, and then primed the eyes with Urban Decay Primer Potion, and used a tiny hint of MAC Behold to define the crease:


Once that was in place, we used Humid as a liner:


We added a layer of L'Oreal Collagene mascara, and finished with a slick of Prescriptives lipgloss in Stellar:


Here's how she looked after:


Pretty as a picture.
Share:

Monday 16 November 2009

NARS Skorpios and Pop Life Pencils

Mainly thanks to the gorgeous Lipstick Rules  I bought NARS Pop Life Velvet Matte Lip Pencil in Liberty yesterday, and while I was there I very graciously allowed the Sales Assistant to convince me to hand over some hard earned cash for the Skorpios Soft Touch Shadow Pencil too ... just kidding, the sales assistant was adorable, and very sweetly left me to my own devices while convincing me that I didn't, in fact, need Cruella too!  I do need Cruella too, but it can wait a month or two (are you reading this, Santa?)!

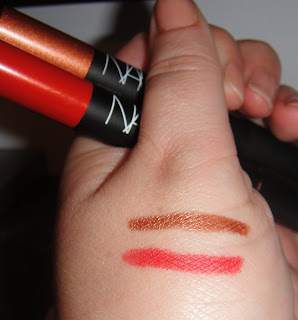
Here's the swatches:


Pop Life is a gloriously cheery orange-red with tiny hint of gold sparkle, and Skorpios is a deep and shimmery coppery-bronze shade.  Both pencils are beautifully soft and silky on the skin and not dry or powdery.  The lip pencil does work better with a touch of gloss over the top, but it's not necessary.

Here's how the Pop Life looks on the lips (no gloss):


I really, really love how this looks!  I'm even smiling!   The Skorpios and the Pop Life don't really go together in one look,  too many brights on my face these days makes me feel uncomfortable, but here's a very quick - actually an exceptionally quick - eye look I created with the Skorpios this morning:


I'm wearing Skorpios all over the lid, and up to the brow bone, I've added a touch of NARS Galapagos at the outer corner, I've lined the upper waterline with MAC Feline, and finished with Clarins Wonder Perfect mascara.  The pencil took literally seconds to colour and blend, and it wore pretty well throughout the day with only minimal creasing on the lids (I didn't use a primer, as I wanted to see how the wear was on the product itself).  I'm always a bit wary of cream-shadows, but I'm pleased with this one, and I think I may check out more of them.

I think NARS is really breaking my brown-aversion!

What do you think?
Share:

Sunday 15 November 2009

Makeover: Anna

Another Sunday, another makeover ... please meet Anna:


Anna came to me a couple of weeks ago, wanting to look more polished, and also to see how to create a smokey eye that would suit her beautiful grey-green eyes.  We decided on a neutral brown palette from Pixi to create the look around - I can't read the name on the packaging anymore, sorry - and I thought keeping the focus on those lovely eyes was definitely the way forward.

First things first, as always, we start with creating the perfect base.  Anna has some red marks, and a few pigmentation issues, so a foundation that could double up as a concealer was ideal.  I chose Benefit Play Stick foundation in Jax.  I really like these foundation sticks as they're really versatile, and you can amuse yourself painting pictures on your face before you blend them in! (Yes, I am a child).  We dotted a little extra over the problem areas,  blended well, then finished with a layer of Benefit Bluffdust to even out the complexion.  Here's how it looked after:


Already a little more polished! From the eyeshadow palette below, I used shade two as a colour wash all over the lid, and used shade 1 as a brow highlight (this is a well loved and much abused palette, so please forgive how it looks!):


I thought these colours worked really well on their own and would be suitable for a pretty and polished day time look with just a touch of mascara.  Anna wanted something a little more defined however, so I went on and used shade 3 to add some contour definition, and shade 4 as a liner:


Then, of course, it was time for mascara, we added a layer of Lancome Hypnose, and it really made her eyes stand out:


After this, we added blush (MAC Blushbaby) and a tiny slick of lipgloss (Prescriptives Stellar) and the look was finished:


Polished, subtle, slightly smokey, and really lovely.  Here's the before and afters:


Still waiting to hear how the date went, Anna!


Share:

Sunday 8 November 2009

Makeover: Gillian

It's Sunday, and that means it's makeover day here at Get Lippie!  Meet Gillian:


Gillian came to me a couple of weeks ago, wanting to look like a sexy 50's bombshell.   Now, this is a look I happen to love, as it's actually pretty simple and quick to put together.  First things first though, the classic bombshell look is dependent on flawless porcelain skin for it to work.  So we used a base of Max Factor Seamless in porcelain to even out Gillian's skintone, and give us a flawless base to work from:


We added a little concealer, then powdered down with some Benefit Bluffdust to tone down any lingering redness and give a matte finish, and Gillian was feeling more like a bombshell already!


There are two main elements to the bombshell look, eyeliner, and lipstick, both are crucial, so we'll start with the eyes.  I started by showing Gillian how to define the crease of her eyelid using MAC Behold as a contour shade:


Once this was in place (and Gillian had had a lesson in how to find it for herself) we moved on to liner.  Liquid liner can be tricky for a novice, so I showed Gillian how to use powder and an angled brush to paint on a line that looks just as dramatic and flattering as liquid liner, but takes a lot less practice to perfect.  We used Virgin Vie shadow in charcoal, then a coat or two of mascara:


Personally, I think this look suits Gillian down to a tee, and we could just have added a touch of lip balm or gloss right here and we'd have a lovely glamorous look suitable for daywear already!  However, the bombshell look demands lipstick.  So we added a slick of Guerlain lipstick in CanCan red as the finishing touch:


So there you go, quick, simple, with a minimum of products, but the maximum of impact.

Here's the before and afters:


Thank you, Gillian.
Share:

Sunday 1 November 2009

Makeover: Louise

This is Louise:


Louise came to me wanting a classic "English Rose" look, as she wanted to look glowing, natural, and make the most of her beautiful blue eyes.  She has a make up bag full of steely greys, but after a chat, we thought something more apricot, and shimmery would be an excellent contrast.

Louise has lovely skin - no pores! - and we didn't need a huge a huge amount of coverage, so as a base, we used Benefit You Rebel in Light.  Louise does have a small patch of broken veins on her right cheek, so to cover them, we used a small amount of MAC concealer patted on, and finished off with a very, very light dusting of Benefit Bluffdust to further counteract the redness, and tone down shininess.


On Louise's eyes, I wanted to use lovely shimmering golden apricot shades, to complement her skintone, and to really make the blue in her eyes stand out. I applied MAC Naked Lunch as a colourwash all over her lid up to the brow bone:


Then we added just a touch of MAC Patina to the outside corner, and as an eyeliner, I used Cargo's Plant Love shadow in Sparrow:


Louise's lashes needed a little definition - actually, everyone's lashes need a little definition, mascara should totally be everyone's desert island beauty product, if you ask me! - so we added a coat of Louise's own Boots mascara:


Then we moved onto blush, and we used MAC's Prism, which is a lovely coral-y peach shade:


Once that was in place, we added a touch of Bobbi Brown's lipgloss in Rose Sugar, and the look was finished:


Here's the before and after, just look at the difference in those eyes!


Pictures by Genna.
Share:
© Get Lippie | All rights reserved.
Blogger Template by pipdig