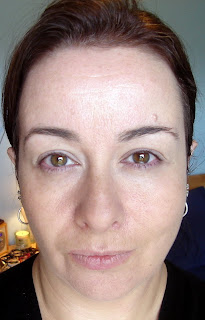
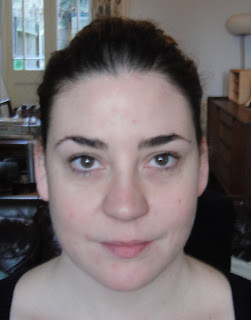
As you may know, my birthday treat to myself was a couple of Ellis Faas Ellis Eyes Lights shadows. I created a FotD with E305 - a rich burgundy brown with amazing green duochrome - at the time, but I've since got around to wearing the E304 - a shimmering lilac metallic - and this is how it looked under a variety of lighting conditions:
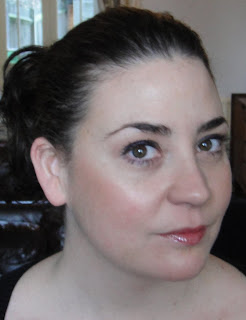
As you can see, depending on the lighting conditions it can look very different. Also, depending on the angle you're looking it from, it can appear very sheer with a hint of sparkle, or a vibrant lilac shade, accordingly. For me, in all honesty, I actually find it a slightly easier shade to wear than the E305, possibly because I like to play up the green tones in my eyes, and this is an excellent vehicle for that.
It's maybe not entirely suitable for office wear, but that's never stopped me wearing glitter for work before, to be honest! I teamed it with a taupe eyeshadow in the crease alongside my beloved Guerlain Oriental Metal kohl, and a very nude lip (Becca's Giselle topped with Le Metier de Beaute's Manhattan gloss), here's how it looked in the full context of my face:
Yeah, my hair looked insane in the full picture, so I had to crop it out, that'll learn it.
The Fine Print: Bought them! Nyah Nyah!!
Thursday, 24 June 2010
Friday, 11 June 2010
Ellis Faas: Ellis Eyes Lights Eyeshadows.
My birthday treat to myself was a trip to Liberty to have a look around the Le Metier de Beaute counter, and play with the Ellis Faas eyeshadows. I love me some Ellis Faas, and I was delighted when I discovered that she's recently introduced a new range of shadows to go alongside her Milky and Creamy shadows (you can see my post about those here). Most people know that the Ellis Faas range is based on shades found in the human body, but the shades in the new "Ellis Eyes Lights" range are metallics and duochromes, and were inspired by silver shimmers. They're beautiful, and they had my name written all over them:
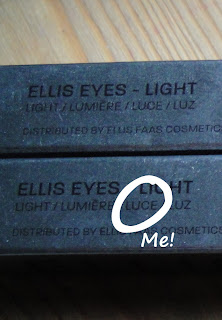
How could I resist? Yes, yes, my name is Louise, but most people call me Luce - only my mum and my boss really call me Louise! I bought two. I had to. Shades E304 - a shimmering metallic lilac and E305, a reddish-brown with a beautiful green duochrome. Here's the swatches:
See how the colours change depending on the angle? Simply gorgeous. Housed in the signature Ellis Faas bullet applicators, these have a brush tip for an easy application. The swatches above have been applied quite heavily to show them in their full glory.
Applied more sheerly to the eye, here's how the brown E305 looks:
I've added a touch of a darker brown in the crease, and along the upper lash area, but this is just one coat that I've sheered out a little with my fingertips towards the socket line. The green flash is far more visible in the flesh. The shadows do dry quickly so you have work quite quickly, but they are long lasting, and hard wearing, and will last a full work day without wearing off.
This is how the shadows look in the full context of my face:
Do you own any Ellis Faas?
Tuesday, 19 January 2010
Face of the Week - Ellis Faas
This was a very simple, and exceedingly quick look I created in about three minutes flat this morning. After applying foundation (Rimmel Stay Matte in 200 Soft Beige), I used E105 on the eyes, darker on the mobile lid, and sheered out with the fingers towards the brow-bone. Eyes were finished with Clarins Wonder Perfect. Then I used S302 on the cheekbones - I love the subtle flush of sheerly shimmering colour you get with this! - and finished with L307 on the lips, which is a lovely, and surprisingly wearable, coral shade.
I won't lie, there is a learning curve to using the Ellis Faas products, the applicators can be temperamental until you get used to them (not helped by the fact that I think the nozzles on my blush are all blocked bar one) but they're worth it as the eye and cheek products barely budge during the day. The hard part is actually not applying too much! This look was a lot brighter and more glow-y in the flesh. I loved it, as it was natural and not too much for a day in the office.
Do you have any Ellis Faas? Is it a brand you'll be checking out when it arrives in Liberty next month?
Wednesday, 30 December 2009
Ellis Faas - the haul!
Courtesy of the lovely, lovely LondonMakeUpGirl these arrived today, and I'm delighted! I'd ordered two eyeshadows and a blush a couple of weeks ago, and after a slight snafu with the order courtesy of the Ellis Faas online shop (which was very quickly and most courteously sorted, bless their cotton socks!) it's taken a while for them to get here.
I love the entire ethos behind Ellis Faas, innovative products innovatively designed and packaged, made to suit everyone. All the colours are based on natural colours you'd find in the human body, but that doesn't mean it's all beiges and browns, there are reds, purples, oranges, blues and greens. And beige, and brown ...
But onto the products, that's why you're all here, innit? I love the packaging, even if people occasionally think I'm carrying around "intimate objects" for midgets ... basically, all the products are cream-based, and depending on which part of the face they're for, they either stay glossy and creamy (the lip products) or dry to a flattering powder (eye and skin). The packaging is based on bullets:
Onto the swatches, I ordered Milky Eyes (the sheerer eye formulation) in E208 - a pinkish-orange coral shade, Creamy Eyes (the more matte eye formulation) in E105 - a purplish brown, and the blush in S302, which is a beautiful slightly shimmery coral colour:
Without flash:
With Flash:
I have to say that the picture with the flash is more true to the actual colour of the products. I do have one issue with Ellis Faas and that is that the online swatches are dreadful, these colours (beautiful though they are) aren't quite what I was expecting from the online shop. Online they look pinker, but I suggest you hang on till you can see them in the flesh before buying - they're launching at Liberty in February, and both Grace and I will be in line for more!
I'll bring you a FotD with these products soon, I can't wait to use them properly! I already have two of the lipsticks, and I know they'll both work with these colours!
I'll bring you a FotD with these products soon, I can't wait to use them properly! I already have two of the lipsticks, and I know they'll both work with these colours!
Sunday, 13 December 2009
Makeover: Jane C
Another Sunday, and another makeover (or two) today! Please meet Jane:
Jane's great, and I think she's one of the most naturally gorgeous people I've ever met, so having her volunteer for a makeover was a lovely surprise! Jane was interested in finding out a simple look suitable for daytime, and trying out a more dramatic look too. Here's what we came up with - and before we start, I must apologise for the quality of the pictures in this post, we lost the light quite dramatically towards the end of our session, and so some of the later pictures have a lot of shadows which I find really distressing!
So, for the daytime look, as always we started with the base. Jane is blessed with naturally creamy skin, so, instead of using a foundation, I used Benefit You Rebel in Light to even out her skintone:
I used a very tiny bit of ELF High Definition powder on Jane's T-zone, but there really wasn't a huge amount of corrective work that needed doing here. We then moved onto Jane's eyes, I dug out my Bobbi Brown palette, and used Flesh as a colour wash all over the lid up to to brow, then used Naked as a crease contour:
Jane uses a lot of grey shadows ordinarily, but we thought something a little different might work, so, as an eyeliner, we used a Korres pencil in blueblack - I love these pencils, they're buttery-soft and beautifully blendable, perfect for a novice user - to set off the browns in her eyes:
Then, we finished off with a little Lancome Hypnose, a dusting of Cargo Illuminator in Wind on the cheekbones, and a little beige lipgloss:
For Jane's more dramatic look, we removed the eyemakeup altogether and started from scratch. I was determined to make this as simple as possible for Jane to be able to replicate at home, so I used a very similar application technique, and mainly just worked with different colours.
As a colour wash over the lid, I used Korres eyeshadow in Base 12s, which is a lovely taupe with a slight pink iridescence. The iridescence made Jane a bit nervous, but once I explained that it's not actually a PINK eyeshadow, and it would just make her eyes seem a bit brighter, she relented and let me use it. Then, to accentuate the crease, I use MAC Behold, which is a grey-taupe, and possibly the most useful eyeshadow I have in my kit:
I then applied an extremely thin line of black powder eyeshadow in place of liquid liner, and accentuated the lashes with a coat of Lancome Hypnose Drama (forgot to take pictures of this step - sorry!) Once the eyes were finished, I applied Ellis Red from Ellis Faas to Jane's lips, and the look was finished:
Personally, I love how this looks on Jane. If I were to try to re-create this look, I'd probably do a little cheekbone contouring too - probably using Ilamasqua blush in Rumour - and add another coat or two of mascara. I'd also make sure the lighting was right!
Thank you very much for being my sitter, Jane, I hope you enjoyed the session as much as I did.
Saturday, 12 September 2009
Review - Eyeshadow Primers
Today, I've decided to to a side-by-side product test. Two of my all time favourite products are MAC Paint (which I use as an eyeshadow primer, as well as a colour) and Urban Decay Eyeshadow primer. Up until now, I'd be hard pressed to say which was better, so I'm trying them both out at the same time, with an eyeshadow that I already now disappears in the blink of an eye ... so here goes:
WARNING: This post will contain pictures of me without makeup.
Stage one: In which our blogger goes barefaced
 At this stage, what I mainly notice is that I've neglected to groom my eyebrows, no matter, won't be making that mistake again! What I also notice is that the MAC Paint on my right eye (left on these pics) reflects the light a little more than the Urban Decay primer on the left eye (right in these pics), I think this is because there is a little hint of shimmer and pigment in the MAC, which the UD is missing.
Stage Two: Wherein the experiment begins in earnest

 At this stage, with both eyes open, there is little difference, but with my eyes closed, you can see that the UD primer is definitely better at grabbing the pigment, and the colour is truer. I'm using a loose shadow from Bare Essentials (Smoked Clay), which is a nice greenish grey, but that's hard to pick up with your brush. However, there is a price to pay for this extra pigment being visible, as you'll see in the next stage.
Stage Three: Wherein the colour deepens

 I thought that the shadow I was using was too wishy-washy in the first pics, so decided to go for another layer of colour. When applying this, I realise that the Urban Decay is damned difficult to blend over. In fact, it's damn near impossible to blend over after it's had a chance to set for a minute or two. This means that there is a visible line in my socket-crease on my left eye (on the right there), which I'm finding infuriating. Blending is important, vitally important, to any good make up, and the Urban Decay simply won't let you do it.
Stage Four: In which my mascara is uneven.


Here, I've finished adding my eyeliner, and just wanted to see what the difference was between no mascara and one layer of Hypnose Drama (upper, pic) and with two layers of mascara (lower). What it has done is highlighted the fact that I have thicker lashes on my right eye, but longer lashes on my left. I'll be sticking with one coat from now on, I think.
Stage five : in which the finishing touches are revealed
 I got around to powdering, adding blush and putting on some lipstick (Ellis Faas in L307, a lovely glossy coral shade) but not fixing that damn eyebrow. That's obviously why I'm looking so unhappy.
Stage six: In which your blogger fixes her hair, and her expression
 There we go, I've covered up my pointy spock-ears, and am feeling more human again.
Verdict:
At the moment, they're fairly evenly matched. Whilst you do get a better coverage, and colour trueness with the Urban Decay, this is outweighed with the MAC Paint being easier to blend with. Now, I'm going to see how this look lasts throughout the day, and report back.
Products used:
Urban Decay Eyeshadow Primer
MAC Paint in Untitled
Bare Essentials powder shadow in Smoked Clay
Revlon Wet/Dry Liner in Chocolate
Lancome Hypnose Drama in Black
Bare Essentials Blusher in Poppy
Benefit Bluff Dust face powder
Ellis Faas Glossy Lip in L307
WARNING: This post will contain pictures of me without makeup.
Stage one: In which our blogger goes barefaced
 At this stage, what I mainly notice is that I've neglected to groom my eyebrows, no matter, won't be making that mistake again! What I also notice is that the MAC Paint on my right eye (left on these pics) reflects the light a little more than the Urban Decay primer on the left eye (right in these pics), I think this is because there is a little hint of shimmer and pigment in the MAC, which the UD is missing.
Stage Two: Wherein the experiment begins in earnest

 At this stage, with both eyes open, there is little difference, but with my eyes closed, you can see that the UD primer is definitely better at grabbing the pigment, and the colour is truer. I'm using a loose shadow from Bare Essentials (Smoked Clay), which is a nice greenish grey, but that's hard to pick up with your brush. However, there is a price to pay for this extra pigment being visible, as you'll see in the next stage.
Stage Three: Wherein the colour deepens

 I thought that the shadow I was using was too wishy-washy in the first pics, so decided to go for another layer of colour. When applying this, I realise that the Urban Decay is damned difficult to blend over. In fact, it's damn near impossible to blend over after it's had a chance to set for a minute or two. This means that there is a visible line in my socket-crease on my left eye (on the right there), which I'm finding infuriating. Blending is important, vitally important, to any good make up, and the Urban Decay simply won't let you do it.
Stage Four: In which my mascara is uneven.


Here, I've finished adding my eyeliner, and just wanted to see what the difference was between no mascara and one layer of Hypnose Drama (upper, pic) and with two layers of mascara (lower). What it has done is highlighted the fact that I have thicker lashes on my right eye, but longer lashes on my left. I'll be sticking with one coat from now on, I think.
Stage five : in which the finishing touches are revealed
 I got around to powdering, adding blush and putting on some lipstick (Ellis Faas in L307, a lovely glossy coral shade) but not fixing that damn eyebrow. That's obviously why I'm looking so unhappy.
Stage six: In which your blogger fixes her hair, and her expression
 There we go, I've covered up my pointy spock-ears, and am feeling more human again.
Verdict:
At the moment, they're fairly evenly matched. Whilst you do get a better coverage, and colour trueness with the Urban Decay, this is outweighed with the MAC Paint being easier to blend with. Now, I'm going to see how this look lasts throughout the day, and report back.
Products used:
Urban Decay Eyeshadow Primer
MAC Paint in Untitled
Bare Essentials powder shadow in Smoked Clay
Revlon Wet/Dry Liner in Chocolate
Lancome Hypnose Drama in Black
Bare Essentials Blusher in Poppy
Benefit Bluff Dust face powder
Ellis Faas Glossy Lip in L307
Subscribe to:
Posts (Atom)
©
Get Lippie | All rights reserved.


